

What Makes a Top Professional Studio Mic Preamp?
Last Updated: October 25, 2026
Quick Summary
A top professional studio microphone preamp raises a weak mic-level signal to line level, roughly 40 to 60 dB, without adding noise or unwanted color. The best choice depends on your microphone: match on gain range, input impedance, and coloration, in that order, rather than buying on reputation alone.
- A condenser mic outputs millivolts, so the preamp boosts the signal roughly 40 to 60 dB before conversion.
- Clean preamps add minimal harmonic distortion, while colored tube or transformer designs deliberately shape tone.
- Check equivalent input noise and maximum gain together, since high gain with a high noise floor is a trap.
- Route an outboard preamp's balanced output into a line input and confirm phantom power comes from only one device.
- A 500 Series module needs a powered chassis, so the break-even point usually arrives once you own two or more modules.
Table of Contents
- What a Studio Microphone Preamp Actually Does in the Signal Chain
- Clean Microphone Preamp vs Colored Microphone Preamp: Which Sound Do You Need?
- Gain, Headroom, and Noise Floor: The Specs That Decide Quality
- Choosing a Mic Preamp for Home Studio Setups
- When an External Preamp for Audio Interface Upgrades Makes Sense
- Matching Preamps to Microphones and Sources
- Total Cost of Ownership: What Buyers Overlook
- Building Your Preamp Setup with Perfect Take Gear
- Frequently Asked Questions
What a Studio Microphone Preamp Actually Does in the Signal Chain
A studio microphone preamp is the first electronic stage a microphone signal hits, and its only job is to raise a weak mic-level voltage up to line level without adding noise or unwanted color.
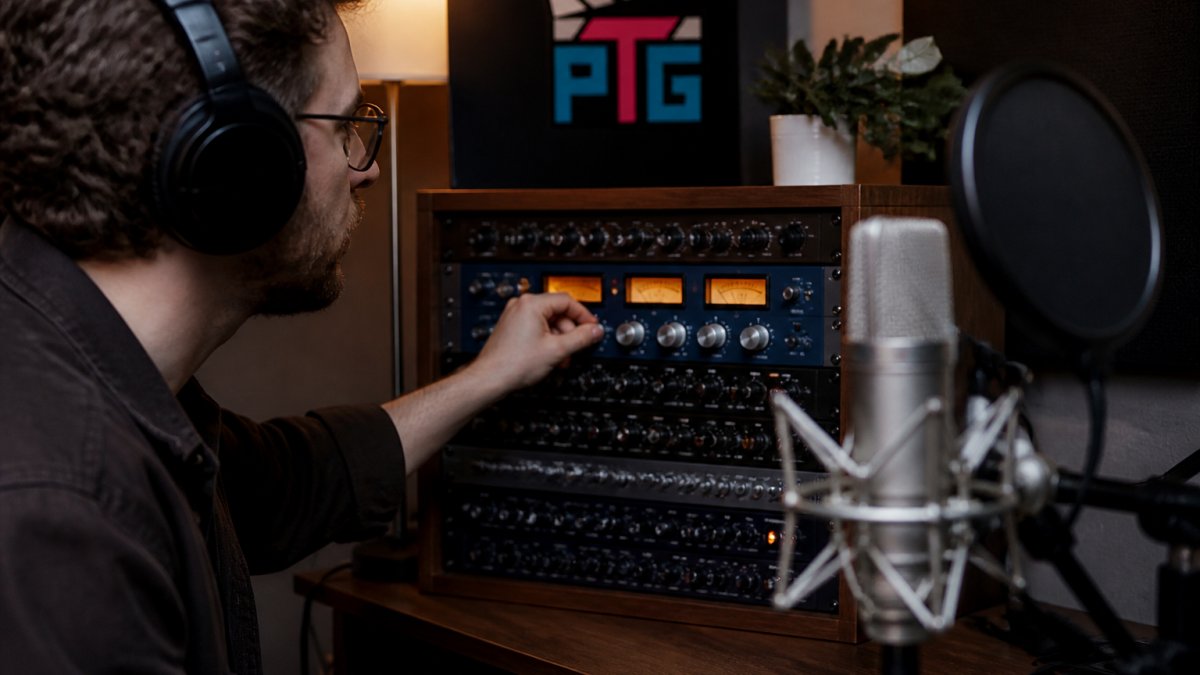
Here's the part most buying guides skip: the preamp cannot create detail the microphone never captured. It can only preserve it or smear it. That single idea should shape every purchase decision that follows.
Clean Microphone Preamp vs Colored Microphone Preamp: Which Sound Do You Need?
The choice between a clean microphone preamp and a colored microphone preamp comes down to whether you want the preamp to document the source or interpret it. Clean designs add minimal harmonic distortion and let the microphone's character dominate.
Neither is "better." A voice that already sounds bright and forward rarely needs more presence pushed into it. A dull source often benefits from the harmonic thickening a colored preamp provides.
How Tube, Transformer, and Solid-State Designs Shape Tone
Three design families do most of the tonal work:
- Tube circuitry tends to add soft compression and harmonic richness, especially when driven harder.
- Transformer-coupled designs add weight and a slight midrange push, which flatters vocals and drums.
- Solid-state, discrete circuitry usually aims for transparency, speed, and low noise.
Many modern units blend approaches, pairing a transformer output with a solid-state input stage. The label on the box matters less than how the design handles transients and gain.
Gain, Headroom, and Noise Floor: The Specs That Decide Quality
Three specs separate a serious preamp from a budget one: usable gain range, headroom, and noise floor. Gain range tells you whether the unit can drive a low-output dynamic or ribbon mic. Headroom determines how gracefully it handles a loud source before clipping. Noise floor, often expressed as self-noise or signal-to-noise ratio, sets the quietest detail you can capture.
A preamp with plenty of gain but a high noise floor is a trap. You'll hear hiss on quiet passages and blame the microphone. Check the equivalent input noise figure and the maximum gain together, not in isolation.
Room treatment belongs in this conversation too. Readers chasing a lower noise floor should treat the room before upgrading electronics, and a soundproofing guide for home recording studios covers where to start.
Choosing a Mic Preamp for Home Studio Setups
For most home studios, a mic preamp for home studio work should prioritize clean gain, low self-noise, and simple connectivity over vintage mystique.
Watch out: buying a colored preamp as a first outboard unit often backfires.
Practical priorities for a home setup:
- Enough clean gain for your least sensitive microphone
- A low noise floor at high gain settings
- Phantom power for condensers
If hum or buzz shows up after wiring a new preamp, a fix for microphone buzzing on Windows systems walks through the common causes before you blame the gear.
When an External Preamp for Audio Interface Upgrades Makes Sense
An external preamp for audio interface upgrades makes sense when the interface's built-in preamps run out of clean gain, add audible noise, or limit your microphone choices.
The honest test: record the same source through both paths at matched levels and listen for noise and detail. A guide on when to upgrade your audio interface for vocals covers the signs that the interface, not the preamp, needs replacing.
Connecting an Outboard Preamp to Your Interface
Route the external preamp's balanced output into a line input, not a mic input, and bypass the interface's own preamp stage. Set gain on the outboard unit, keep the interface input at unity, and confirm phantom power comes from only one device. A step-by-step walkthrough of integrating analog gear into a digital studio covers cable routing and gain staging in detail.
Matching Preamps to Microphones and Sources
Microphone matching decides more of the final sound than most buyers expect. A bright condenser paired with a bright preamp compounds harshness. A dark ribbon paired with a neutral preamp can sound dull. The pairing matters because three electrical realities interact: the preamp's input impedance loads the microphone, its gain range determines whether low-output mics reach a usable level, and its transformer or tube stage shapes transients and harmonics.
A practical framework by microphone type:
| Microphone Type | Electrical Reality | Preamp Direction | Example Archetypes |
|---|---|---|---|
| Large-diaphragm condenser | High output, often bright | Neutral to slightly warm; avoid stacked presence | Clean solid-state or transformer output |
| Small-diaphragm condenser | Fast transients, high output | Clean, high headroom, fast slew | Transparent solid-state |
| Dynamic (moving coil) | Low output, needs 60 dB+ clean gain | High gain, low self-noise, transformer weight helps | High-gain solid-state or transformer |
| Ribbon | Very low output, sensitive to impedance | High gain, high input impedance (1.5 kΩ+), no phantom power unless specified | Ribbon-safe high-gain designs |
| Tube condenser | High output, already colored | Clean, so the mic's character leads | Neutral solid-state |
Pairing by Source
- Lead vocals: A large-diaphragm condenser into a neutral-to-warm preamp is the common starting point. If the voice is already bright, choose clean; if it is dull or thin, a transformer or tube stage adds weight. Avoid pairing a bright mic with a preamp known for presence lift.
- Drum overheads: Small-diaphragm condensers want clean, fast preamps with enough headroom for transient peaks. Colored preamps can smear cymbal detail.
- Kick and bass: Dynamic mics need high clean gain and often benefit from transformer weight, which flatters low-mid body.
The Impedance Rule Buyers Miss
Input impedance matters most with ribbons and some dynamics. A preamp with a low input impedance can load a ribbon mic and dull its top end. Many modern preamps offer switchable impedance (commonly around 1.2 kΩ to 3 kΩ or higher); if you record ribbons, check this spec before buying. Phantom power is the other trap: most ribbons should not receive phantom power, so confirm the preamp allows phantom to be switched off per channel.
A simple test before committing: record the same source through your candidate preamp and your interface preamp at matched levels, then compare noise and transient detail. If the difference is marginal on your most-used microphone, the pairing is not the bottleneck.
Total Cost of Ownership: What Buyers Overlook
Total cost extends well past the sticker price, and the format you choose changes the math more than most buyers expect. A standalone rack preamp includes its own power supply and chassis; a 500 Series module does not. That difference is the single most overlooked line item in preamp budgeting.
Standalone vs. 500 Series: The Real Math
A 500 Series module is typically cheaper than an equivalent standalone unit, but it requires a powered chassis (a "rack"). Chassis costs vary widely by brand and slot count: a single-slot or small chassis is the least expensive entry point, while 6- to 10-slot chassis cost substantially more and are only economical if you plan to fill multiple slots. The break-even point is usually reached once you own two or more modules, below that, a standalone unit is often the simpler and cheaper path.
Budget for these line items regardless of format:
- Cables: balanced XLR and TRS cables are inexpensive individually but add up across channels; budget for spares.
- Rack or mount: a desktop rack or rack shelf is needed for standalone units; 500 Series chassis are themselves rack units.
- Power conditioning: a basic surge protector is the minimum; serious setups add a power conditioner.
Price Tiers and When an External Preamp Is Worth It
Organize the decision by tier rather than by brand:
- Interface preamps (no added cost): sufficient for most home recorders using condenser mics at moderate gain. Upgrade only when you hear noise at high gain or run out of clean gain.
- Entry external preamp: the first outboard unit makes sense when your least-sensitive microphone (dynamic or ribbon) needs more clean gain than the interface provides.
- Mid-tier standalone or 500 Series: worth it when you want a specific coloration (transformer or tube) as a deliberate choice, not a fix.
The Hidden Cost: Learning Time
Every new gain structure costs time. Outboard preamps introduce a second gain stage, and mismanaging it (too much gain at the preamp, too little at the interface, or the reverse) adds noise or clips the converter.
Buyers weighing long-term value should also put realistic lifespans on the gear they pair with the preamp. A look at how long professional streaming microphones last helps frame the replacement cycle for the rest of the chain.
Building Your Preamp Setup with Perfect Take Gear
The right preamp choice follows from the microphone, the room, and the source, in that order. Get those three aligned and the electronics become straightforward.
Perfect Take Gear carries audio equipment and studio essentials for creators building a first serious setup or upgrading a home studio. The catalog includes microphones, audio gear, and studio accessories that pair with a new preamp, plus cameras and lighting for creators who record on video as well as audio.
Frequently Asked Questions
What is the best microphone preamp for a professional studio?
There is no single best model, because the right studio microphone preamp depends on what you record. A clean, transparent preamp with high headroom suits vocals, acoustic instruments, and drum overheads where accuracy matters. A colored, transformer or tube design adds harmonic character that flatters close-miked vocals and rock drums. Professionals often keep one of each rather than chasing a single do-it-all unit. Match the preamp to your microphone and source first, then compare gain range, noise floor, and connectivity before buying.
Can an external preamp for audio interface setups really improve the sound?
It can, but only when the interface's built-in preamps are the weak link. If your interface preamps are noisy at high gain or thin with low-output dynamic and ribbon mics, an external preamp for audio interface use can add cleaner gain and more headroom. Connect it to a line input, bypassing the interface preamp, and set the interface gain low. If your interface preamps are already quiet and clean, the money is usually better spent on microphone placement, room treatment, or a better microphone.
What is the difference between a clean preamp and a colored preamp?
A clean microphone preamp amplifies the signal with minimal added distortion, so the sound you hear is mostly the microphone and the room. A colored preamp intentionally adds harmonic distortion, transformer saturation, or tube warmth, which thickens and shapes the tone. Neither is better. Clean designs suit classical, acoustic, and detailed vocal work; colored designs suit rock, pop, and anything that benefits from attitude. Many engineers track clean and add color later, or track with color and keep the option to re-amp.
How much gain does a studio microphone preamp need?
Gain needs depend on the microphone. Condensers typically need 20 to 40 dB, while low-output dynamics and ribbons can demand 60 dB or more. Look for a preamp whose gain range covers your quietest source with room to spare, and check the noise floor at that gain setting, not just the maximum. A preamp that reaches 70 dB but hisses at 60 is less useful than one that stays quiet at 65. Match the gain range to your microphone collection before you buy.
The challenge isn't finding a preamp with impressive specs. It's matching one to the microphone and room you actually record in. Perfect Take Gear offers audio equipment, studio essentials, and creator gear at accessible prices, so you can build the chain around your voice instead of guessing. Get started with Perfect Take Gear and put a preamp in front of a microphone that deserves it.
