

7 Steps for Integrating Analog Gear Into Your Digital Studio
Last Updated: October 24, 2026
Quick Summary
Integrating analog gear into a digital studio means routing a DAW track out through an interface output, into the hardware, and back in on a separate input to record the processed signal. Match line levels, measure round-trip latency with your DAW's ping tool, check phase when blending, and document every setting for recall.
- Track through gear before the DAW during recording, or use a hardware insert on a track or bus while mixing.
- Measure round-trip delay once per buffer setting, since the value changes when buffer size or sample rate changes.
- Aim for the gear's input meter around 0 VU and leave at least 6 dB of headroom below clip.
- Professional line level is +4 dBu while consumer gear runs at -10 dBV, roughly 12 dB quieter.
- Photograph every knob position and note the gear model and serial number for hardware recall.
Table of Contents
- What a Hybrid Studio Setup Actually Buys You
- Recording Analog Gear Into a DAW: The Signal Chain
- DAW Hardware Insert Setup by Workflow
- DAW Latency Compensation and Phase Alignment
- Gain Staging, Noise Floor, and Headroom
- Hardware Recall and Session Documentation
- Picking Your First Outboard Gear on a Creator Budget
- Wiring Your First Hardware Insert With Perfect Take Gear
- Frequently Asked Questions
What a Hybrid Studio Setup Actually Buys You
A hybrid studio setup combines analog outboard gear with a digital audio workstation, letting you track and mix with both hardware color and software precision. The payoff is real, but narrower than the marketing suggests, plenty of creators buy a rack unit expecting instant magic and end up with a tangled desk instead.
Analog warmth versus digital precision
Analog gear adds harmonic distortion, often called tube saturation or analog warmth, which thickens drums and smooths harsh vocals. Digital recording stays clean and exact, which is why most editing, automation, and recall happen in the DAW.
A common mistake is assuming hardware always beats plugins. As Harmony Central's comparison of analog gear and plugins notes, the value of hardware depends on the task and workflow, not on the gear being analog.
The trade-offs nobody mentions
Hardware costs time. A discussion on Reddit's audio engineering community about integrating outboard gear points out that processing a 45-minute record can take at least 45 minutes in real time, and your interface needs free inputs and outputs to route it.
- Real-time printing slows every session
- More cables mean more places for noise to creep in
- Recalling a mix by hand takes notes and discipline
For a deeper look at why professional-grade components matter before you commit, see why professional studio gear matters. And if you are still weighing the spend, this breakdown of whether professional studio gear is worth it answers the cost question directly.
Recording Analog Gear Into a DAW: The Signal Chain
Recording analog gear into a DAW means sending a signal out of your interface, through the hardware, and back in on a separate input. Get the chain order right and everything else gets easier.
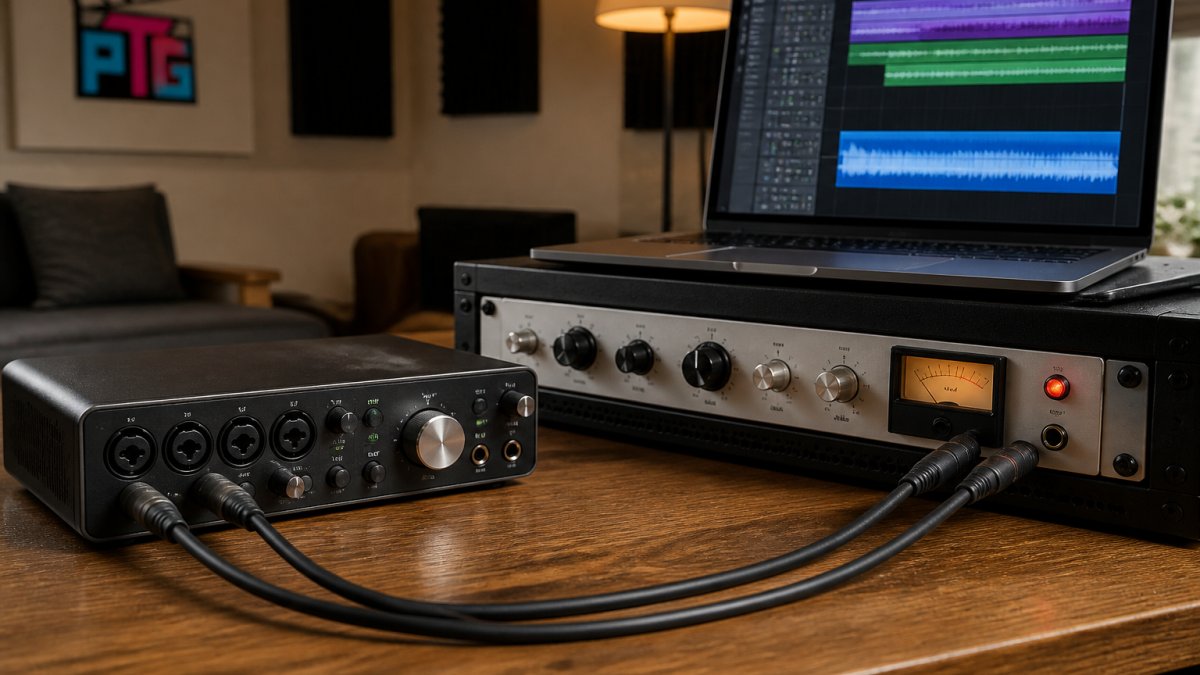
Signal chain basics:
- DAW track output feeds a specific interface output
- A cable carries that signal to the gear's input
- The gear's output returns to an interface input
Line level, inputs, and outputs explained
Line level is the standard signal strength studio gear expects, hotter than a microphone and weaker than a speaker feed. Most outboard units run at line level, so match your interface outputs to line inputs on the gear.
If wiring feels intimidating, this primer on how to choose and use audio equipment like a pro walks through the basics before you patch anything in.
DAW Hardware Insert Setup by Workflow
DAW hardware insert setup changes based on whether you track or mix. During recording, route the mic through the gear before it hits the DAW. During mixing, use a hardware insert on a track or bus so the signal leaves and returns in sync.
| Workflow | Routing approach | Best for | Watch out for |
|---|---|---|---|
| Tracking | Mic → preamp → gear → interface | Capturing color on the way in | No undo, commit carefully |
| Mixing insert | Track/bus → output → gear → input | Adding color to finished takes | Latency and phase |
| Bus processing | Summed bus → gear → return | Glue on drums or mix bus | Extra round-trip delay |
| Print to track | Route through gear to new track | Permanent processed copy | Real-time length |
The mixing insert is the most flexible. The tracking approach locks in a sound you cannot easily reverse.
DAW Latency Compensation and Phase Alignment
Every hardware insert adds round-trip latency: the time a sample takes to leave an interface output, pass through the converter, cable, and outboard processing, and return to the DAW. At 48 kHz, a single conversion pair commonly adds a millisecond or two before the gear's own delay, and a bus insert pays that cost once for the whole bus. Without compensation, the processed return sits late against the dry tracks, and blending the two produces comb filtering, a hollow, swept tone that thins drums and smears transients.
Measure the round-trip delay once per buffer setting
Most DAWs include a ping-based measurement tool for external inserts: the DAW sends a click out the insert send, listens on the return, and reports the time difference. In Pro Tools, the Hardware Insert Delay tab under I/O setup takes a per-channel value in samples, and the Ping button measures it. Logic Pro's I/O plugin has a Ping button that writes the offset in.
- Set your buffer size and sample rate first, then measure, the value changes when either changes
- Measure each hardware path separately if you use more than one outboard unit
- Re-measure after swapping converters, cables, or the gear itself
Check phase when blending processed and unprocessed signals
The classic parallel-compression mistake is summing a hardware-compressed copy with the dry original and hearing the low end thin out. That is phase cancellation, caused by the two signals arriving at slightly different times or with inverted polarity. The fix is procedural:
- Solo the dry track and the hardware return together
- Flip the polarity on one of them and listen, if the combined signal gets fuller, keep the flip; if it gets thinner, revert
- Nudge the return earlier or later by a few samples and listen for the point where the low end is strongest
- Confirm with a correlation meter if your DAW has one; a reading near +1 means the signals are aligned, near -1 means they are fighting
A common pattern is to align by ear first, then verify with the meter, because a perfectly correlated signal is not always the one that sounds best, sometimes a few samples of offset is the sound.
Latency budgets by workflow
| Workflow | Typical added delay | Compensation approach |
|---|---|---|
| Tracking through gear before the DAW | One converter pass | None needed; the DAW records what it hears |
| Mixing insert on a single track | One round trip plus gear delay | Ping-measure and set insert offset |
| Bus insert across many tracks | One round trip, shared | Measure once on the bus, apply to the bus |
| Print-to-track bounce | One round trip | Measure, then trim the printed region to the source |
Get this right and hardware inserts sit perfectly in the mix, parallel processing stays full, and you can revise a mix weeks later without re-measuring. Skip it and you will hear a hollow, comb-filtered mess that no amount of EQ fixes.
Gain Staging, Noise Floor, and Headroom
Gain staging means setting levels at every stage, interface output, cable, gear input trim, gear output, return converter, so the signal stays above the noise floor without clipping. In a hybrid rig the stakes are higher than in the box because every analog stage adds noise, and a level mistake cannot be undone later.
Target levels that work in practice
A common pattern among engineers working with outboard is to aim for nominal operating level rather than pushing the meters. Professional line level in the United States is +4 dBu, and most outboard is calibrated so that 0 VU on its meter corresponds to +4 dBu at its output. Consumer and semi-pro gear often runs at -10 dBV, which is roughly 12 dB quieter, a mismatch here is one of the most common causes of a hardware insert sounding thin or noisy.
- Send signal out of the interface so the gear's input meter sits around 0 VU on loud passages, not pinned
- Leave at least 6 dB of headroom below the gear's clip point; many engineers leave 12 dB or more on the mix bus
- Set the gear's output so the return converter sees a healthy level without clipping its input
Find the noise floor before you fight it
Noise floor is the background hiss a device adds with no signal present, and every cable, connector, and gain stage contributes a little. Isolate stages to find the culprit:
- Unplug the gear's input and listen to its output, that is the gear's own noise floor
- Plug the input back in with the interface output muted, any new hiss is coming from the cable or the interface output stage
- Raise the interface output gain and listen, if the hiss rises with it, the noise is upstream of the gear
- Swap one cable at a time to find a bad shield or connector
Hum is different from hiss. A 60 Hz hum in the United States usually points to a ground loop, often created when gear on different power circuits is connected by an audio cable. Fixes, least invasive first: plug all studio gear into the same power strip or circuit, use balanced cables for every line-level connection, and lift the ground on a single device only as a last resort, never lift the safety ground on a device that has one.
Mismatched line and instrument levels
Outboard gear expects line level, while guitars and basses output instrument level, far weaker and higher impedance. Plugging an instrument into a line input produces a thin, noisy signal; plugging line level into an instrument input overloads it. Use a DI box or an interface input with a dedicated instrument switch for instruments, and reserve line inputs for gear outputs.
Fix noise and level problems at the source. A plugin gate or denoiser applied after the fact removes the symptom and some of the signal along with it.
Hardware Recall and Session Documentation
Hardware recall means getting the session back to the exact same settings later. Unlike a plugin, a physical knob has no saved preset. Documentation is the only way back.
A repeatable system saves hours:
- Photograph every knob and switch position
- Note the gear model and serial number
- Record the insert routing and interface inputs used
A patchbay helps: it centralizes connections so you can reroute without crawling behind the desk, and it makes recall far faster.
Picking Your First Outboard Gear on a Creator Budget
Start with one piece that solves a real problem, not a rack full of gear you barely use.
Budget matters. This beginner studio setup guide maps out a full budget-friendly rig, and this beginner versus professional gear comparison shows where the extra spend actually helps.
Perfect Take Gear stocks cameras, lighting, and audio equipment at accessible prices, so creators can build a hybrid rig without overspending on day one.
Watch out: buying three cheap units instead of one solid piece usually costs more in the long run. Buy once, buy right.
Wiring Your First Hardware Insert With Perfect Take Gear
Wiring your first hardware insert is simpler than it looks. Connect one output to the gear's input, the gear's output to one interface input, then set up the insert in your DAW.
The steps, in order:
- Connect interface output to gear input
- Connect gear output to interface input
- Create the insert in your DAW and select those channels
- Measure round-trip latency and set the offset
- Test with a known signal and check phase
- Document every setting for recall
Perfect Take Gear carries the audio interfaces, cables, and studio essentials that make this setup painless for new creators.
Frequently Asked Questions
How do you connect analog gear to a DAW?
Connect your outboard unit to two free inputs and two free outputs on your audio interface. Run a cable from an interface output into the gear's input, then from the gear's output back into an interface input. In your DAW, set up an insert or external effect on that input/output pair. Keep the whole path at line level and match sample rates in your interface settings so both devices clock correctly.
How do you manage latency when using analog gear with a DAW?
Every trip out of the computer and back adds round-trip latency. Measure it once using a loopback test, then enter that figure in your DAW's hardware insert delay or external effect offset. Most DAWs then nudge the return automatically so the processed signal lines up with the dry track. If your interface offers direct monitoring, use it while tracking and apply the insert only at mixdown.
How do you recall settings on analog gear for a mix?
Photograph every knob and switch position, then save the images in the session folder with a dated filename. Note the unit, the track it processed, and the insert order in a text file or your DAW's session notes. For anything you use constantly, mark a few favorite positions with tape or console tape. This hardware recall habit turns a two-hour reset into a five-minute one.
Is analog gear worth using in a digital studio?
It depends on the task. Analog outboard can add tonal character and a tactile mixing workflow that plugins imitate but do not fully replace. The costs are real: extra conversion, round-trip latency, and slower recall. If you mix the same project repeatedly or work on tight deadlines, plugins usually win on speed. If you want a specific sound and enjoy hands-on control, a small hybrid studio setup earns its place.
Building a hybrid rig takes patience, and the first session rarely sounds perfect. Perfect Take Gear makes the gear side easier with affordable audio equipment, studio essentials, and starter kits built for new creators. Get started with Perfect Take Gear and turn any space into a working studio.
