

How To Fix Microphone Buzzing Noise On Windows
Table of Contents
- Quick Checks Before You Troubleshoot
- Check Cables and Connections for Microphone Buzzing
- Adjust Microphone Sensitivity and Gain Levels
- Disable Audio Enhancements and Set Sample Rate
- Update or Reinstall Audio Drivers in Device Manager
- Fix Grounding Issues and Electromagnetic Interference
- Use Microphone Noise Suppression on Windows
- How to Reduce Mic Background Noise
- Frequently Asked Questions
Last Updated: September 11, 2026
Quick Checks Before You Troubleshoot
A buzzing microphone on Windows usually traces back to one of four things: a loose or unshielded cable, a misconfigured input device, an outdated audio driver, or electrical interference. Most people jump straight to reinstalling drivers, but that's rarely where the problem lives. This guide from Perfect Take Gear walks through the checks that actually solve it, in the order that saves the most time.
Start with the cheapest, fastest checks before touching any software:
- Mute the mic and listen. If the buzz continues, it's coming from your speakers or headphones, not the microphone.
- Move the mic cable away from power bricks, monitors, and charging cables. These emit electromagnetic interference that bleeds into unshielded audio lines.
- Test with a different USB port, ideally one directly on the motherboard rather than a hub.
- Check the recording level in Windows. A gain set too high amplifies the noise floor along with your voice.
Once you've ruled out the obvious, the fixes below cover everything from cable swaps to software noise suppression.
Check Cables and Connections for Microphone Buzzing
The most common cause of microphone buzzing is a failing or unshielded cable. A damaged USB or XLR cable introduces static and hum that no amount of software tweaking will remove.
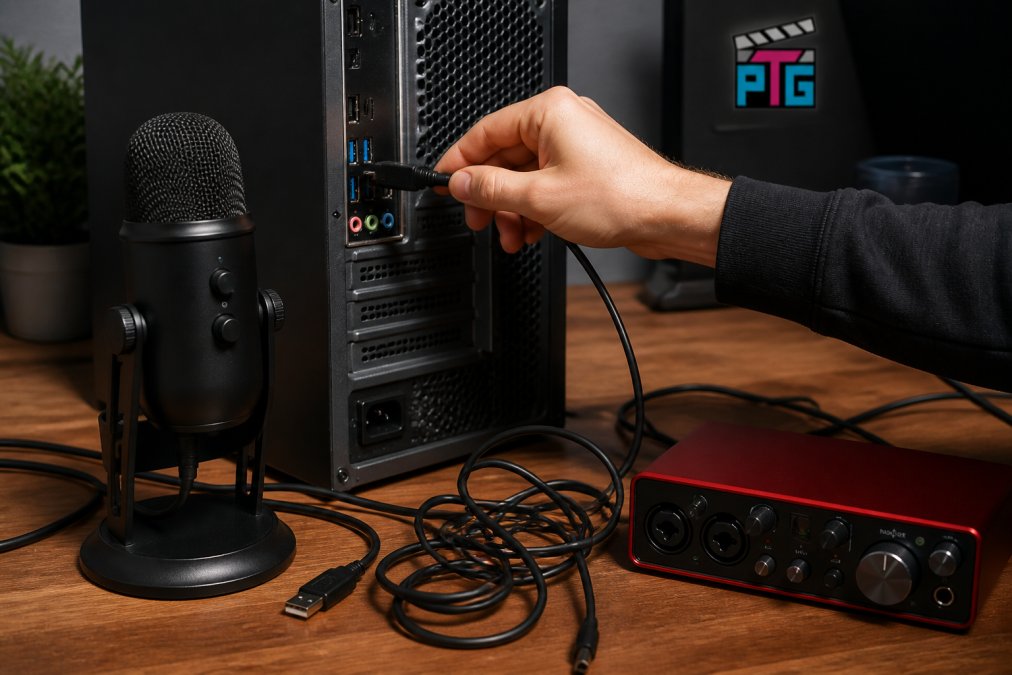
Inspect the full length of the cable for kinks, fraying, or crushed sections. XLR cables with damaged shielding pick up interference from nearby electronics, and USB cables that have been bent repeatedly at the connector can develop internal breaks. Swap in a known-good cable before doing anything else. If the buzz disappears, you've found the problem.
Swap Cables and Test USB Ports
Different USB ports route through different controllers, and some are noisier than others. Front-panel ports on a desktop tower often share a bus with other peripherals, which can introduce a ground loop. Move the microphone to a rear port directly on the motherboard and test again. If you're using an audio interface, connect it to its own USB controller rather than daisy-chaining through a hub.
Adjust Microphone Sensitivity and Gain Levels
Excessive gain is the second most common cause of microphone buzzing. When the input level is cranked too high, the microphone picks up its own electrical noise floor along with room ambience.
Open Settings > System > Sound > More sound settings to reach the classic Microphone Properties window. On the Levels tab, reduce the microphone level to around 70-80% and test. If the buzz fades as you lower the slider, you've confirmed a gain issue rather than a hardware fault.
A common mistake is leaving Microphone Boost enabled at a high value. Boost adds up to 30 dB of clean gain on paper, but in practice it amplifies every bit of electrical noise in the signal chain (support.microsoft.com). Drop it to zero and compensate with physical mic placement instead.
Disable Audio Enhancements and Set Sample Rate
Windows ships with audio enhancements that are meant to improve sound quality but frequently introduce buzzing and static instead. Disabling them resolves the issue for many users.
In Microphone Properties, open the Advanced tab. Under Default Format, set the sample rate to 44100 Hz or 48000 Hz at 16-bit or 24-bit depth. Mismatched sample rates between the microphone and Windows cause resampling artifacts that sound like a constant buzz. Uncheck Enable audio enhancements on the same tab, then click Apply.
Advanced Sound Control Panel vs. Settings App
Most troubleshooting guides point you to the modern Settings app, but it hides the controls that matter. The legacy Sound Control Panel exposes the Recording tab, Listen tab, and per-device Advanced properties that the Settings app buries or omits entirely.
To open it, press Win + R, type mmsys.cpl, and hit Enter. From there you can set your default input device, disable unused inputs that may be feeding noise into the mix, and access driver-level configuration. If a fix isn't working in Settings, it's almost always because the real toggle lives in the Sound Control Panel.
Update or Reinstall Audio Drivers in Device Manager
Corrupted or outdated audio drivers cause buzzing that appears suddenly, often after a Windows update. The fix takes about five minutes.
Open Device Manager (Win + X, then select it), expand Audio inputs and outputs and Sound, video and game controllers, and locate your microphone or audio interface. Right-click and choose Update driver > Search automatically for drivers. If Windows reports the driver is current, choose Uninstall device instead, restart the computer, and let Windows reinstall a clean copy on boot.
For USB microphones and audio interfaces, check the manufacturer's site for a firmware update. Firmware fixes often address USB timing issues that show up as periodic buzzing.
Fix Grounding Issues and Electromagnetic Interference
A ground loop happens when two devices in your signal chain reference different electrical grounds, creating a small voltage difference that travels back up the audio cable as a steady 60 Hz hum (in North American wiring) (peer-reviewed research). Electromagnetic interference is different: it's radiated noise from a nearby cable, transformer, or component that couples into an unshielded audio line. Both sound like "buzzing," but they have different fixes, so identify which one you have before you start swapping hardware.
Diagnose the Source Before You Fix It
Run these three tests in order. Each one isolates a different failure mode.
- The touch test. Put your finger on the microphone body or the metal collar of the XLR connector. If the buzz gets louder or changes pitch, you're dealing with a grounding or shielding problem, not a software issue.
- The battery test (laptops). Unplug the charger and run on battery. If the buzz disappears, the charger's ground reference is the culprit. A grounded replacement or a ground-loop isolator on the audio line usually resolves it.
- The proximity test. Slowly move the mic cable past your monitor, power strip, and any wall-wart chargers. If the buzz rises as the cable gets closer to one of them, that's EMI, not a ground loop.
Is It Coil Whine or a Power Cable?
GPU coil whine is a high-pitched, variable squeal that changes with frame rate or GPU load, it is not a 60 Hz hum. If you hear it through your mic, the noise is being picked up acoustically by the microphone capsule, not electrically through the cable. Move the mic farther from the case, or move the PC off the desk. A power cable running parallel to your mic cable, by contrast, induces a constant low hum; separating the two cables by several inches and crossing them at 90 degrees instead of running them parallel typically kills it.
Practical Fixes, in Order of Effort
- Plug every device in the signal chain into the same power strip. This equalizes the ground reference and is the single most common fix for ground-loop hum.
- Use a ground-loop isolator on the audio line between your interface and your computer. These are inexpensive inline transformers that break the ground connection while passing the audio signal.
- Move the microphone away from monitors, power supplies, and LED lighting. Cheap LED drivers and switching power supplies are notorious EMI sources.
- Use a shielded USB cable with a ferrite bead. The ferrite suppresses high-frequency interference that rides on the cable shield.
- Check the chassis ground on desktop towers. A loose motherboard standoff or a missing grounding screw can introduce hum that no cable swap will fix.
Use Microphone Noise Suppression on Windows
Software noise suppression is the right tool when the buzz is residual, a low-level hiss or hum that survives every hardware fix. It cannot remove a ground loop or a failing cable, so treat it as the last layer, not the first.
Windows 11 Built-In vs. the Legacy Sound Control Panel
The modern Settings > System > Sound > Microphone > Audio enhancements toggle applies a voice-focused filter to your input, but it hides the per-device controls that actually matter. The legacy Sound Control Panel, open it with Win + R, type mmsys.cpl, press Enter, exposes the Recording tab, the Listen tab, and per-device Advanced properties that the Settings app buries or omits. If a noise-suppression toggle in Settings does nothing, the real switch is almost always in the legacy panel under the device's Advanced tab or in the manufacturer's own control app.
Software Tools That Reduce Static and Hum
Three categories of tool cover almost every case:
- Noise gates cut the signal below a threshold you set, silencing the mic between phrases and removing constant low-level hum. OBS Studio ships a free noise gate filter under the microphone's Filters menu, along with a Noise Suppression filter (RNNoise) and an Expander for finer control.
- AI noise suppression tools like NVIDIA Broadcast (formerly RTX Voice) and Krisp use machine-learning models to subtract non-voice sound in real time. NVIDIA Broadcast requires an RTX-class GPU; Krisp runs on CPU and works as a virtual microphone that any Windows app can select.
- Parametric EQ lets you notch out specific frequencies. For ground-loop hum, that means a narrow cut at 60 Hz and its harmonics at 120 Hz and 180 Hz. Most audio interfaces and DAWs include a parametric EQ; free options exist as VST plugins.
Match the Tool to the Noise
A noise gate is the wrong fix for a constant buzz, it will chop your voice and still let the hum through while you speak. Use a gate for intermittent background noise (keyboard, chair squeaks) and a notch EQ or AI suppression for constant tonal hum. For a steady 60 Hz ground-loop hum that you cannot eliminate at the source, a narrow EQ notch is the most surgical option.
How to Reduce Mic Background Noise
Reducing background noise starts with the room, not the software. Soft furnishings, rugs, and acoustic panels absorb reflections that a sensitive condenser microphone picks up easily. Position the mic close to your mouth, use a cardioid pickup pattern where available, and keep the gain as low as your voice allows.
A dynamic microphone like the Shure SM7B product documentation rejects more room noise than a condenser because of its tighter pickup pattern, which is why it's common in untreated home studios. For creators building a first setup, Perfect Take Gear's microphone range includes USB and XLR options suited to streaming, podcasting, and video work, along with the NXG MD21 USB sound card for cleaner input routing. If you're upgrading the rest of your desk at the same time, their Content Creator Gear & Equipment covers cameras, lighting, and audio gear that pair well with a noise-free mic chain.

If buzz persists after every hardware and software fix, the microphone itself may be faulty. Test it on a second computer. If the noise follows the mic, it's time to replace it.
Frequently Asked Questions
How to get rid of microphone buzzing?
Start by checking cables and ports. Swap the USB cable, move it to a rear port directly on the motherboard, and test another device. If buzzing continues, disable audio enhancements in Windows Sound settings, set the sample rate to 48000 Hz, and update your audio drivers in Device Manager. For persistent hum, try a ground loop isolator or plug your computer and audio gear into the same power strip.
How to stop mic from making static noise?
Static noise often comes from a loose connection or a driver conflict. Unplug and replug the mic, then go to Device Manager and reinstall the audio driver. In Sound Control Panel, turn off exclusive mode and disable any 'listen to this device' option. If static remains, move the mic away from routers, monitors, and phone chargers, which can introduce electromagnetic interference on the cable.
What causes microphone hum?
Hum usually comes from a ground loop, where two devices connect to different ground points and create a low-frequency buzz. It can also come from unshielded cables running near power supplies or from a microphone with a failing internal ground. Plugging all audio gear into the same outlet or using a ground loop isolator often removes the hum without replacing the mic.
Does a ground loop cause microphone buzzing?
Yes, a ground loop is one of the most common causes of a steady low hum or buzz. It happens when your computer, monitor, and audio interface connect to different electrical grounds. To test, unplug your laptop charger and run on battery. If the buzz stops, the charger or outlet is the culprit. Use a ground loop isolator or plug everything into one power strip to break the loop.
Buzzing microphones rarely need a technician. Working through cables, gain levels, sample rates, drivers, and grounding in that order solves the vast majority of cases in under an hour. When the problem turns out to be the gear itself, Perfect Take Gear carries USB condenser mics, dynamic USB/XLR microphones, and audio interfaces built for creators who need clean audio without a studio budget. Browse the audio collection and get a setup that records the take you actually want.