

Signs Your Microphone Preamp Is Failing
Table of Contents
- Common Symptoms of a Failing Microphone Preamp
- Symptoms of a Bad Preamp Tube vs. Power-Tube Problems
- Microphone Preamp Crackling: Isolate the Source
- How to Test a Microphone Preamp Systematically
- Microphone Cable Troubleshooting and RF Interference
- When to Repair, Replace, or Seek Professional Service
- Solid-State Preamps and Audio Interface Inputs
- Frequently Asked Questions
Last Updated: October 19, 2026
Common Symptoms of a Failing Microphone Preamp
Signs your microphone preamp is failing include noise, dropouts, weak output, and distortion. Recognizing these symptoms early lets you isolate the problem before it ruins a session.
When the preamp fails, the signal gets corrupted between the microphone and the audio interface, so identifying the exact symptom matters.
Hissing, Crackling, Popping, and Static Noise
Hissing is constant, high-pitched noise under your audio; crackling and popping are sharp, sudden sounds that interrupt clean audio; static feels like electrical interference.
These noises point to several possible sources:
- Dirty XLR connectors or loose cable connections
- Ground loops between devices
- RF interference from nearby electronics
Check your microphone cable first. A damaged connector or frayed wire often causes crackling before the preamp fails.
If noise persists after cable testing, the preamp input stage may be degrading. Tube preamps develop hiss as tubes age; solid-state preamps develop noise when components drift out of tolerance.
Intermittent Sound or Signal Dropouts
Signal dropouts feel like the audio cuts in and out randomly, leaving gaps or silence in the recording.
Intermittent problems are harder to diagnose than constant ones. They point to loose connections, failing components under thermal stress, or RF interference that comes and goes.
Check these first:
- Wiggle the XLR cable where it connects to the preamp and microphone
- Listen for audio dropout when you move the cable
- Test with a different XLR cable
If dropouts stop when the preamp cools down after being off for an hour, a failing component is likely overheating, a sign the preamp needs professional service or replacement.
Weak, Thin, or Muffled Output
Weak output means the signal stays low even with the gain knob turned up, and the audio sounds thin, muffled, or distant.
This suggests the input or output stage is failing: the gain knob controls voltage amplification, so if turning it up doesn't raise output, the amplifier circuit isn't working.
Weak output can also come from:
- Phantom power not reaching a condenser microphone
- A microphone capsule that's damaged or aged
- Connector pins not making full contact
Test phantom power by toggling it off and on and listening for a pop or click through headphones.
Unwanted Distortion and Tone Changes
Distortion sounds like the audio is clipping, breaking up, or becoming harsh.
A failing preamp tube often produces distortion first, since tubes near end-of-life add harmonic distortion. Solid-state preamps develop distortion when internal circuitry fails.
Distortion also appears when:
- The gain knob is set too high, causing the input to clip
- The microphone is too close to the source, overloading the input
- Phantom power voltage is unstable
Lower the gain knob and move the microphone back from the source. If distortion disappears, the preamp was being overdriven. If it remains, the preamp itself is likely failing.
Symptoms of a Bad Preamp Tube vs. Power-Tube Problems
Tube preamps contain two main types of tubes: preamp tubes and power tubes.
Preamp tubes amplify the weak microphone signal in the input and early gain stages.
Power tubes amplify the final signal before it leaves the preamp and handle more voltage and current.
Signs of a bad preamp tube:
- Hissing or crackling in the audio
- Microphonic noise (ringing or feedback triggered by tapping the preamp)
- Weak output that doesn't improve with gain adjustment
Signs of a bad power tube:
- Weak output that improves slightly when the gain knob goes up
- Muffled or compressed sound
- Audio that sounds flat or lifeless
A failing rectifier tube (which converts AC to DC voltage) causes the entire preamp to lose power or produce hum.
Creators often ask how to know which tube is failing without testing equipment.
Microphone Preamp Crackling: Isolate the Source
Crackling is one of the most common signs your microphone preamp is failing, though it's easiest to misdiagnose because the problem could be anywhere in the signal chain.
The key is systematic isolation. Test one component at a time, changing only one variable per test.
Test Your Microphone and Cable First
Start with the microphone and cable because they're the easiest to swap.
- Disconnect the microphone from the preamp
- Connect a known working microphone to the same preamp input
- Record audio and listen for crackling
- If crackling is gone, the original microphone is the problem
- If crackling remains, the preamp or cable is at fault
Next, swap the XLR cable:
- Disconnect the working microphone from the preamp
- Connect it using a different XLR cable
- Record audio and listen
- If crackling stops, the cable was damaged
- If crackling persists, the preamp input is likely failing
This two-step test eliminates the microphone and cable as causes, focusing attention on the preamp itself.
Check Phantom Power and Connector Pins
Phantom power supplies voltage to condenser microphones through the XLR cable. Problems with it cause crackling, noise, and intermittent dropouts.
Check phantom power:
- Locate the phantom power button on the preamp or audio interface
- Toggle it on and listen through headphones for a pop or click
- If you hear a pop, phantom power is working
Inspect the XLR connector pins:
- Look at pins 2 and 3 inside the XLR connector
- They should be shiny and clean, not green or corroded
- If pins are corroded, the connection is poor
Loose pins inside the connector prevent full contact. Push the XLR connector firmly into the preamp input. Listen for the click that signals a secure connection.
How to Test a Microphone Preamp Systematically
Testing a preamp requires a method. Random swapping of cables and microphones wastes time. A systematic approach identifies the problem in minutes instead of hours.
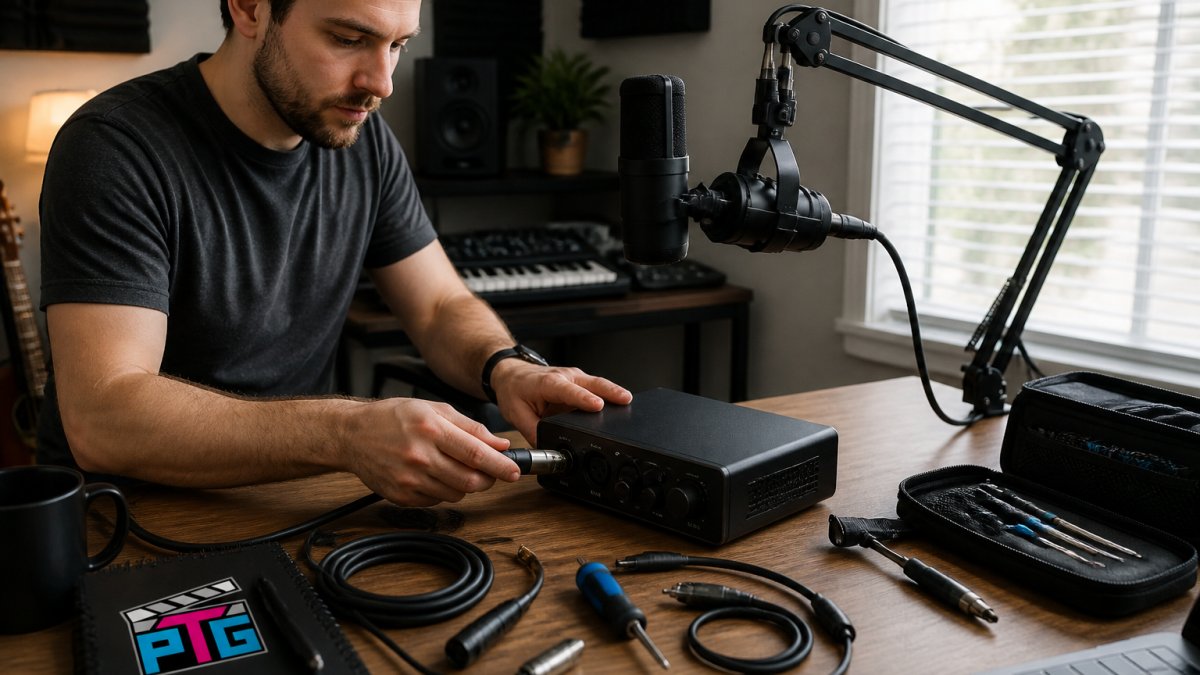
Swap Components to Narrow Down the Problem
Component swapping works by changing one thing at a time and listening for changes.
The swap order matters:
- Swap the XLR cable (use a cable you know works)
- Swap the microphone (use one you know works)
- Swap the audio interface input (plug into a different input channel)
- Swap the preamp itself (use a different preamp if available)
- Swap the monitoring headphones (to rule out headphone issues)
After each swap, record 10 seconds of audio and listen carefully. Note whether the problem changed, stayed the same, or got worse.
If the problem disappears after swapping the preamp, the original preamp is failing. If it stays no matter what you swap, the issue is upstream (microphone or cable) or downstream (audio interface or monitoring system).
Run a Controlled Recording Test
A controlled test removes variables and produces repeatable results.
Set up the test:
- Use the same microphone, cable, and preamp each time
- Record in the same room at the same time of day
- Keep the gain knob at the same position
- Record 30 seconds of silence
- Record 30 seconds of speaking at normal volume
- Save the file with a timestamp
Listen to the recordings on different devices. Headphones, speakers, and other preamps may reveal problems the original monitoring system masked.
Compare recordings from different times. If crackling appears only at night, RF interference from nearby electronics may be the cause; if it appears only after the preamp has run for an hour, thermal stress is degrading a component.
Microphone Cable Troubleshooting and RF Interference
The microphone cable carries the signal from microphone to preamp, and cable problems are the most common cause of noise and dropouts.
Inspect Cables and Connectors for Damage
Visual inspection catches most cable problems.
Look for:
- Bent or crushed connectors
- Cracks in the cable jacket
- Exposed wires inside the connector
Damage to the cable jacket exposes the shield that protects the signal from RF interference; without it, noise enters the signal.
Bent connectors prevent pins from making full contact, causing intermittent dropouts and crackling.
Test a suspect cable by:
- Bending it gently along its length while recording
- Listening for crackling or noise that changes with the bend
- If noise appears, the cable has internal damage
- Replace the cable rather than repair it
A new quality XLR cable costs less than an hour of troubleshooting time.
Eliminate RF Interference and Ground Loops
RF interference comes from nearby electronics: WiFi routers, mobile phones, power supplies, fluorescent lights, and radio transmitters.
Ground loops form when multiple devices share a ground connection through different paths, creating a loop that picks up electromagnetic noise.
Reduce RF interference:
- Move the preamp away from other electronics
- Keep the XLR cable away from power cables
- Use cables with good shielding
Eliminate ground loops:
- Use only one ground connection between devices
- Avoid daisy-chaining multiple preamps or interfaces
- Use balanced XLR connections (they reject ground-loop noise better than unbalanced connections)
If hum appears at 50 Hz or 60 Hz (the AC power frequency), a ground loop is present. Moving the XLR cable away from power cables often solves this.
When to Repair, Replace, or Seek Professional Service
Whether to repair, replace, or seek professional help depends on the preamp's age, cost, and severity of the problem.
Repair makes sense when:
- The preamp is less than 10 years old
- Repair cost is less than 40% of replacement cost
- The problem is a bad tube (easy and inexpensive to replace)
Replace when:
- The preamp is more than 15 years old
- Repair cost exceeds 50% of a new preamp
- Multiple components are failing
Seek professional service when:
- The problem involves internal circuitry or soldering
- You're unsure whether the preamp or another component is failing
- The preamp requires calibration after repair
DIY tube replacement is safe and simple. Tube preamps have user-replaceable tubes in sockets. Turn off the preamp, let it cool for 10 minutes, and gently pull the tube straight out.
Solid-state preamp repairs usually require a technician. Internal components need soldering and specialized test equipment.
Solid-State Preamps and Audio Interface Inputs
Not all preamps use tubes.
Solid-state preamps use transistors and integrated circuits instead of tubes, with no user-replaceable tubes.
Signs of audio interface preamp failure:
- Noise or distortion on one input channel only
- Other input channels work perfectly
- Swapping cables and microphones doesn't help
Testing an audio interface preamp:
- Plug a microphone into a different input channel
- Record and listen for the same problem
- If the problem follows the microphone, the microphone is at fault
- If the problem stays on the original channel, the interface preamp is failing
Many audio interfaces let you bypass the built-in preamp by using line-level inputs.
A failing microphone preamp stops a recording session cold, but systematic testing reveals the problem quickly.
When the preamp truly is failing, decide based on age and repair cost.
Frequently Asked Questions
What are the most common signs that my microphone preamp is failing?
The most common signs include hissing or crackling noise in your audio signal, intermittent sound dropouts, weak or thin output even at high gain settings, and unwanted distortion or fuzzy tone. You might also notice the preamp responds inconsistently to the gain knob or produces noise triggered by vibration. If your microphone and cable test fine but these symptoms persist, your preamp likely needs attention.
How can I tell if crackling is coming from my microphone preamp or my cable?
Swap your microphone cable with a known working XLR cable first. If the crackling stops, your original cable has a connector or pin issue. If it continues, test with a different microphone on the same preamp and cable. If the crackling moves with the microphone, the issue is upstream. If it stays with the preamp, your preamp is the source. This isolation method works because each component in your signal chain can be tested independently.
Can a bad microphone cable make my preamp sound like it's failing?
Yes. A damaged XLR cable, loose connector pins, or poor grounding can produce hissing, intermittent dropouts, and weak signal that mimics preamp failure. Always test with a known good cable before concluding your preamp is bad. Cables are also cheaper to replace, so start there. Check that pin 2 and pin 3 are making solid contact inside the connector.
When should I repair my preamp instead of replacing it?
Repair makes sense if your preamp is relatively new, has sentimental value, or is a high-end model. If it's an older entry-level preamp and repair costs approach 50% or more of a replacement, replacement is usually better. Tube-based preamps may need tube replacement, which is often affordable. For solid-state preamps, internal component failures are harder to diagnose and repair. Consider the age, model, and cost before committing to professional service.