

Best Microphones for Home Studio Streaming and Recording
Table of Contents
- Quick Comparison: Home Studio Microphones at a Glance
- Dynamic vs Condenser Microphone for Streaming
- Top Home Studio Microphones for Streaming and Recording
- How to Set Up a Home Studio Microphone
- How to Reduce Background Noise in Home Recordings
- XLR vs USB: Which Connection Fits Your Setup?
- Frequently Asked Questions
Last Updated: September 18, 2026
Quick Comparison: Home Studio Microphones at a Glance
Choosing the best microphones for home studio streaming and recording starts with matching the mic to your room, connection type, and budget. Choosing the best microphones for home studio streaming and recording starts with matching the mic to your room, connection type, and budget. A dynamic mic tames a noisy room, while a condenser mic rewards a quiet one.
| Microphone | Price | Type | Connection | Best For |
|---|---|---|---|---|
| Maono PD200X Dynamic RGB | $129.99 | Dynamic | USB-C and XLR | Best overall |
| USB RGB Condenser Mic | $33.99 | Condenser | USB | Tightest budgets |
| Tenlamp CG1 RGB | $54.99 | Condenser | USB-A, USB-C, 3.5mm | Everyday streaming |
| Tenlamp PKPRO | $62.99 | Condenser | XLR only | Studio vocals |
| Tenlamp G10 PKPRO Bundle | $164.99 | Condenser + mixer | USB-C, Bluetooth | All-in-one setups |
| MAONO AM200-S1 Bundle | $106.99 | Condenser + mixer | 3.5mm, USB-C | Podcasting |
| Tenlamp Y300-P15B Bundle | $51.99 | Condenser + sound board | USB, Bluetooth, XLR | Budget bundles |
| FIFINE A8 | $85.99 | Condenser | USB | Solo streamers |
| FIFINE A6T | $92.99 | Condenser | USB-C | Gaming and PS5 |
| FIFINE Ampligame A6V | $65.99 | Condenser | USB | Plug-and-play gaming |
Dynamic vs Condenser Microphone for Streaming
A dynamic microphone uses a moving coil and magnet, making it durable and resistant to room noise. A condenser microphone uses a charged capsule that captures more detail and higher frequencies, which is why studios favor it. That difference decides which mic suits your room, but three specs underneath it decide whether the mic suits your voice.


Polar Patterns: What the Mic Hears
A polar pattern is the shape of a mic's sensitivity around its capsule. The most common:
- Cardioid picks up mostly what's in front of it and rejects the rear. It's the default for solo streaming and recording because it ignores the wall behind the mic and the monitor in front of you.
- Omnidirectional picks up equally in all directions. It sounds natural and handles room tone gracefully, but it's a poor fit for an untreated bedroom.
- Figure-8 (bidirectional) hears front and back and rejects the sides, useful for two-person podcasts or for placing the null over a noisy source.
Frequency Response: Bright vs Dark
Frequency response describes how a mic treats different pitches. A flat response reproduces the source faithfully, good for instruments, less flattering on a voice. A presence-boosted response lifts the 2 to 5 kHz range where intelligibility lives; it makes vocals cut through a mix but can turn sibilant on a bright voice.
- Bright or thin voices (higher-pitched, lots of sibilance) often pair better with a darker, flatter mic that doesn't add more top end.
- Warm or deep voices (lower-pitched, less top-end energy) often benefit from a presence-boosted mic that adds clarity.
- Midrange-heavy voices sit well with almost anything; pick based on the room, not the timbre.
Sensitivity and Self-Noise
Sensitivity measures how much signal a mic produces for a given sound pressure level. Dynamic mics are less sensitive, so they need more gain, and pick up less room. Condenser mics are more sensitive, capturing detail but also every HVAC hum in the building.
When a Dynamic Mic Wins
Untreated rooms, noisy apartments, and shared spaces favor a dynamic mic. Its lower sensitivity picks up less background noise and reverb, so your voice sits forward without heavy processing. The Maono PD200X is the clearest example: its cardioid pattern and 78dB signal-to-noise ratio keep room tone out of the recording.
When a Condenser Mic Wins
Quiet, treated rooms let a condenser mic show what it can do: extra sensitivity captures vocal clarity and detail a dynamic mic flattens. If your space is silent and you want broadcast-quality warmth, a condenser like the Tenlamp PKPRO is the better tool. Just budget for treatment first, a condenser in a bare room records the room, not the voice.
Top Home Studio Microphones for Streaming and Recording
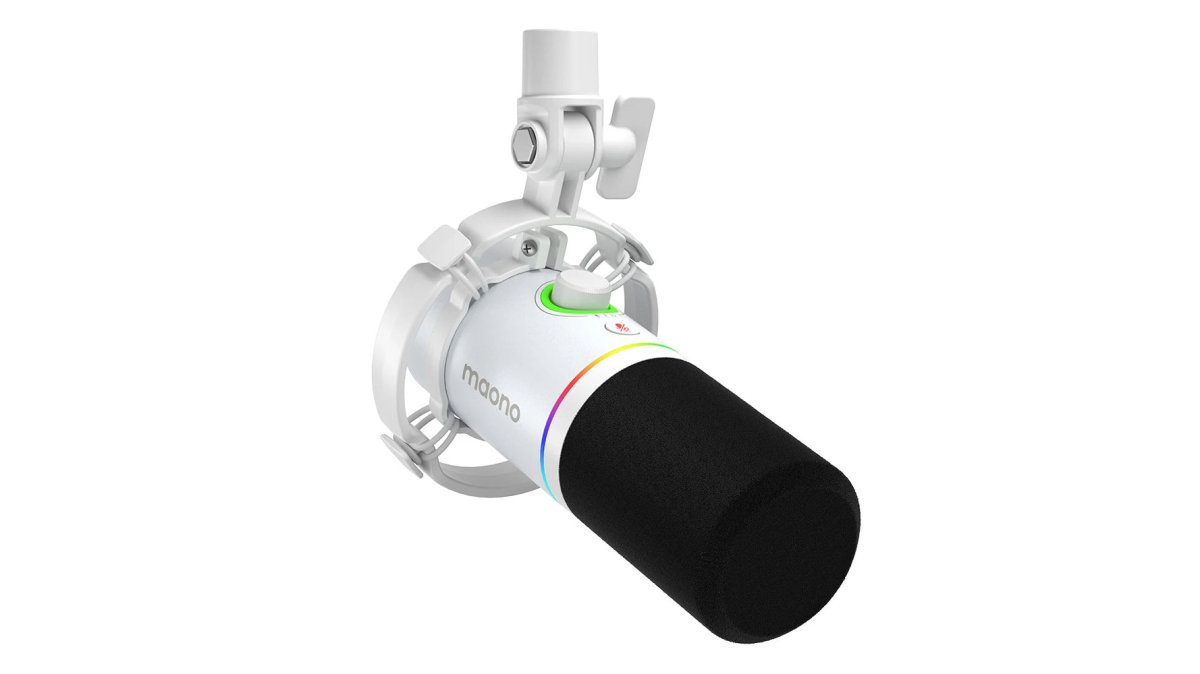
The Maono PD200X works as a USB mic today and an XLR mic later.
Best Overall: Maono PD200X Dynamic RGB (USB/XLR)
This is the pick for anyone who wants one mic to carry them from first stream to serious setup. The PD200X runs USB-C straight into a computer, then switches to XLR when you add a mixer. Its all-metal body, suspended shock mount, and built-in foam windscreen handle desk bumps and plosives without extra gear. Independent gain and headphone dials mean no menu diving mid-stream.
Best Budget USB: USB RGB Condenser Microphone
For a first setup, this $33.99 USB condenser is hard to argue with. It's plug-and-play on PC and laptop and ships with a pop filter and desktop tripod stand, so there's nothing else to buy. RGB lighting is a nice touch for on-camera setups.
Best for Podcasting: MAONO AM200-S1 Bundle
The AM200-S1 pairs the MaonoCaster Lite interface with the PM360TR condenser mic for $106.99, with eight preset sound effects, four pitch changers, built-in EQ, Bluetooth 5.0 for music beds, and about eight hours of battery.
How to Set Up a Home Studio Microphone
Setting up a home studio microphone takes about 15 minutes: mount it, connect it, set your gain, and position it correctly. Most beginners rush the last step, the one that matters most.
- Mount the mic on a boom arm or stand so it sits off your desk
- Position it 6 to 8 inches from your mouth, slightly off-axis
- Connect via USB, or via XLR into an interface with phantom power on
- Set gain so normal speech peaks around -12dB, never clipping
- Add a pop filter and enable monitoring through headphones
- Record a 30-second test and listen back before going live
How to Reduce Background Noise in Home Recordings
Reducing background noise in home recordings comes down to four moves, in order: quiet the room, treat the reflections, get closer to the mic, then cut what's left in software. The order matters, software can't fix a bad source, only shrink what's there.
Step 1: Quiet the Room at the Source
Before you buy anything, walk your room with your eyes closed and listen. Common offenders: HVAC vents, a refrigerator on the other side of a wall, a laptop fan under load, a mechanical keyboard, and a phone on the desk. Moving the mic 3 to 4 feet from a laptop and switching to a quieter keyboard often removes more noise than any plugin will.
Step 2: Treat Reflections, Not Just Noise
Background noise and room reflections are two different problems needing two different fixes. Noise is sound coming into the room. Reflections are your own voice bouncing off hard surfaces and arriving back at the mic a few milliseconds late, that's what makes a home recording sound boxy or "small."
- First reflection points. The walls to your left, right, and behind the mic are the worst offenders. Hanging a moving blanket, a thick quilt, or a purpose-built acoustic panel at those points absorbs the early reflections before they reach the capsule.
- Behind the mic. A cardioid mic rejects sound from directly behind it, so a bare wall behind the mic is less of a problem than a bare wall behind you. Treat the wall you face.
- Floor and ceiling. A rug under the desk and a bookshelf behind the mic break up vertical and rear reflections cheaply.
- The closet trick. A closet full of clothes is a genuinely effective vocal booth, dense fabric on three sides absorbs broadband reflections. It's not glamorous, but it works, and it costs nothing.
Step 3: Use the Polar Pattern as a Tool
A cardioid pattern rejects sound from behind and beside the capsule, which is why it's the default for solo streaming. But rejection isn't absolute, it's frequency-dependent, and off-axis sound that gets in often sounds colored. Point the rear null (the dead zone behind the capsule) at your noisiest source: a window, a door, an AC unit.
Step 4: Cut What's Left in Software
Once the room is as quiet as it gets, a short processing chain handles the rest. A beginner-friendly order:
- High-pass filter at 80 to 100 Hz to remove rumble, desk thumps, and HVAC drone below the vocal range.
- Noise gate or expander to mute the channel between phrases, set the threshold just above your room's noise floor, not so high that it clips the start of words.
- Subtractive EQ to notch out any resonant hum (often a narrow cut somewhere between 100 and 300 Hz).
- Compressor to even out dynamics so quiet words don't disappear and loud ones don't clip.
- De-esser if sibilance is harsh, especially on condenser mics.
XLR vs USB: Which Connection Fits Your Setup?
USB is right for solo creators who want to plug in and record; XLR is right for anyone building toward a mixer, interface, or multi-mic setup. USB mics have the converter built in; XLR mics send an analog signal that needs an interface to reach your computer.
Frequently Asked Questions
What is the best microphone for recording in a home studio?
The best choice depends on your room and workflow. A dynamic mic like the Maono PD200X ($129.99) handles untreated rooms well because its cardioid pattern rejects ambient noise. If your space is quiet and treated, a large-diaphragm condenser such as the Tenlamp PKPRO ($62.99) captures more vocal detail. USB models like the FIFINE A8 ($85.99) skip the audio interface entirely for plug-and-play recording.
What is the difference between dynamic and condenser microphones for home studios?
Dynamic mics use a moving coil and handle loud sources while rejecting room noise, making them forgiving in untreated spaces. Condenser mics use a charged capsule and pick up more detail across the frequency response, but they also capture more background sound. For streaming in a typical bedroom, a dynamic mic usually delivers cleaner results with less acoustic treatment.
Do I need an audio interface for a home studio microphone?
Only if you choose an XLR microphone. The Tenlamp PKPRO, for example, requires 48V phantom power from an interface or mixer. USB mics like the Tenlamp CG1 ($54.99) or FIFINE A6V ($65.99) connect straight to your computer with no interface needed. If you want both paths, the Maono PD200X offers USB-C and XLR in one mic.
How do I reduce background noise in home recordings?
Start with mic placement and gain staging. Keep gain low and move the mic closer to your mouth to improve the signal-to-noise ratio. Choose a cardioid pattern to reject off-axis sound, add a shock mount to stop desk vibrations, and use a pop filter for plosives. Software noise gates and high-pass filters clean up what remains.
The hardest part of building a home studio isn't the gear. It's knowing which piece actually improves your sound and which one just looks good on a desk. Perfect Take Gear stocks microphones, audio interfaces, and studio essentials built for creators at every stage, from a first $33.99 USB mic to a full mixer bundle. Browse the audio collection, compare the specs side by side, and get started with Perfect Take Gear to turn any room into a studio that sounds as good as it looks.