

Are Professional Studio Microphone Shootouts Worth It?
Last Updated: November 1, 2026
Quick Summary
A professional studio microphone shootout reveals how specific microphones behave on a specific voice in a specific room, so treat it as a listening test rather than a leaderboard. Run your own blind, level-matched microphone shootout with the same passage, distance, gain and room to find the mic that fits your voice.
- The Tenlamp PKPRO costs $62.99 and needs 48V phantom power from an interface, mixer or sound card.
- The Maono PD200X offers dual USB-C and XLR connectivity with a 40Hz-16kHz frequency range.
- Record the same 20-second vocal passage three times per mic and match perceived loudness before judging tone.
- Level-match files and include one mic you expect to dislike when running a blind test.
- Start with two mics, not five, and listen back blind before revealing which was which.
Table of Contents
- What a Professional Studio Microphone Shootout Actually Tells You
- Five Studio Mics Compared: Specs, Price and Best Use
- The Best Studio Microphones for Vocals in This Lineup
- How to Audition a Studio Vocal Microphone at Home
- Running a Blind Microphone Test That Removes Brand Bias
- Using Studio Mic Sound Samples to Judge Tonal Character
- Total Ownership Costs and Setup Requirements
- Build Your Shootout Rig at Perfect Take Gear
- Frequently Asked Questions
What a Professional Studio Microphone Shootout Actually Tells You
A professional studio microphone shootout reveals how specific microphones behave on a specific voice in a specific room. That is its whole value, and its whole limit.
The logic here is not controversial among engineers. Puremix's discussion of vocal mic shootouts argues that expecting one microphone to suit every voice is not a reasonable assumption, and frames selection around finding a fit for a particular voice.
Below, this guide breaks down what a shootout can and cannot prove, how to run one at home, and which mics in this lineup are worth putting in front of your face first.
Five Studio Mics Compared: Specs, Price and Best Use
A shootout is only as useful as the data behind it.
The Tenlamp PKPRO ($62.99) uses a 26mm gold-plated large-diaphragm capsule with a cardioid polar pattern and XLR output.
The BM800 Home Studio Recording Kit ($55.99) pairs a cardioid condenser with a two-channel mixer, adjustable boom arm, pop filter, and shock mount.
The BOYA BY-BM6060 ($271.99) is a super-cardioid shotgun condenser with 3-pin XLR output, running on 24-48V phantom power or a single AA battery.
Quick Comparison Table
| Microphone | Price | Type | Connectivity | Best For |
|---|---|---|---|---|
| Tenlamp PKPRO | $62.99 | Large-diaphragm condenser | XLR, 48V phantom | Detailed studio vocals |
| BM800 Kit | $55.99 | Condenser + mixer kit | 3.5mm, Bluetooth | First home setup |
| BOYA BY-BM6060 | $271.99 | Shotgun condenser | XLR, phantom or AA | On-camera dialogue |
| Haomuren USB | $116.99 | USB condenser | USB, Type-C adapter | Streaming and podcasts |
| Maono PD200X | $125.99 | Dynamic | USB-C and XLR | Noisy rooms, gaming |
How the Specs Translate to What You Hear
Spec sheets are a filter, not a verdict. Use them to narrow the field, then confirm with your ears. Here is how the numbers map to audible behavior:
- Frequency response. A wide, gently rising response (common on large-diaphragm condensers) tends to sound bright and detailed on vocals. A narrower response (common on dynamics) tends to sound thicker and more forgiving. Neither is better; they suit different voices and rooms.
- Polar pattern. Cardioid rejects the rear and reduces side pickup. Super-cardioid rejects more off-axis sound but picks up a lobe directly behind the mic. In an untreated room, tighter patterns buy you usable recordings.
- Self-noise. Lower self-noise matters most on quiet sources and high-gain settings. On loud vocals it is rarely the limiting factor.
- Sensitivity. Higher sensitivity means more output per unit of sound pressure, reducing how hard your preamp has to work. Low-sensitivity dynamics demand more clean gain.
- Maximum SPL. Relevant for drums and close-miked loud sources. For solo vocals, most modern mics clear the bar easily.
If you want to cross-check this lineup against a broader range of options, the best microphones for home studio streaming and recording roundup covers more ground.
The Best Studio Microphones for Vocals in This Lineup
The Tenlamp PKPRO uses a large-diaphragm capsule and cardioid pattern. Connectivity is XLR only, with phantom power required and no USB option.
The Maono PD200X is a dynamic microphone with a cardioid pattern and dual USB-C and XLR connectivity.
The Haomuren USB condenser connects over USB with a Type-C adapter and includes a 3.5mm headphone output with echo effects.
How to Audition a Studio Vocal Microphone at Home
Auditioning a mic at home comes down to one rule: change only one variable at a time. Same phrase, same distance, same gain, same room. Anything else and you are comparing performances, not microphones.
A workable home audition runs like this:
- Record the same 20-second vocal passage on each mic, three takes each.
- Match perceived loudness between files before judging tone.
- Label files by number, not by model, before listening back.
- Listen on headphones first, then on speakers.
- Note sibilance, low-end buildup, and how the mic handles your loudest note.
The room will skew everything. An untreated space adds reflections that make every condenser sound brighter and more diffuse than it is, which is why home studio acoustics for untreated rooms matters more than most buyers expect.
A common mistake is auditioning with a different song or script each time. Use one passage you know intimately, and sing it the same way every take.
Running a Blind Microphone Test That Removes Brand Bias
A blind microphone test removes the three things that corrupt listening judgment: brand reputation, appearance, and price. Transom's blindfold mic shootout article makes the case directly, arguing that microphones are best assessed by listening without those preconceptions. That is not a philosophical point. It is the difference between choosing a mic that suits your voice and choosing one that suits your ego.
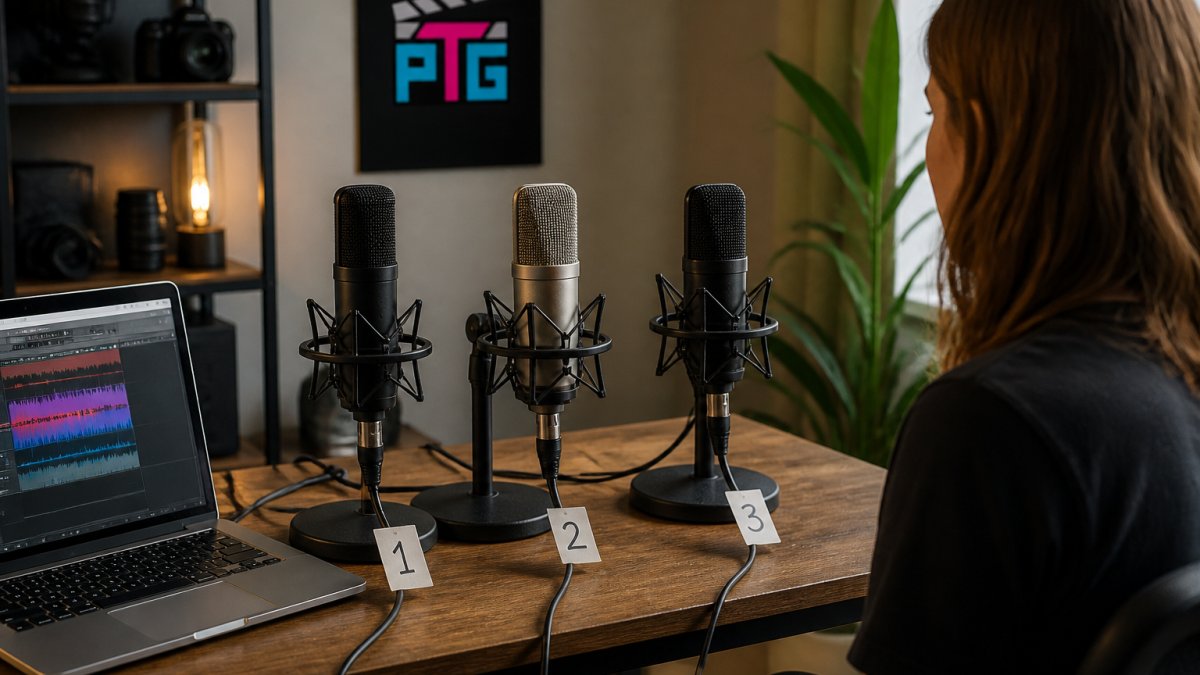
The mechanics are simple. Have someone else set up the mics and assign random numbers. Record into numbered tracks. Do not look at the hardware while tracking.
Tenlamp PKPRO Large Diaphragm Condenser Microphone - XLR →
Two refinements make the test honest. First, level-match the files, because louder almost always sounds better and will bias the result. Second, include one mic you expect to dislike. If it wins, you learned something worth knowing.
Using Studio Mic Sound Samples to Judge Tonal Character
Many shootout samples do not document how they were recorded. A sample captured louder, closer, or in a more flattering room tells you about the recording conditions, not the microphone. The fix is a documented, level-matched methodology you can reproduce at home.
The Four-Point Sample Standard
Treat any sample that does not meet all four points as entertainment rather than evidence:
- Level-matched. Perceived loudness is normalized across files before listening. Louder almost always sounds better, so unmatched samples bias every judgment toward the loudest file.
- Identical conditions. Same room, same distance, same preamp gain, same performance. One variable changes per comparison.
- Documented. The source states the room type, distance, preamp, interface, and whether any processing was applied. A sample without this is a demo, not a test.
- Raw files available. Downloadable, uncompressed audio lets you load the files into your own session, match levels yourself, and listen on your own monitors instead of someone else's compressed stream.
What to Listen For
Once the files are level-matched and documented, listen for four traits in this order:
- Sibilance. How the mic handles "s" and "sh" sounds. Harsh, lisping, or smeared sibilance is hard to fix later.
- Low-end buildup. Whether chest notes get muddy or stay defined. Proximity effect makes this worse at close distances, so note the distance used.
- Plosive recovery. How quickly the mic recovers from a "p" or "b" burst. A mic that chokes on plosives needs a pop filter and a technique change.
- Midrange naturalness. Whether the voice sounds like the voice or like a scooped, hyped version of it. This is the trait that most reliably predicts whether you will still like the mic in six months.
Build Your Own Reference Set
Do not rely on someone else's samples alone. Record a 20-second passage on each mic in your own room, level-match the files, and keep them as a personal reference library.
Specifications help here, but only as a filter. Frequency response, polar pattern, self-noise, and maximum SPL narrow the field before you listen. They do not replace listening. A mic with a flat-looking response curve can still sound wrong on your voice, and a mic with a colored curve can sound exactly right.
Total Ownership Costs and Setup Requirements
Total ownership cost is where most shootout coverage stops short. The microphone price is the smallest number in the chain.
An XLR condenser like the Tenlamp PKPRO requires an audio interface or mixer with 48V phantom power, an XLR cable, a stand or boom arm, and ideally a pop filter.
A USB microphone removes the interface from the equation entirely, which is why the Haomuren USB condenser and the USB side of the Maono PD200X are the lower-friction starting points.
The preamp matters more than most buyers assume. As covered in what makes a top professional studio mic preamp, the preamp colors and feeds the microphone, so a great mic into a weak input still sounds weak. If you are deciding between the two paths, USB microphone vs audio interface for beginners lays out the tradeoff directly.
Gain staging, phantom power, and cable quality round out the list. Budget for all of it before you buy the mic, not after.
Build Your Shootout Rig at Perfect Take Gear
A shootout rig does not need to be expensive. It needs to be consistent: matched cables, matched gain, matched distance, and a room you have at least partially controlled.
Perfect Take Gear's Content Creator Gear & Equipment range covers the broader setup beyond the mic itself. The Tenlamp PKPRO Large Diaphragm Condenser Microphone - XLR is the natural starting point for vocal comparison work, with its 26mm gold-plated capsule and cardioid pattern.

Start with two mics, not five. Record the same passage on both, level-match, and listen blind.
Frequently Asked Questions
What is a microphone shootout?
A microphone shootout is a side-by-side recording test where several mics capture the same source, usually the same vocalist singing or speaking the same lines, so you can compare them on identical material. The point is not to crown a universal winner. It is to hear which mic suits that particular voice and room. A useful shootout keeps performance, distance and gain consistent, then plays the takes back level-matched so louder never reads as better.
How do you compare studio microphones fairly?
Keep every variable fixed except the mic. Use one performance or loop the same phrase, hold the same distance, and set gain so each take peaks at a similar level. Label files by number rather than brand so reputation does not sway you. Then listen on headphones and on speakers. A blind listening approach helps judge microphones without brand, looks or price in the room.
Which studio microphone is best for recording vocals?
There is no single answer because fit depends on the voice. The Tenlamp PKPRO is a large-diaphragm condenser at $62.99. The Maono PD200X is a dynamic microphone at $125.99. Record the same verse on both, level-match the takes, and keep the one that needs the least EQ to sound like you.
Do microphone shootout recordings sound different through headphones?
Yes, and that is why you should check both. Headphones expose self-noise, sibilance and small detail differences between mics. Listening on speakers in your room gives a different perspective on each recording. If a mic sounds bright and clean on headphones but thin on speakers, that gap tells you something about your room. Use studio mic sound samples on both before deciding.
Are expensive studio microphones worth it?
Only when the rest of the recording chain and the room can show the difference. A $62.99 Tenlamp PKPRO and a $271.99 BOYA BY-BM6060 solve different problems, not better and worse versions of the same one. Put budget into treating reflections and buying a clean interface before spending more on a mic.
The hardest part of a shootout is not the listening. It is accepting that the mic you wanted to win may not be the one that suits your voice. Perfect Take Gear carries the condensers, dynamics, and complete kits that let you run that test properly, with gear built for daily studio and streaming use and priced for creators who are still building their setup. Get started with Perfect Take Gear and put two mics in front of your voice this week.
