

Beginner vs Professional Studio Gear: When to Upgrade
Table of Contents
- Understanding Beginner vs Professional Studio Gear
- Essential Home Studio Equipment for Beginners
- Best Budget Studio Microphones and When to Upgrade
- Upgrading Studio Gear: Workflow Integration and Hybrid Setups
- Professional Audio Equipment Brands and Investment Strategy
- Budgeting for Home Studios: Beginner vs Professional Investment
- Comparison Table: Beginner vs Professional Gear at a Glance
- Common Mistakes Beginners Make When Buying Studio Gear
Beginner vs Professional Studio Gear: When to Upgrade
Last Updated: July 26, 2026
When setting up a home studio, the gap between beginner and professional gear feels overwhelming. A $120 condenser microphone and a $3,750 one will both record your voice, but the difference in signal-to-noise ratio, frequency response, and audio fidelity becomes obvious once you open your DAW. At Perfect Take Gear, we help creators know when affordable equipment is sufficient and when upgrading transforms your workflow.
The real question isn't whether professional gear sounds better, it does. The question is whether the improvement justifies the cost for YOUR specific use case. This guide breaks down technical differences, identifies the diminishing returns threshold, and shows you exactly when to upgrade versus when to wait.
Understanding Beginner vs Professional Studio Gear
Beginner gear prioritizes affordability and ease of setup. Professional gear prioritizes accuracy, durability, and flexibility across recording environments. A beginner condenser microphone might have a presence peak around 4-5 kHz that adds brightness without requiring EQ. A professional microphone like the Neumann U87 Ai offers selectable polar patterns and a switchable pad for high sound pressure levels, features that matter once you're recording multiple sources or working in untreated rooms.
The signal chain, the path audio takes from microphone to computer, determines how much noise and distortion gets captured before reaching your mixing software. Beginner audio interfaces often have preamps with higher noise floors. Professional interfaces use lower-noise electronics and better shielding, resulting in quieter recordings and more headroom for loud sources.
Key Differences in Signal Chain and Audio Quality
Your signal chain includes the microphone, preamp, audio interface, cables, and monitoring setup. Each component adds or removes noise, coloration, and distortion.
The Shure SM58 is a legendary dynamic microphone built for live performances and home recording. Its cardioid pickup pattern isolates the main sound source and minimizes background noise, making it forgiving in untreated rooms. At around $109, it requires an audio interface with an XLR input.
The Neumann U87 Ai is a large-diaphragm condenser that captures every detail in a room, including echoes, air conditioning hum, and keyboard clicks. At around $3,750, it demands a treated recording space, quality preamp, and careful mic technique. When conditions are right, it produces reference-quality recordings needing minimal EQ and compression.
The difference in signal-to-noise ratio is measurable: the SM58 has a noise floor around 35 dB SPL, while the U87 Ai sits around 7 dB SPL. That means the professional microphone captures 28 decibels of additional clarity, but only if your room is quiet enough to benefit from it. In a bedroom with traffic noise outside, that extra clarity becomes extra noise.
Most home studios use 24-bit, 48 kHz as standard, sufficient for professional mixing and mastering. 24-bit recording gives you 144 dB of dynamic range, more than any acoustic source produces.
The Diminishing Returns Threshold
Spending $500 on gear instead of $200 produces noticeable improvement. Spending $5,000 instead of $500 produces subtle improvement. Spending $15,000 instead of $5,000 produces improvement only trained ears can hear.
For most home studio applications, the diminishing returns threshold sits around $800-$1,200 total investment in core gear: a decent audio interface, solid microphone, and monitoring headphones. Research from Audio Engineering Society technical resources shows that listener preference plateaus once recording equipment meets baseline specifications: low self-noise, flat frequency response within ±3 dB, and sufficient headroom.
The threshold question: Does your current workflow actually prevent you from achieving your goals? If you're recording podcasts and your current mic sounds clear, upgrading won't improve your content. If you're mixing music and can't hear low-end detail in your current headphones, upgrading to reference monitors becomes essential.
Essential Home Studio Equipment for Beginners
A functional home studio requires four core components: an audio interface, a microphone, monitoring headphones, and acoustic treatment.
Audio Interface and Preamp Basics
An audio interface converts analog audio signals into digital data your computer can process, and converts digital audio back to analog for monitoring. Beginner interfaces typically include single or dual-channel preamps with enough gain for most microphones.
For beginners, a USB audio interface like the Focusrite Scarlett offers simplicity: plug in, install drivers, start recording. The preamp has adequate gain range, converter quality is clean, and latency is low enough for overdubbing. Professional interfaces add features like multiple I/O channels, word clock sync, and balanced XLR outputs, features that matter once you're recording multiple sources simultaneously.
USB interfaces introduce 5-10 ms of latency, acceptable for most uses. Thunderbolt interfaces reduce this to 1-2 ms, which matters for live monitoring during recording. For beginners, USB latency is not a limiting factor.
Microphone Selection: Condenser vs Dynamic
Condenser microphones use a capacitor to convert sound waves into electrical signals. They're sensitive, detailed, and require phantom power (48V supplied by the audio interface). Dynamic microphones use a moving coil and are rugged, forgiving, and don't require phantom power.
The Shure SM58 excels at isolating the source you're pointing at while rejecting off-axis sound. It's the industry standard for live vocals and works well for home recording in untreated rooms. The presence peak around 4 kHz adds clarity to vocals without sounding thin.
For beginners: start with a dynamic microphone if your room is untreated. Upgrade to a condenser once you've added acoustic treatment. The frequency response of a dynamic mic is more forgiving in poor acoustics.
Monitoring: Studio Monitors vs Headphones
Studio monitors are powered speakers designed to reproduce sound accurately without coloration. Headphones isolate you from room sound but can mask frequency balance issues that room speakers reveal immediately.
For beginners, closed-back monitoring headphones like the Audio-Technica ATH-M20x at $59 are sufficient for tracking and basic mixing. The ideal setup uses both: headphones for tracking and detailed work, studio monitors for checking how your mix translates to other playback systems.
Best Budget Studio Microphones and When to Upgrade
Budget microphones in the $100-$300 range serve specific purposes well. The Shure SM58 at $109 is the right choice for vocals, acoustic instruments, and live recording. It has durability to survive years of use, sound quality for professional recordings, and simplicity requiring no special treatment.
Upgrading from the SM58 makes sense when recording sources that demand detail: vocals in a treated room, acoustic guitar with finger noise, or drums where you need to hear the beater on the kick drum. A condenser microphone captures that detail; a dynamic microphone misses it.
Entry-Level Options: Shure SM58 vs Neumann U87 Ai
The SM58 costs around $109. The U87 Ai costs around $3,750. That's a 34x difference in price.
The SM58 is a dynamic cardioid microphone with a presence peak that adds clarity to vocals. It handles high sound pressure levels without distortion, rejects off-axis noise effectively, and survives rough handling.
The U87 Ai is a large-diaphragm condenser with three selectable polar patterns, a switchable 10dB pad for loud sources, and a switchable low-frequency roll-off. It requires 48V phantom power, a quality preamp, and careful placement in a treated room.
For a beginner recording vocals in a bedroom, the SM58 produces better results than the U87 Ai. The U87 would capture room reflections, air conditioner hum, and street noise along with the vocal. The SM58's cardioid pattern rejects that off-axis sound.
For a professional recording vocals in an acoustically treated studio with a quality preamp, the U87 Ai produces superior results. The upgrade decision hinges on whether your current microphone limits your recordings. If you're recording in an untreated room and the SM58 sounds good, upgrading to a $1,500 condenser will make things worse. If you're recording in a treated room and the SM58 sounds thin and lacks detail, a condenser upgrade is justified.
What Frequency Response and Signal-to-Noise Ratio Tell You
Frequency response describes how a microphone reproduces different pitches. A flat response (±3 dB across 20 Hz to 20 kHz) captures sound accurately. A presence peak adds clarity to vocals and instruments. A bass roll-off reduces low-frequency rumble.
The Shure SM58 has a presence peak around 4 kHz and a bass roll-off below 100 Hz. This makes vocals sound clear and natural in live applications. In a recording studio, that presence peak means you're adding brightness you might not want.
Signal-to-noise ratio (SNR) measures how much louder the signal is compared to the microphone's self-noise. A 35 dB SNR means the microphone's noise is 35 decibels quieter than a loud source. In quiet recording environments, high SNR becomes essential. In noisy environments, it doesn't matter because room noise dominates.
For beginners recording in bedrooms and apartments, SNR below 40 dB is acceptable. For professionals recording in treated studios, 50+ dB SNR is expected.
| Microphone Type | Best For | Frequency Response | SNR | Upgrade When |
|---|---|---|---|---|
| Dynamic (SM58) | Live, untreated rooms | Presence peak 4kHz | 35 dB | Recording detail sources in treated rooms |
| Condenser (U87 Ai) | Studio, treated rooms | Neutral, switchable | 7 dB | Need flexibility, multiple polar patterns |
| Budget Condenser | Learning, treated rooms | Presence peak | 40 dB | Mixing professionally, need flat response |
Upgrading Studio Gear: Workflow Integration and Hybrid Setups
Most professionals upgrade incrementally, often keeping older equipment for specific purposes. The SM58 might be retired from lead vocal duty but becomes the perfect kick drum microphone.
When Incremental Upgrades Beat Full Replacements
Upgrading one component at a time reveals which bottlenecks actually limit your recordings. Replacing everything simultaneously masks which upgrades mattered.
Start by upgrading the component that most limits your current workflow. If your recordings have high noise floor, upgrade the preamp or microphone. If you can't hear low-end detail in your mixes, upgrade your monitoring headphones. If latency makes overdubbing difficult, upgrade to a lower-latency interface.
At Perfect Take Gear, we recommend this upgrade sequence for most home studios: (1) acoustic treatment, (2) microphone, (3) audio interface, (4) monitoring headphones, (5) additional microphones for drums or ensemble recording. Acoustic treatment produces the biggest quality improvement per dollar spent. Adding bass traps, absorption panels, and diffusers costs $300-$800 and improves every recording you make.
Mixing Beginner and Professional Equipment
A hybrid setup combines beginner and professional components strategically. You might use a budget USB interface for tracking but monitor through professional studio monitors. You might record vocals on a professional condenser but use a dynamic microphone for drums.
The key is understanding where each component's limitations matter. A budget audio interface has adequate conversion quality for most applications but may introduce subtle artifacts in the 10-15 kHz range. In a mix with dense synths and cymbals, those artifacts become audible. In a mix with vocals and acoustic guitar, they're inaudible.
Professional Audio Equipment Brands and Investment Strategy
Professional audio brands like Neumann, Shure, Sennheiser, and RME have earned their reputation through decades of consistent performance. Their gear holds resale value, receives long-term support, and works reliably in professional environments.
Neumann microphones are the standard in professional recording studios worldwide. The U87 Ai appears on more professional recordings than any other condenser microphone because it delivers consistent results across different sources and rooms.
Shure microphones dominate live sound and home recording because they're durable, affordable, and sound good in imperfect conditions. The SM58 is the best-selling microphone of all time because it works reliably in every environment.
What Separates Pro-Grade Gear from Budget Options
Pro-grade gear offers build durability, long-term support, modular design, and professional features like word clock sync and ADAT optical connections. Professional microphones' capsules remain stable across temperature and humidity changes. Budget microphones' capsules can shift over time, changing frequency response.
Long-term support means manufacturers provide replacement parts, firmware updates, and technical support for decades. Shure still manufactures replacement parts for the SM58, which debuted in 1966.
Modular design allows professional gear to integrate with other professional equipment. A professional audio interface accepts balanced XLR inputs and outputs, word clock sync, ADAT optical connections, and S/PDIF digital audio. A budget interface offers USB only, limiting future expansion.
Future-Proofing Your Setup Without Overspending
Future-proofing means buying gear that remains useful as your skills and needs evolve. A $200 USB microphone becomes obsolete when you want to record drums with multiple microphones. A $500 XLR microphone remains useful because it integrates with any professional setup.
Buy professional-grade components at beginner price points. The Shure SM58 at $109 is professional-grade, used on professional recordings worldwide. You're not paying a premium for features you don't need yet; you're paying for durability and sound quality that scales with your skills.
Avoid buying cheap versions of professional equipment. A budget condenser microphone might cost $80 but won't sound as good as the SM58 at $109. It won't last as long. It won't integrate as seamlessly with professional gear.
Budgeting for Home Studios: Beginner vs Professional Investment
A functional home studio for beginners requires $500-$1,000 total investment. A professional home studio requires $3,000-$8,000. A broadcast-quality studio requires $15,000+.
The beginner budget ($500-$1,000) includes: a USB audio interface ($150-$300), a dynamic microphone ($100-$200), monitoring headphones ($100-$200), XLR cables ($50), and acoustic treatment ($200-$300). This setup produces recordings suitable for podcasts, voice-overs, and bedroom music projects.
The professional budget ($3,000-$8,000) includes: a dedicated audio interface ($800-$1,500), a quality condenser microphone ($800-$2,000), professional studio monitors ($1,500-$3,000), acoustic treatment ($1,000-$2,000), and a microphone preamp ($500-$1,000). This setup produces recordings suitable for commercial music, film scoring, and broadcast applications.
Acoustic Treatment, Cables, and Hidden Costs
Acoustic treatment is the hidden cost beginners underestimate. A small bedroom needs $200-$500 in bass traps, absorption panels, and diffusers. This investment produces more audible improvement than upgrading from a $300 microphone to a $2,000 microphone.
Professional XLR cables cost $15-$30 each. A typical setup needs 3-5 cables. Budget cables introduce noise and signal degradation. Professional cables maintain signal integrity over long runs and survive years of use.
Microphone stands, pop filters, and shock mounts add up. A quality boom arm costs $50-$100. A pop filter costs $20-$50. A shock mount costs $30-$80. These accessories improve recording quality and protect expensive microphones from damage.
Maintenance and Longevity: Protecting Your Investment
Professional gear lasts 10+ years with proper maintenance. Budget gear often fails within 3-5 years. The cost difference between replacing budget gear every 3 years and buying professional gear once becomes economical quickly.
Maintenance includes: storing microphones in protective cases, keeping XLR connectors clean and dry, replacing worn cables before they fail, and protecting gear from temperature and humidity extremes.
Resale value matters for expensive gear. A Neumann U87 Ai purchased five years ago resells for 60-70% of its original price. A budget condenser microphone has minimal resale value. If you eventually upgrade, professional gear recovers some of your investment.
Professional manufacturers offer 2-5 year warranties and long-term technical support. Budget manufacturers offer 1-year warranties and minimal support. If gear fails after warranty, professional manufacturers often repair it affordably.
Comparison Table: Beginner vs Professional Gear at a Glance
| Component | Beginner Option | Professional Option | Upgrade When |
|---|---|---|---|
| Microphone | Shure SM58 ($109) | Neumann U87 Ai ($3,750) | Recording detail sources in treated rooms |
| Audio Interface | Focusrite Scarlett ($150) | RME Fireface UFX ($2,000) | Need multiple I/O, low latency, professional features |
| Headphones | Audio-Technica M20x ($59) | Sennheiser HD 600 ($500) | Mixing professionally, need reference accuracy |
| Studio Monitors | None (use headphones) | Neumann KH120A ($1,800/pair) | Mixing for broadcast, checking translation |
| DAW | GarageBand or Reaper ($0-$60) | Pro Tools or Logic Pro ($300-$700/year) | Recording professionally, need advanced features |
| Acoustic Treatment | DIY foam panels ($200-$300) | Professional panels ($1,000-$2,000) | Treating larger rooms, need precision |
Common Mistakes Beginners Make When Buying Studio Gear
The biggest mistake is buying professional gear before mastering beginner fundamentals. A $4,000 microphone in an untreated room sounds worse than a $400 microphone in a treated room. Learn mic placement, room acoustics, and mixing technique first. Upgrade gear after you've exhausted what your current equipment can do.
The second mistake is upgrading the wrong component. If your recordings have high noise floor, upgrading your monitor headphones won't help. If you can't hear low-end detail, upgrading your microphone won't fix it. Diagnose the actual bottleneck before upgrading.
The third mistake is buying gear-specific accessories instead of universal ones. A $100 microphone stand designed for one specific microphone becomes useless if you upgrade. A $50 universal boom arm works with any microphone.
The fourth mistake is ignoring cables and connectivity. A $3,000 microphone through a cheap, noisy XLR cable sounds worse than through a professional cable. Professional cables maintain signal integrity. Budget cables introduce noise and signal loss.
The fifth mistake is underestimating acoustic treatment. A bedroom with hard walls reflects sound, creating phase cancellation and comb filtering that no microphone can overcome. Acoustic treatment addresses this. Gear upgrades don't.
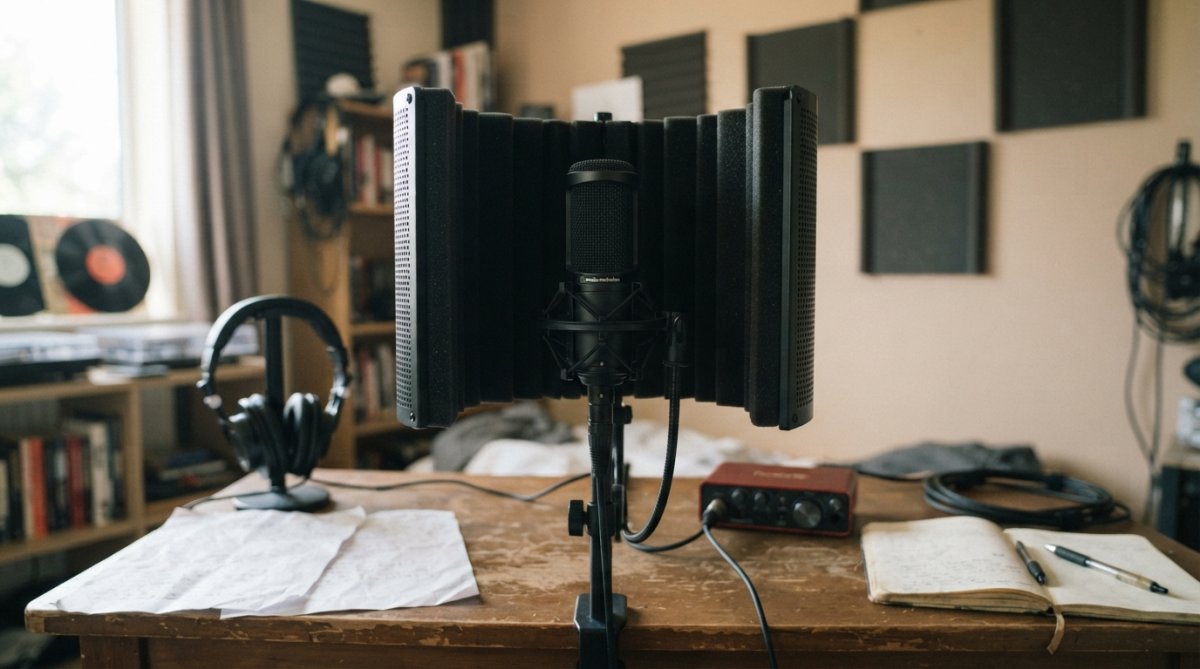
The decision between beginner and professional studio gear comes down to one question: Does your current equipment prevent you from achieving your specific goals? If the answer is no, your current gear is sufficient. If the answer is yes, identify which component is the bottleneck and upgrade that component first.
Most home studios thrive with a hybrid approach: professional-grade microphone and cables, budget audio interface, acoustic treatment, and learning-focused DAW. This combination costs $1,000-$1,500 and produces professional-quality recordings. Perfect Take Gear specializes in curated starter kits that combine proven beginner components with upgrade paths as your skills develop, eliminating the guesswork of building a studio from scratch and letting you focus on recording rather than equipment research.
Frequently Asked Questions
What's the main difference between beginner and professional studio gear?
Beginner gear focuses on essential functionality at lower cost, while professional audio equipment brands prioritize signal-to-noise ratio, frequency response accuracy, and durability. Professional condenser microphones capture more detail; dynamic microphones suit beginners. Professional audio interfaces offer lower latency and higher bit depth/sample rate. The real difference lies in precision, reliability under heavy use, and the preamp quality that shapes your entire signal chain.
When should I upgrade my home studio equipment for beginners to professional gear?
Upgrade when your current setup limits your workflow or output quality. If you're tracking vocals and a budget condenser microphone captures too much room noise, upgrading makes sense. If your audio interface introduces noticeable latency during MIDI controller use, that's a signal to invest. The diminishing returns threshold typically comes after your first $500-$1,000 investment. Before upgrading, optimize acoustic treatment and XLR cable quality, these often yield bigger improvements than expensive gear alone.
Can I mix beginner and professional studio equipment, or do I need matching brands?
You can absolutely mix brands and levels. A budget Shure SM58 dynamic microphone works fine into a professional audio interface. Hybrid setups are common, many creators use beginner-level studio monitors with professional-grade preamps and phantom power supplies. What matters is signal compatibility: ensure your XLR cables, phantom power, and impedance matching work together. Mixing gear lets you upgrade gradually without replacing everything at once, which is both practical and cost-effective.
What are the hidden costs of upgrading studio gear that beginners overlook?
Beyond the microphone and audio interface, budget for acoustic treatment (bass traps and absorption panels), quality XLR cables, a pop filter, headphone amplifiers if needed, and studio desk space. Maintenance and longevity matter too, professional gear lasts longer but requires proper care. Many beginners also underestimate the cost of a DAW (Digital Audio Workstation), monitoring headphones like the Audio-Technica ATH-M20x, and room treatment. Plan for 20-30% of your gear budget to go toward these supporting elements.
Is expensive professional studio gear worth it if I'm just starting out?
Not immediately. Start with home studio equipment for beginners, a USB interface, a budget dynamic microphone, and closed-back headphones. This teaches you workflow and reveals what you actually need. The Neumann U87 Ai ($3,750) is legendary but unnecessary until you've mastered recording fundamentals. Most professionals recommend investing in acoustic treatment and learning your DAW before buying high-end microphones. Best budget studio microphones like the Shure SM58 ($109) deliver professional results when used correctly, proving that expensive gear isn't always the limiting factor.
This article was written using GrandRanker