

Beginner Studio Setup on Budget: Essential Gear Guide
Table of Contents
- Essential Gear List for a Beginner Studio Setup on Budget
- Budget Audio Interface Selection: Your Signal Chain Foundation
- Microphone Types: Condenser vs. Dynamic for Home Recording
- DIY Acoustic Treatment for Home Studio Without Breaking the Bank
- Home Recording Studio Essentials: Headphones, Monitors & More
- DAW & Software: Free and Affordable Options for Beginners
- Home Studio Setup Under $500: Budget Allocation Strategy
- Workflow Optimization for Beginner Recording Setup
Beginner Studio Setup on Budget: Essential Gear Guide
Last Updated: July 24, 2026
Building a beginner studio setup on budget doesn't mean sacrificing sound quality or professional results. Whether you're starting a podcast, recording music, or creating content, the right equipment choices matter far more than spending the most money. At Perfect Take Gear, we understand that creators need reliable, affordable tools to launch their work without financial strain. Below, we'll show you exactly how to assemble a functional home recording studio for under $500, with gear that scales as your needs grow.
Essential Gear List for a Beginner Studio Setup on Budget
Core Equipment Breakdown
A beginner studio setup requires five core components: a microphone, an audio interface, headphones or monitors, cables, and a digital audio workstation (DAW).
The Audio-Technica AT2020 delivers clear vocal capture at an entry-level price point. For a more affordable option, the Behringer C-1 offers solid performance for half the cost. Dynamic microphones excel at reducing room noise in untreated spaces.
Your audio interface converts analog sound into digital data your computer understands. The Focusrite Scarlett 2i2 (3rd Gen) has become the industry standard for beginners because it handles microphone preamps, phantom power delivery, and USB connectivity in one compact unit. It includes software bundles with DAWs and plugins, effectively extending its value beyond the hardware itself.
Closed-back headphones like the AKG K240 Studio work for monitoring during recording without feeding sound back into your microphone. The Mackie CR3-X Creative Reference Multimedia Monitors provide affordable speakers for mixing and playback.
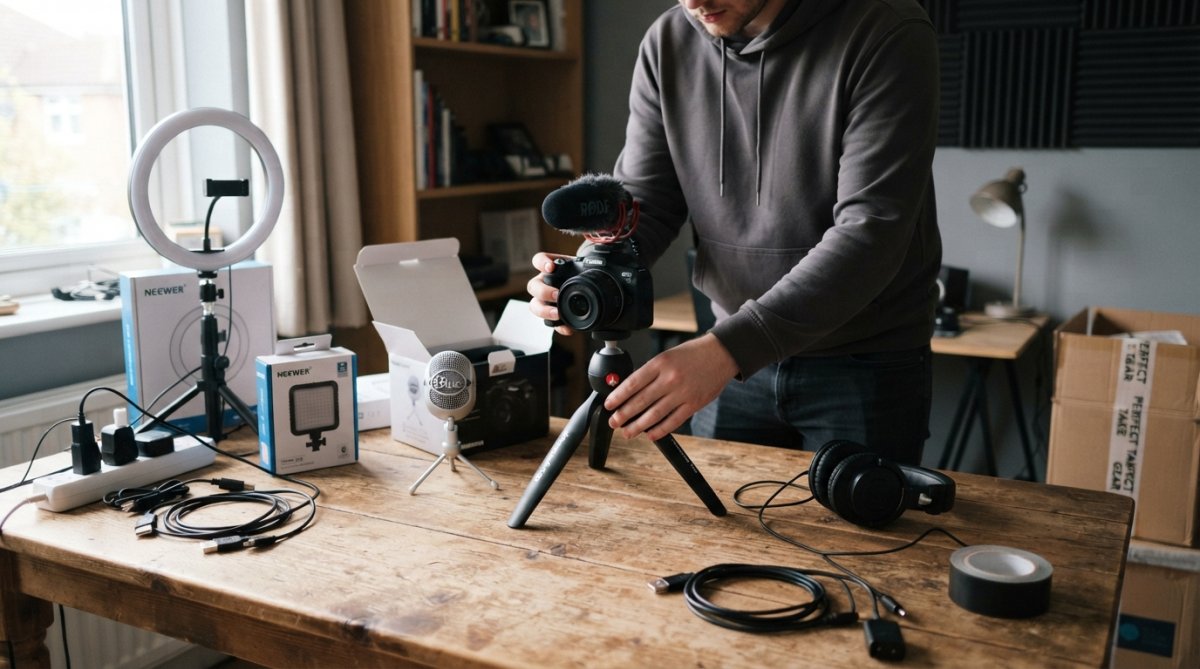
XLR cables carry balanced audio from your microphone to the interface with minimal noise. A pop filter reduces plosive sounds during vocal recording, a $30 addition that prevents expensive re-recording sessions later.
Budget Audio Interface Selection: Your Signal Chain Foundation
Why an Audio Interface Matters for Beginners
An audio interface sits at the center of your home recording setup. Your microphone plugs into it, your headphones connect to it, and your computer communicates through it. Without a quality interface, even expensive microphones sound weak because your computer's built-in audio inputs lack proper preamps and impedance matching.
The preamp inside an audio interface amplifies your microphone's weak signal to usable levels. A good budget preamp delivers clean amplification with minimal noise floor, keeping your recordings clear even when you need to turn up the gain.
Latency is the delay between when you speak into the microphone and when you hear yourself in your headphones. High latency (over 10ms) breaks your concentration and makes timing impossible. The Scarlett 2i2 maintains latency under 5ms on most computers, making it suitable for real-time recording.
Watch Out
Microphone Types: Condenser vs. Dynamic for Home Recording
Condenser Microphones for Clarity
Condenser microphones use a thin diaphragm that vibrates in response to sound waves, capturing high-frequency detail with exceptional clarity. They excel at vocal recording, acoustic instruments, and podcast dialogue because they reproduce the nuances of human speech.
The trade-off: condenser microphones require phantom power and pick up more ambient noise because of their sensitivity. In an untreated room with traffic outside or HVAC systems running, a condenser microphone captures everything.
The Audio-Technica AT2020 delivers professional-grade clarity at a beginner price. Its cardioid pattern focuses on sound directly in front while rejecting sound from the sides and rear, minimizing room noise.
Dynamic Microphones for Control
Dynamic microphones use a moving coil inside a magnetic field, making them less sensitive than condensers. This reduced sensitivity becomes an advantage in untreated rooms because they ignore ambient noise while capturing the sound source directly in front.
Dynamic microphones don't require phantom power, simplifying your setup. They handle high sound pressure levels without distortion, making them ideal for loud instruments or spoken word in noisy environments.
| Microphone Type | Best For | Requires Phantom Power | Picks Up Room Noise | Price Range |
|---|---|---|---|---|
| Condenser (AT2020) | Vocals, acoustic instruments, podcasts | Yes | More sensitive | $99-$150 |
| Condenser (Behringer C-1) | Budget-conscious beginners | Yes | More sensitive | $50-$75 |
| Dynamic (Budget options) | Noisy rooms, loud instruments | No | Less sensitive | $50-$200 |
DIY Acoustic Treatment for Home Studio Without Breaking the Bank
Room Acoustics on a $0 Budget
Before spending money on acoustic panels, use what you already have. Soft materials absorb sound reflections: blankets, curtains, foam mattress toppers, and bookshelves filled with books all reduce echo and reverb in a room.
Position your recording area in a corner with curtains on one wall and a bookshelf on another. This breaks up parallel surfaces that create standing waves and flutter echo. Hang a blanket behind your microphone to absorb reflections from the wall directly behind you.
The Aokeo Professional Studio Recording Microphone Isolation Shield costs under $30 and provides targeted acoustic treatment for your microphone. It's a four-panel barrier that mounts to your microphone stand, absorbing sound reflections from the wall behind and above your microphone.
Low-Cost Acoustic Solutions
DIY acoustic panels using Rockwool or Owens Corning 703 fiberglass provide effective sound absorption at a fraction of commercial panel costs. A typical DIY panel measures 2 feet by 4 feet and uses 4 inches of rigid fiberglass wrapped in acoustically transparent fabric. The material cost runs $50-$100 per panel.
Building 4-6 panels positioned on the walls surrounding your recording area creates noticeable improvement. Position them on the first reflection points, the walls and ceiling areas where sound bounces before reaching your microphone.
Home Recording Studio Essentials: Headphones, Monitors & More
Studio Headphones vs. Monitors: What You Need
Studio headphones let you monitor your recording in real-time without feeding sound back into your microphone. Closed-back headphones like the AKG K240 Studio prevent sound leakage that would contaminate your recording. The AKG K240's semi-open design provides a wide soundstage, making them suitable for monitoring and mixing.
Studio monitors are speakers designed for accurate sound reproduction. Unlike consumer speakers that boost bass and treble for entertainment, monitors aim for flat frequency response. The Mackie CR3-X offers affordable monitoring with compact dimensions suitable for small desks.
Most beginners should start with headphones because they're cheaper, require less room treatment, and work in any environment. Monitors demand acoustic treatment to sound accurate.
Cables, Pop Filters & Accessories
Quality XLR cables make a difference. Cheap cables pick up electromagnetic interference, introducing buzz and hum into your recordings. Monoprice or Mogami cables cost $10-$15 per cable and provide reliable shielding without premium pricing.
A pop filter reduces plosive sounds, the "p" and "b" sounds that cause microphone distortion. The Aokeo isolation shield serves double duty, providing both acoustic treatment and pop filtering. Alternatively, a simple foam windscreen ($10-$15) covers your microphone and reduces plosives significantly.
Cable management matters more than aesthetics. Coiling cables neatly prevents them from rolling across your desk and creating noise during recording. Velcro cable ties ($5-$10) keep your setup organized.
DAW & Software: Free and Affordable Options for Beginners
Entry-Level DAW Recommendations
A digital audio workstation (DAW) is the software where you record, edit, and mix your audio. Professional options like Pro Tools or Logic Pro cost $200-$300, but excellent free and affordable alternatives exist.
Reaper costs $60 for a discounted perpetual license and runs efficiently on older computers. It includes a comprehensive suite of recording, editing, and mixing tools. The learning curve is steeper than some alternatives because Reaper prioritizes flexibility over simplicity, but the software grows with your skills.
GarageBand comes free with Mac computers and provides a capable recording environment for beginners. It includes software instruments, loops, and effects. For simple podcasts or acoustic recordings, GarageBand suffices.
Audacity is free, open-source software that handles basic recording and editing. It lacks virtual instruments and advanced mixing features, but for podcast editing or simple audio cleanup, Audacity works well.
According to Reaper's official documentation, the software includes unlimited tracks, comprehensive MIDI support, and a fully-featured mixing console, capabilities reserved for expensive professional DAWs in competing software.
Home Studio Setup Under $500: Budget Allocation Strategy
How to Prioritize Your Spending
A beginner studio setup on budget requires strategic allocation. Here's a realistic breakdown for a $500 total investment:
- Audio Interface: $180
- Microphone: $100
- Headphones: $75
- Cables & Accessories: $45 (XLR cables, USB cable, pop filter)
- Acoustic Treatment: $50-$100 (DIY panels or isolation shield)
- DAW: $0-$60 (free options or Reaper license)
This allocation prioritizes the signal chain, microphone and interface, because these components directly affect recording quality. Acoustic treatment comes last because free alternatives (blankets, curtains) provide meaningful improvement without spending.
If your budget is tighter, cut acoustic treatment initially and add it later. If your budget is higher, upgrade the microphone or add studio monitors once you've treated your room.
Used Gear Market Strategy for Maximum Value
The used gear market offers 30-50% savings on professional equipment. Facebook Marketplace, eBay, and Reverb.com list used audio gear constantly. Audio interfaces and microphones hold their value well because they're durable; a used Scarlett 2i2 from 2020 performs identically to a new one.
When buying used, prioritize items that don't degrade: audio interfaces, microphones, and cables. Ask sellers for photos of the item powered on and connected, confirming it works before committing.
Workflow Optimization for Beginner Recording Setup
Getting Started: Step-by-Step Setup Guide
Setting up your beginner studio takes roughly 30 minutes if you follow this sequence:
-
Install the audio interface driver from the manufacturer's website (10 minutes). Restart your computer after installation.
-
Connect your microphone to the audio interface using an XLR cable. Plug your headphones into the interface's headphone output jack.
-
Connect the audio interface to your computer using a USB cable. In your computer's audio settings, select the Scarlett as your input and output device.
-
Enable phantom power on the audio interface if using a condenser microphone. You'll see an LED indicator confirming it's on.
-
Install your DAW software (GarageBand, Audacity, or Reaper). Select your audio interface as the input device in the DAW's settings.
-
Create a test recording by speaking into the microphone at a normal volume. Adjust the gain knob on your audio interface until the level meter shows -12dB to -6dB during speech. This prevents clipping (distortion from too-loud input).
-
Monitor your recording in real-time by enabling input monitoring in your DAW. You should hear yourself in your headphones with minimal delay.
Common Beginner Mistakes to Avoid
Mistake 1: Cranking the gain too high. Beginners often maximize the audio interface's gain knob, thinking louder input means better recording. Proper gain staging means setting the level so peaks reach -6dB to -3dB during normal speaking or playing.
Mistake 2: Recording in untreated rooms without adjusting microphone placement. Moving your microphone to the center of the room away from walls reduces reflections more effectively than expensive acoustic panels.
Mistake 3: Skipping the pop filter. Plosive sounds cause microphone distortion and require re-recording. A $20 pop filter eliminates this problem entirely.
Mistake 4: Using the wrong cable types. USB cables carry digital data and come in different speeds. Audio XLR cables carry analog signals. Label your cables clearly.
Mistake 5: Neglecting headphone monitoring during recording. Enable input monitoring in your DAW immediately after setup so you can catch problems in real-time.
Perfect Take Gear curates equipment specifically designed for creators launching their first studios. Our selection focuses on tools that deliver professional results without overwhelming beginners with unnecessary complexity. Whether you're building your beginner studio setup on budget or upgrading from basic equipment, we've tested each recommendation to ensure it performs as promised. Start with the core setup outlined above, and expand as your projects demand more capabilities.
Building a professional-quality home studio doesn't require thousands of dollars or years of technical knowledge. The equipment outlined here, a quality microphone, solid audio interface, and proper monitoring, creates a foundation that supports everything from podcasting to music production. Perfect Take Gear helps creators select gear that grows with their ambitions, ensuring your initial investment remains valuable as your skills advance. Explore our curated beginner bundles and discover how affordable professional recording can be.
Frequently Asked Questions
What's the minimum equipment needed for a beginner studio setup on budget?
A basic beginner studio setup on budget requires four essentials: a microphone (condenser or dynamic), an audio interface for signal conversion, studio headphones or monitors for monitoring, and a DAW (Digital Audio Workstation) for recording. You'll also need XLR cables, a pop filter, and basic acoustic treatment. Many entry-level options exist under $500 total, making professional-quality home recording accessible to beginners without major investment.
Can I use a budget audio interface without sacrificing quality?
Yes. Budget audio interfaces deliver professional-quality audio conversion at entry-level prices. The key is choosing an interface with low latency, decent preamps, and reliable drivers. For home recording studio essentials, a budget audio interface handles vocals, instruments, and podcasts excellently. Look for 24-bit/192kHz conversion and USB-C connectivity to ensure your recordings sound polished without premium pricing.
What's the best way to improve acoustics in my home studio on a budget?
Start with free methods: rearrange furniture, add soft furnishings like curtains and blankets, and position your microphone away from hard reflective surfaces. For low-cost acoustic treatment, build DIY acoustic panels using Rockwool or Owens Corning 703 fiberglass, materials cost $50-$250 depending on size. A microphone isolation shield ($28-$40) reduces room reflections effectively. These solutions address the biggest acoustic issues without expensive pre-made panels.
Should I buy new or used gear when setting up on a budget?
The used gear market offers significant savings for budget-conscious beginners. Audio interfaces, microphones, and monitors hold value well and rarely fail. Buy used from reputable sellers with return policies. Pair used hardware with new cables and accessories for reliability. This strategy lets you allocate more budget to critical items like your microphone and audio interface while staying within a home studio setup under $500 total investment.
Do I need both studio headphones and monitors for a beginner setup?
Not initially. Start with either closed-back studio headphones or compact monitors, not both. Headphones are portable and don't require room treatment; monitors provide a more natural mix reference. For a beginner studio setup on budget, quality headphones like the AKG K240 offer better value. As you grow, add monitors later. Many successful home recordings use headphones exclusively, so choose based on your space and workflow.
This article was written using GrandRanker