

Future-Proofing Your Home Recording Studio: A Practical Guide
Last Updated: October 27, 2026
Quick Summary
Future-proofing your home recording studio means building the room and infrastructure first, then letting the gear follow. Prioritize acoustic treatment, standard connectors like XLR and class-compliant USB, spare inputs and ports, and open file formats so upgrades become swaps rather than rebuilds.
- Set your listening position roughly a third of the way into the room from the front wall, centered between the side walls.
- Soundproofing stops sound entering or leaving the room, while acoustic treatment controls how sound behaves inside it.
- Buy an audio interface with at least two more inputs than you currently use, favoring ADAT or S/PDIF expansion.
- Record and archive in open formats like WAV, and bounce critical tracks to stems before archiving.
- Once a year, restore a session from backup onto a clean machine to confirm it opens, plays, and renders.
Table of Contents
- Why Future-Proofing a Home Recording Studio Starts With the Room
- Home Studio Acoustic Treatment That Scales With Your Gear
- Choosing Home Studio Equipment You Won't Outgrow
- Home Studio Cable Management and Infrastructure for Easy Upgrades
- The Home Studio Upgrade Checklist for Phased Budgeting
- Modular, Repairable Gear and Software Longevity
- Plan Your Next Studio Upgrade With Perfect Take Gear
- Frequently Asked Questions
Why Future-Proofing a Home Recording Studio Starts With the Room
Future-proofing your home recording studio begins long before you buy a single microphone. It starts with the room itself, because the room is the one piece of gear you can't swap out when your needs change.
Room acoustics is the study of how sound behaves inside a physical space, including how it reflects, absorbs, and builds up at certain frequencies.
Room Dimensions, Layout, and Listening Position
Room dimensions shape which frequencies pile up and where. A rectangular room with parallel walls creates predictable resonance, and symmetry helps your monitoring stay honest.
Small-space setups need compromise, but the principle holds: avoid mixing in a corner, keep speakers off the desk surface, and face the short wall so sound reflection arrives from behind you rather than across your monitoring path.
Soundproofing vs. Acoustic Treatment: Know the Difference
Soundproofing stops sound from entering or leaving the room. Acoustic treatment controls how sound behaves inside it. These are different problems with different fixes, and confusing them wastes money.
- Soundproofing addresses noise leakage and external noise: sealed studio doors, caulked studio windows, and mass in the walls.
- Acoustic treatment addresses room acoustics inside the space: acoustic panels, bass traps, and strategic sound absorption.
If your goal is a quiet recording room, start with sealing gaps. For a deeper walkthrough of treating an untreated space, see this guide to home studio acoustics for untreated rooms.
Home Studio Acoustic Treatment That Scales With Your Gear
Here's the good news: home studio acoustic treatment is the most upgrade-friendly part of any studio setup. Panels and traps don't become obsolete when you change microphones or interfaces. They keep working.
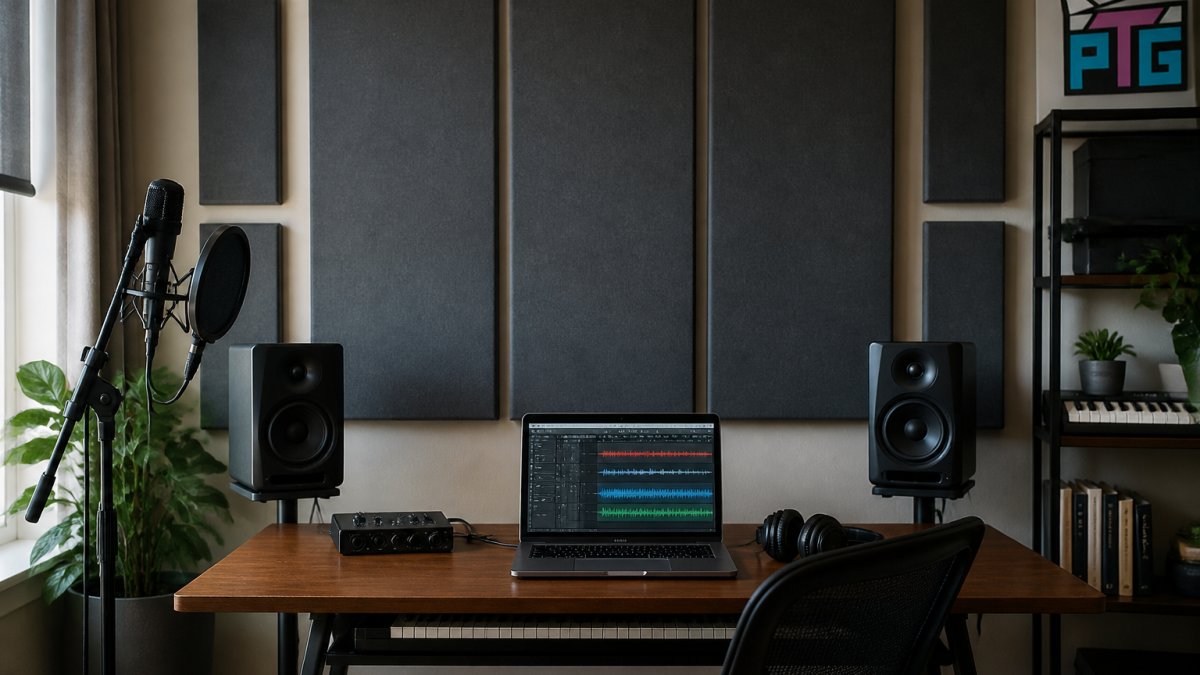
Start with first-reflection points: the side walls beside your listening position, the ceiling above it, and the wall behind your monitors.
DIY Panels, Bass Traps, and Budget Moves
A budget setup can go a long way. Common budget moves include:
- Thick moving blankets hung with an air gap behind them
- Bookshelves packed with books and soft items to break up reflections
- Rugs and soft furnishings to tame a hard floor
DIY builds work, but they take time and trial. For a faster route, self-adhesive fiberglass panels install without drilling and deliver consistent absorption. The VEVOR fiberglass acoustic panels 4-pack uses a fiberglass core with an NRC rating of 0.95, which is a strong absorption figure for mid-to-high frequencies, and the 3M adhesive backing means no tools.

Choosing Home Studio Equipment You Won't Outgrow
The home studio equipment you buy today should still earn its place in three years. That means prioritizing gear selection around open standards and physical compatibility rather than trends, bundles, or the feature list on the box. XLR connections, 48V phantom power, balanced TRS and XLR monitor outputs, and class-compliant USB audio will outlast any single software ecosystem or product line.
Signal chain thinking helps here. Map your chain from source to output, microphone, preamp, interface, monitors, and storage, then buy the strongest link you can afford at each stage instead of replacing everything at once.
Buy for Interoperability, Not Bundles
Interoperability is the test: if a new piece of gear can't connect to what you already own using a standard cable or protocol, it isn't an upgrade, it's a new island. Before you buy, ask three questions:
- Does it use a standard connector (XLR, TRS, USB-C, Thunderbolt) that your existing interface or computer already accepts?
- Does it run without proprietary drivers, or does it at least offer a class-compliant mode?
- Can it be replaced individually if one part fails, or is it a sealed unit that takes the whole chain down?
A microphone on a standard stand mount, an interface with standard connectors, and a monitor with common inputs can each be swapped individually. That is what turns equipment upgrades into swaps rather than rebuilds.
Microphones, Monitors, and the Signal Chain
For microphone choice, match the mic to the job and to the room you actually have. The Tenlamp PKPRO large-diaphragm condenser microphone runs on 48V phantom power over XLR, and the Maono PD200X dynamic microphone offers USB-C and XLR in one body.
For studio monitors, placement matters more than price, and connectivity matters more than both. Before investing, understand the difference between studio monitors and gaming monitors for producers so you don't buy the wrong tool for critical listening.
Leave Headroom in Every Connection
Future-proof gear selection is as much about capacity as capability. Buy an audio interface with at least two more inputs than you currently use, and favor units with ADAT or S/PDIF expansion so you can add preamps later without replacing the interface. Choose a computer or dock with spare USB and Thunderbolt ports rather than a sealed all-in-one that forces a full replacement when one port dies.
Home Studio Cable Management and Infrastructure for Easy Upgrades
Home studio cable management is the least glamorous upgrade and the one that pays off most.
VEVOR Fiberglass Acoustic Panels - 4-Pack →
Power supply deserves the same planning. Keep audio gear on a separate circuit from noisy appliances where possible, and leave spare outlets at your desk.
For a step-by-step method, this guide to organizing cables in a home studio covers routing, labeling, and upgrade-friendly layouts.
The Home Studio Upgrade Checklist for Phased Budgeting
A home studio upgrade checklist keeps spending sane. Phase your build so each stage delivers usable results before you commit to the next.
| Phase | Focus | Typical Gear | What It Unlocks |
|---|---|---|---|
| 1 | Room and basics | Acoustic panels, starter mic kit | Cleaner recordings in any space |
| 2 | Monitoring | Studio monitors, stands, placement | Accurate mixing decisions |
| 3 | Signal chain | Audio interface, quality cabling | Lower noise, more inputs |
| 4 | Expansion | Modular gear, storage, backup | Growth without replacement |
Phase 1 is where most beginners should start.
Watch out: buying all four phases at once usually means paying for capability you won't use for months, and gear that sits idle tends to get replaced before it earns its keep.
Modular, Repairable Gear and Software Longevity
Modular gear wins the long game, but software and data longevity decide whether your sessions survive a decade of operating-system updates, plugin retirements, and license servers going dark. Most home-studio guides stop at "back up your files." The real work is building a migration strategy before you need one.
The Repairability and Modularity Test
Before any purchase, run a simple test:
- Standard mounts and connectors: Can the piece be mounted on a standard stand, rack ear, or VESA pattern, or does it need a proprietary bracket?
- Replaceable parts: Are the cable, pad, capsule, or power supply user-replaceable, or is the unit sealed?
- Service documentation: Does the manufacturer publish a manual, firmware history, and support contact, or does the product page vanish after the model is discontinued?
Gear that passes all four is an investment. Gear that fails two or more is a consumable, price it accordingly and don't build your chain around it.
File Formats, Plugins, and Operating-System Compatibility
Software longevity starts with format choices you make on day one:
- Record and archive in open or widely supported formats. WAV for audio, and for project interchange prefer formats that other DAWs can read rather than a single vendor's proprietary session file.
- Freeze or bounce critical tracks. A rendered WAV stem survives a plugin that no longer loads; a live plugin instance does not.
- Keep a plugin inventory. List every plugin, version, license type, and where the installer lives. When an OS update breaks a plugin, you want to know within minutes which sessions are affected.
Interoperability is the test at every layer: if a new piece of gear or software can't connect to what you already own, or can't export what it creates, it isn't an upgrade.
Backup and Migration Strategy
A backup you have never restored is a hope, not a plan. Use a simple three-tier approach:
- Working drive: fast internal or external NVMe storage for active sessions. The MOVESPEED PCIe 4.0 NVMe SSD gives fast internal storage for large sessions.
- Local backup: a separate external drive that receives a full copy on a schedule. The MOVESPEED GD10 external SSD offers password-protected encryption and on-device controls, which matters if the drive leaves the building.
- Offsite copy: a drive stored elsewhere or a cloud archive for finished projects and stems.
Once a year, restore a session from backup onto a clean machine and confirm it opens, plays, and renders. That annual restore test is the single most reliable future-proofing habit in the studio, it catches dead drives, missing plugins, and broken licenses while you still have time to fix them.
Plan Your Next Studio Upgrade With Perfect Take Gear
Future-proofing your home recording studio comes down to one idea: build the room and the infrastructure first, then let the gear follow. Creators who plan this way replace less and record more.
Perfect Take Gear offers storage for creator setups. Browse content creator gear and equipment to match each phase of your build, and start with the room before you spend on anything else.
Frequently Asked Questions
How do I future-proof a home recording studio on a tight budget?
Start with the room and the infrastructure, not the flashiest gear. Add acoustic panels first, since treatment keeps working no matter what microphone or interface you buy later. Then invest in a solid audio interface with room to add inputs and a computer with storage you can expand. Cables, patch bays, and power should be planned for more gear than you own today. Phased budgeting means each purchase removes a bottleneck instead of being replaced in a year.
What home studio equipment should I buy first?
The Tenlamp PKPRO is a large-diaphragm condenser microphone with XLR connectivity and a 48V phantom-power requirement. The Maono PD200X is a dynamic microphone with USB-C and XLR connectivity. The Tenlamp PKPRO is listed at $62.99, and the Maono PD200X is listed at $125.99.
Is it better to upgrade studio monitors or acoustic treatment first?
The VEVOR fiberglass acoustic panels are listed at $91.99 for a 4-pack. They have an NRC rating of 0.95 and are described as absorbing mid-to-high frequency noise and reducing echo and reverberation.
How can I organize cables and equipment in a home studio?
Plan cable routes before gear arrives. Label both ends of every cable, keep audio and power lines separated to reduce hum, and use velcro ties rather than zip ties so you can re-route later. Leave slack loops at the desk and rack so adding a preamp or interface does not mean re-cabling the room. A patch bay pays off once you pass four or five outboard pieces. Good home studio cable management makes every future upgrade a 10-minute job instead of an afternoon.
What is the difference between soundproofing and acoustic treatment?
The VEVOR 4-pack is described as reducing echo and reverberation for mid-to-high frequency noise.
How do I plan a home studio that can expand over time?
The MOVESPEED PCIe 4.0 M.2 NVMe SSD is listed with capacities of 512GB, 1TB, 2TB, and 4TB. The MOVESPEED GD10 external SSD is listed with 1TB and 2TB capacities.
The hardest part of a studio build isn't choosing gear, it's knowing what to buy first. Perfect Take Gear carries affordable creator equipment, including acoustic panels, condenser and dynamic microphones, and fast storage, all aimed at helping creators build setups that last. Get started with Perfect Take Gear and turn your space into a studio you won't need to rebuild.
