

How to Organize Cables in a Home Studio: 2026 Guide
Table of Contents
- Plan Your Cable Routing Before You Touch a Single Cord
- The Best Cable Management Tools for Studios
- How to Group, Bundle, and Route Cables Along Desks and Walls
- How to Label Studio Cables So You Never Guess Again
- Preventing Signal Interference in Studio Cables
- Cable Maintenance and Longevity: Making Your Setup Last
- Conclusion: A Cleaner Studio Starts With One Cable
- Frequently Asked Questions
Last Updated: September 14, 2026
Plan Your Cable Routing Before You Touch a Single Cord
Learning how to organize cables in a home studio starts long before you pick up a single tie. The most common mistake is diving straight into bundling whatever is already plugged in. That approach locks in bad routes and forces you to redo the work later. This guide from Perfect Take Gear walks through a planning-first method that keeps your audio signal path clean and your workspace functional.
Cable routing is the practice of mapping where each cable runs, where it connects, and how it stays out of the way before any physical work begins. A home studio typically has three cable categories: power, audio, and data. Each one has different rules.
Sketch your studio desk layout on paper first. Mark where your monitors, audio interface, microphone, and computer sit. Then trace a path for each cable type. Keep power lines on one side of the desk and audio lines on the other.
The Best Cable Management Tools for Studios
The best cable management tools for studios fall into three categories: ties, sleeves, and trays. Each solves a different problem, and most setups need all three.
Velcro ties handle temporary bundling and cable coiling. Cable sleeves group multiple runs into one clean line. Cable trays and cable ducting carry runs along walls or under desks where nothing should be visible. Cable clips hold individual runs in place on a desk surface.
A cable management rack or cable box works well for hiding power strips and excess slack. Cable strain relief matters too: any cable bending sharply at a connector will fail faster.
| Tool | Best For | Reusable | Typical Placement |
|---|---|---|---|
| Velcro ties | Bundling, coiling | Yes | Desk edge, cable loom |
| Cable sleeves | Grouping multiple runs | Sometimes | Along walls, desk back |
| Cable trays | Long wall runs | Yes | Under desk, wall-mounted |
| Cable clips | Single cable routing | No | Desk surface, monitor arm |
Ties, Sleeves, and Trays: What Each One Does
Velcro ties win for anything you'll change often. They release without tools and don't crush cable insulation the way zip-style cable ties can.
Cable sleeves and spiral wraps suit runs that stay put. Once bundled, a sleeve turns five cables into one line, which makes cable management along a desk or wall far simpler.
Cable trays and ducting handle the heaviest loads. Power distribution strips, XLR cables, and TRS cables all fit in a properly sized tray. A cable management system built around trays keeps signal cables separated from power by design.
How to Group, Bundle, and Route Cables Along Desks and Walls
Group cables by function before bundling anything. Power cables run together. Audio cables run together. MIDI cables and USB data lines get their own path. This separation is the foundation of preventing signal interference later, and it is also what makes the setup maintainable when you swap a piece of gear six months from now.
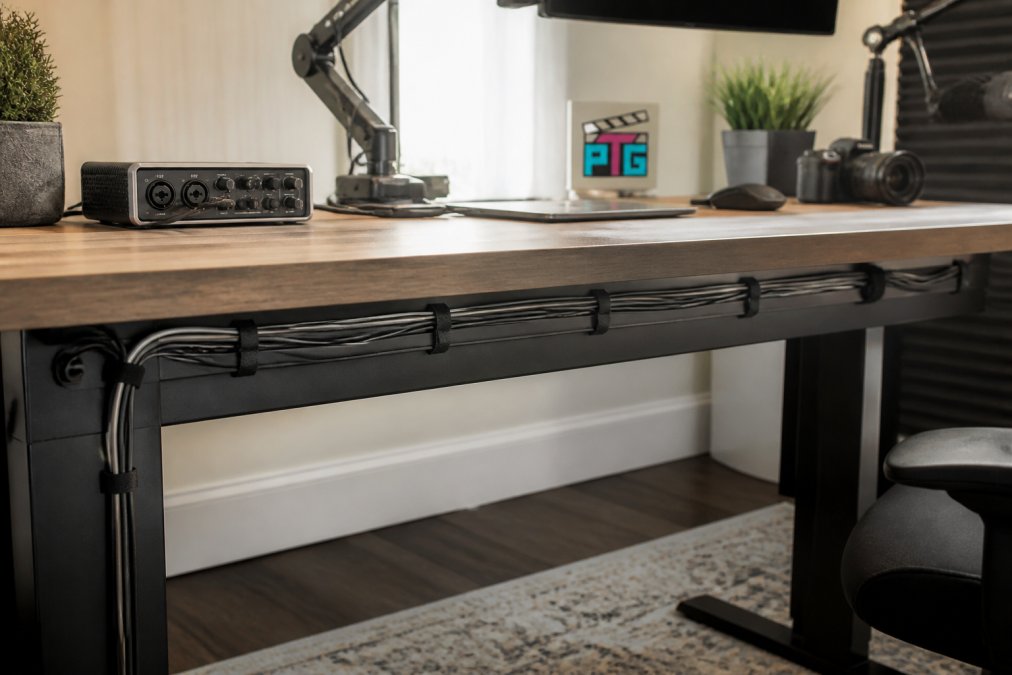
Work in this order:
- Unplug everything and lay cables flat on the floor.
- Group by type: power, audio, data.
- Bundle each group with velcro ties every 6-8 inches.
- Route power along one side of the desk, audio along the other.
- Secure runs with clips or a cable loom.
- Reconnect and test each device.
Leave Slack Where the Gear Moves
Most guides assume your desk is static. It usually isn't. A standing desk, a sliding keyboard tray, a boom arm that swings, or a rack you pull forward to re-patch all change the distance between two fixed points. If you bundle those runs tight, the first time the desk rises you either yank a connector out of an interface or stretch a cable until the shield fatigues.
The fix is a service loop. At every point where a cable crosses a moving joint, leave a loop of slack roughly the size of your open hand, then secure it with a velcro tie so it folds predictably instead of snagging. On a sit-stand desk, run the main bundle down the rear leg and anchor it with an adhesive clip about a third of the way down, so the loop absorbs the travel instead of the connector. The same principle applies to a boom arm: give the microphone cable a loop at the elbow joint, not a straight pull.
Measure Before You Buy
For cable length optimization, measure the actual run along the path the cable will take, not the straight-line distance. Add roughly 10-15 percent for the service loops and any bend radius you need to respect. Extra slack coiled loosely near a connector is fine; tight coils create problems. A gas spring dual monitor desk mount with integrated cable channels, like the one at Perfect Take Gear, removes one common routing headache by hiding display cables inside the arm itself.

Keep Bundles Serviceable
A bundle is only as good as your ability to open it later. Run velcro ties rather than zip ties on anything you might re-patch, and leave a small gap between ties so you can slip a finger under the bundle to lift it off a surface. If a run passes behind a rack or under a desk where you can't reach it, add a pull string when you first install it so a future cable can be fished through without dismantling the whole loom.
How to Label Studio Cables So You Never Guess Again
Learning how to label studio cables takes about ten minutes and saves hours over the life of your setup. Label both ends of every cable with the same identifier.
Use a scheme that tells you three things: what the cable connects, which device it belongs to, and its direction. "MIC-01 to Interface In 1" beats "Mic cable" every time. Cable labels should also note the cable type, since XLR cables and TRS cables look similar in a dark studio.
- Label both ends of every cable
- Match identifiers at source and destination
- Note cable type on the label
- Add a date for cables you replace often
- Keep a written or digital cable map
Preventing Signal Interference in Studio Cables
Preventing signal interference in studio cables comes down to separation, grounding, and cable quality. Electromagnetic interference is the most common culprit in a home studio, and it usually traces back to power cables running parallel to audio lines. The mechanism is straightforward: alternating current in a power cable radiates a magnetic field, and any audio conductor running alongside it picks up a small voltage that shows up as hum or buzz in your monitors.
Separation Rules That Actually Work
Keep power and audio cables at least a few inches apart where they run parallel, and cross them at 90-degree angles when they must intersect (pubmed.ncbi.nlm.nih.gov). A 90-degree crossing minimizes the length of conductor exposed to the field, which is why it is the standard fix in studios and live rigs alike. Where a long parallel run is unavoidable, put distance between the two bundles rather than trying to shield one of them.
Ground Loops and the Hum You Can't Turn Down
A ground loop happens when two pieces of gear connect to ground through more than one path. The resulting voltage difference drives a small current through your audio shield, and you hear it as a low hum that persists regardless of volume. The fix is usually a single, consistent ground path rather than multiple ones: plug everything into one power strip or one circuit where practical, and avoid daisy-chaining gear across outlets on different circuits. If a hum survives that, a ground-loop isolator or a transformer-isolated DI box on the offending line is the next step. Never defeat the ground pin on a power cable to solve a hum; that trades noise for a shock hazard (osha.gov).
Balanced vs. Unbalanced: Know Which You Have
Balanced cables resist interference far better than unbalanced ones over longer runs because the signal travels on two conductors and the receiving end cancels whatever noise both conductors picked up. XLR and TRS are balanced; a typical instrument cable or an RCA cable is unbalanced. If a run exceeds a couple of meters, balanced XLR or TRS cables are worth the cost. For short runs inside a rack, unbalanced is usually fine.
Cable Quality and Shielding
Shielding matters most on low-level signals. A microphone cable carries a tiny voltage, so it is the most vulnerable to interference; a line-level output is far more forgiving. Look for cables with a braided or foil shield and a drain wire that actually terminates at the connector. Signal integrity is a routing problem as much as a cable problem, and a well-routed cheap cable will often beat a poorly routed expensive one.
Cable Maintenance and Longevity: Making Your Setup Last
Cable maintenance is the part almost every guide skips, and it's where setups quietly fail. Cables degrade from heat, sharp bends, and constant flexing at the connector. Strain relief at every connection point is the cheapest insurance available.
Check these every few months:
- Inspect connectors for fraying or discoloration
- Confirm ties haven't crushed insulation
- Verify nothing rests against a heat source
- Re-test each cable's signal where possible
Cable coiling matters for storage too. Over-under coiling, the technique used in broadcast and live sound, prevents the internal twisting that eventually breaks conductors (pubmed.ncbi.nlm.nih.gov). Store spare cables coiled, tied, and labeled.
Conclusion: A Cleaner Studio Starts With One Cable
Organizing a home studio is less about buying the perfect cable management accessories and more about planning routes, separating power from audio, and labeling everything. The tools matter, but the method matters more.
Perfect Take Gear carries the studio essentials that make this work easier, from monitor mounts with built-in cable channels to desk organizers that keep peripherals off your work surface. Browse the creator gear and studio equipment range at Perfect Take Gear and build a setup that stays clean, quiet, and ready for the next take.

Frequently Asked Questions
What is the best way to organize cables in a home studio?
Start by planning your cable routing before plugging anything in. Group cables by function, keep power and audio lines separated, and use velcro ties instead of zip ties so you can adjust later. Label both ends of every cable, then route them along desk edges or walls with clips or trays. This approach keeps your studio tidy and makes troubleshooting faster when you add new gear.
Should I use zip ties or velcro for studio cables?
Velcro ties are the better choice for studio cables. They are reusable, do not crush cable shielding, and let you add or remove a cable without cutting anything. Zip ties are fine for permanent runs you will never touch, but they can pinch audio cables and cause strain over time. For anything you might move, velcro wins.
How do I keep studio cables from tangling?
Coil each cable using the over-under method, which alternates the direction of each loop so the cable stays straight and untwisted. Store spare cables in labeled bags or on a cable rack. When routing, leave a small service loop at each connection point so the cable has slack without drooping. This prevents tangles and protects the cable's internal conductors.
What causes signal interference in studio cables?
Signal interference usually comes from power cables running parallel to audio cables, which creates electromagnetic interference and can introduce hum or ground loops. Keep power and audio lines at least a few inches apart, and cross them at 90-degree angles when they must intersect. Balanced cables like XLR and TRS also reject interference better than unbalanced ones, so use them for longer runs.
A messy studio costs you time on every session, whether it's a hum you can't locate or a cable you can't identify. Perfect Take Gear stocks the practical gear that makes cable management straightforward: monitor arms with integrated cable routing, desk shelves that free up surface space, and studio essentials built for creators at every level. Get started with Perfect Take Gear and turn your workspace into a setup that works as hard as you do.