

How to Set Up a Professional Studio Mixer for Beginners
Last Updated: October 30, 2026
Quick Summary
To set up a studio mixer for beginners, place the unit, connect power, plug in your sources, set gain so meters peak around -12 to -6 dB, then route outputs to monitors, headphones, and your computer. The whole setup takes about 30 minutes if you work in that order.
- Keep the mixer away from power bricks, routers, and phone chargers to avoid noise.
- Set gain first, then use the fader for balance, never the reverse.
- Choose analog for simple hands-on work, digital for recall and saved presets.
- A stereo-only USB mixer sends just two channels to your DAW, so multitrack specs matter.
- Label every cable and aux send before a session to save tracing time.
Table of Contents
- What a Studio Mixer Does and Why You Need One
- Studio Mixer Setup for Beginners: A Step-by-Step Walkthrough
- Audio Mixer Channels Explained: Inputs, Gain, EQ, and Faders
- Analog vs Digital Mixer: Which Fits Your Studio
- Mixer vs Audio Interface: What Your Recording Chain Actually Needs
- Gain Staging and Signal Flow from Microphone to Recording Software
- Troubleshooting Noise, Clipping, and Silent Channels
- Choosing Your First Studio Mixer Setup at Perfect Take Gear
- Frequently Asked Questions
What a Studio Mixer Does and Why You Need One
Without a mixer, every mic, instrument, and playback source fights for one input. With one, you control each signal separately before it reaches your recorder or computer.
, and the same question comes up: do I actually need one? If you record more than one source at a time, yes.
The core parts you'll touch on any mixer:
- Inputs for microphones and line-level gear
- Gain to set how hard each signal hits the channel
- EQ to shape tone
Get comfortable with those five and the rest of the board stops looking intimidating.
Studio Mixer Setup for Beginners: A Step-by-Step Walkthrough
A studio mixer setup for beginners takes about 30 minutes: place the unit, connect power, plug in sources, set gain, then route outputs.
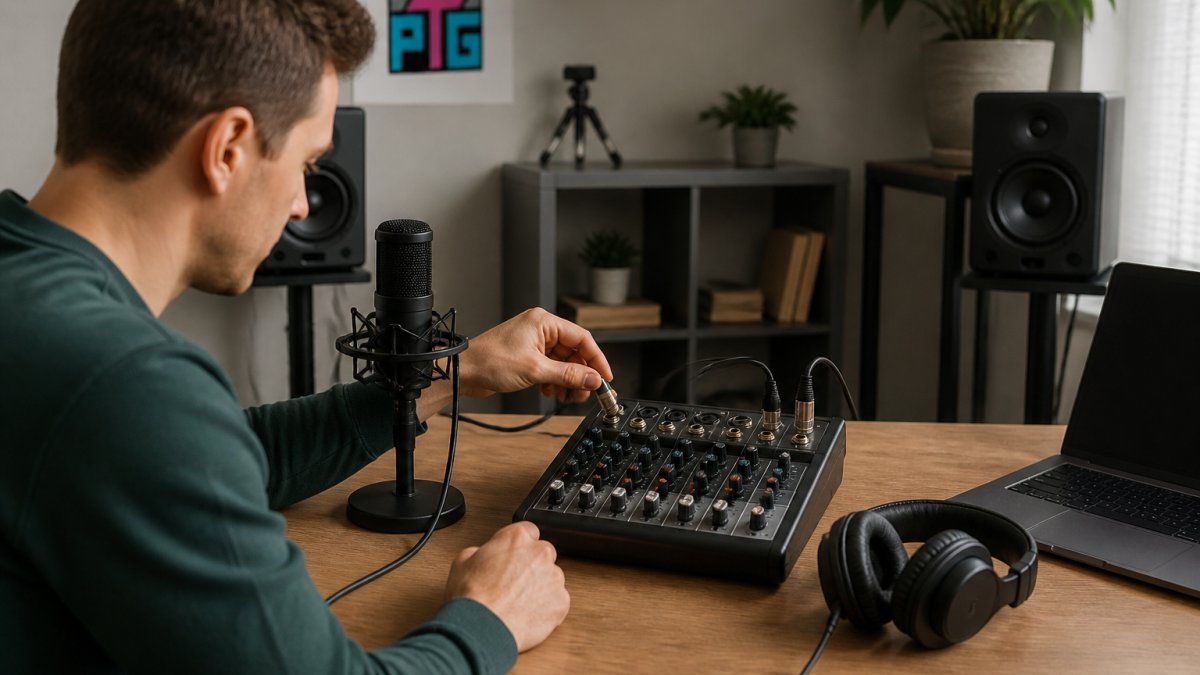
Step 1: Place the Mixer and Connect Power
You'll be adjusting faders constantly, so a unit behind your monitor is useless.
Keep it away from power bricks, routers, and phone chargers, common noise sources. Plug in the supplied adapter, switch on, and confirm the meter lights come alive before connecting anything else.
Step 2: Plug In Microphones and Set Gain
Connect dynamic mics with XLR cables. If you're using a condenser mic, engage phantom power only after the cable is seated. Never plug or unplug a condenser with phantom power live.
Now set gain. Turn the channel fader down, speak at normal volume, and raise gain until the meter peaks around -12 to -6 dB. Louder invites clipping.
If you need two speakers on one setup, a wireless system built for mixer compatibility saves a lot of cable work. The K 6 dual handheld wireless microphone system pairs two handhelds with mixers and PCs.

Step 3: Route Outputs to Monitors, Headphones, and Your Computer
Send your main output to your speakers or interface.
For the computer feed, connect the mixer's USB audio output or run the main out into your interface.
If you're still choosing monitoring gear, this guide to studio monitor headphones for creators covers what actually matters for tracking versus mixing.
Here is the beginner setup sequence at a glance, with the level targets the article recommends.
| Step | What to do | Key detail |
|---|---|---|
| 1 | Place mixer and connect power | Keep away from power bricks, routers, phone chargers |
| 2 | Plug in mics and set gain | Meter peaks around -12 to -6 dB |
| 3 | Route outputs | Main out to speakers, headphone out for monitoring |
| 3 | Computer feed | Use USB audio output or run main out into interface |
| Whole setup | Work in order | Takes about 30 minutes |
Audio Mixer Channels Explained: Inputs, Gain, EQ, and Faders
Every channel strip on an audio mixer follows the same top-to-bottom flow. Signal enters, gets amplified, gets shaped, then gets sent. Learn one strip and you've learned them all.
Here's the order signal travels through a typical channel:
- Input accepts mic or line level
- Mic preamp boosts a weak mic signal
- Gain sets the working level
Two controls confuse beginners most: gain and fader. Gain sets how much signal enters the channel; the fader sets how much leaves it. Set gain first, then use the fader for balance.
Mute and solo buttons sit near the fader. Solo lets you hear one channel alone in your headphones without changing the main output.
Analog vs Digital Mixer: Which Fits Your Studio
The analog vs digital mixer decision comes down to workflow, not sound quality. Modern digital boards sound clean; analog boards are simple to operate.
Analog mixers give you one knob per function. No menus, no layers, no learning curve.
Digital mixers pack EQ, compression, effects, and scene memory into a fraction of the space.
A simple way to choose:
- Recording one or two people at a time? Analog is enough.
- Running a podcast with remote guests and saved presets? Digital saves time.
- Playing live and needing instant recall? Digital wins.
Where analog falls short is recall. If you change settings between sessions, you're resetting by hand.
Mixer vs Audio Interface: What Your Recording Chain Actually Needs
The mixer vs audio interface question trips up nearly every beginner. An audio interface converts analog signal to digital for your computer. A mixer does that plus level control, EQ, and routing for multiple sources at once.
What an audio interface gives you:
- One job done well: clean analog-to-digital conversion
- Low-latency drivers written for recording software
- One or two preamps, usually with combo XLR/TRS jacks
What a mixer adds on top:
- Separate level, EQ, and pan control for every input before conversion
- Aux sends for headphone mixes and outboard effects
- Subgroups and bus routing
The USB mixer question
A USB mixer is not the same as an audio interface with a mixer attached. The difference is how many channels reach your software.
- Stereo USB output (2-in/2-out): The mixer sums everything to a stereo pair and sends that to the computer. You get one stereo track in your DAW. Great for podcasts, livestreams, and quick demos. Bad for mixing later, because you cannot separate the kick from the vocal after the fact.
- Multitrack USB output (often 8, 16, or more channels): Each channel or bus arrives in your DAW as its own track. You can edit, comp, and mix in software with full control. This is what most project studios actually want.
Check the spec sheet before buying. A mixer advertised as "USB audio" may only send two channels. Look for phrases like "multitrack USB," "USB audio interface built in," or a channel count next to the USB spec.
How the signal reaches your DAW
With a USB mixer, the path is: mic into preamp, gain set, channel processed by EQ and dynamics, then routed to the USB send. In your DAW, select the mixer as the audio device, arm a track per USB channel, and set DAW input gain so peaks land near -12 dB.
With a standalone interface, the path is shorter: mic into preamp, gain set, converter, DAW. All mixing happens in software.
MAONO AM200-S1 Podcast Bundle - Mixer + Mic →
When to choose which
Choose an interface if you record one or two mics and mix entirely in software. Choose a mixer for hands-on control, multiple inputs, or separate headphone and monitor mixes. Choose a USB mixer with multitrack output if you want both: faders during tracking and separate tracks for mixing later.
A practical middle path exists: an all-in-one mixer-plus-mic bundle. The MAONO AM200-S1 podcast bundle pairs a compact audio interface with a condenser microphone for a complete recording chain out of the box.

A mixer with multitrack USB output can replace an interface entirely for small setups. You get faders and a computer connection in one box, and you keep the option to mix in hardware or software.
Once signal reaches the computer, the next step is understanding the software receiving it. This beginner guide to DAW software for podcasts explains how recording software handles the incoming signal.
Gain Staging and Signal Flow from Microphone to Recording Software
Gain staging is setting healthy levels at every stage so no single point adds noise or distortion. Signal flow is the path the audio takes. Get both right and your recordings sound clean without plugin rescue.
Trace the path once and it sticks:
- Mic captures sound
- XLR cable carries a balanced signal to the preamp
- Gain raises it to working level
- EQ and effects shape it
- Fader sets the mix balance
- Main output or USB sends it to the computer
- Recording software captures the digital file
Practical level targets to aim for:
- Preamp stage: peaks around -12 to -6 dB
- Channel meter: never touching the red
- Recording software input: peaks near -12 dB, leaving headroom
Watch out: if you set gain high and pull the fader down to compensate, you're amplifying noise and then hiding it. Set gain correctly and leave the fader near unity.
Real routing examples for a studio session
The signal path above is the trunk. The branches are what separate a working studio from a frustrating one. Here's how the same mixer handles four common studio scenarios.
Control-room monitor feed. Route the main mix to your studio monitors through the main outputs. Keep the monitor level on a separate knob from the main fader so you can turn down without changing the recorded level.
Effects send and return. Send a vocal to Aux 2, set Aux 2 to post-fader so the reverb amount follows the fader, run Aux 2 out to a reverb unit or plugin, and bring the return back on a spare channel or dedicated effects return. Keep the return fader low and blend to taste.
Separate mixes for two people. A podcast host and guest often want different balances. Use Aux 1 for the host's headphones and Aux 2 for the guest's, each set pre-fader, and give each person their own aux level knob. This is the single most useful routing trick on a small board.
A diagnostic sequence when levels look wrong
When a recording sounds thin, noisy, or distorted, work backward through the chain instead of guessing:
- At the source: Is the mic the right type, and close enough? A dynamic mic at 6 inches needs far more gain than a condenser at 6 inches.
- At the preamp: Is gain in a normal range, or cranked? Cranked gain plus a quiet source usually means the mic or cable is the problem.
- At the channel: Is the high-pass filter engaged? Is EQ boosting something that should be cut?
- At the send: Is the aux pre or post, and is the return channel open?
- At the interface or USB stage: Is the DAW input set to the right channel, and is DAW input gain near unity?
- At the DAW: Is the track armed, is monitoring on, and is the input meter moving?
Most problems resolve at step 1 or 2. The rest rules out easy fixes before you start swapping cables.
Once signal reaches the computer, the next step is understanding the software receiving it. This beginner guide to DAW software for podcasts explains how recording software handles the incoming signal.
Troubleshooting Noise, Clipping, and Silent Channels
Most mixer problems trace back to four causes: wrong cable, wrong gain, phantom power left off, or a muted channel. Work through them in that order and you'll solve nearly every issue in minutes.
No sound at all? Check the fader, the mute button, and the main output level first.
Buzzing or humming? Move the mixer away from power supplies and routers.
Clipping and distortion? Lower the gain, not the fader.
One channel dead? Swap the cable and the mic to isolate the fault.
A common mistake is cranking gain to fix a quiet mic.
Choosing Your First Studio Mixer Setup at Perfect Take Gear
Start with channel count, then connectivity, then budget. Buying more mixer than you need is the fastest way to waste money on features you'll never touch.
For a first setup, match the mixer to your actual source count. Two mics and a phone input means a small board.
Perfect Take Gear offers starter kits built for new creators, which removes the guesswork of matching a mixer to a mic. The BM800 home studio recording kit bundles a cardioid condenser microphone, a two-channel mixer, a boom arm, and a pop filter for vocals, podcasts, and livestreams.

Buyers often ask whether a kit beats buying pieces separately. For beginners, a kit can make sense because the included parts are designed to work together.
Two things to check before buying:
- Does the mixer have the input types your mics use?
- Does it connect to your computer the way you plan to record?
Answer those and you'll avoid the return label.
Frequently Asked Questions
How many channels do I need on a studio mixer?
Count every source you plan to record or play at once, then add one or two spare channels. A solo podcaster usually needs two mic inputs plus a line input for music or a phone. A two-person interview setup needs at least three. If you record drums or a band, plan for eight or more. Buying a mixer with a couple of empty channels costs little extra and saves you from replacing the unit when your setup grows.
Do beginners need a mixer or an audio interface?
It depends on what you record. An audio interface sends one or two clean signals into your computer and is simpler for solo voiceover or single-mic work. A studio mixer gives you hands-on faders, EQ, and aux sends for multiple sources, and many models also pass audio to a computer over USB. If you plan to stream, podcast with guests, or record several mics at once, a mixer earns its place. For one microphone and a DAW, an interface is enough.
Can you use a studio mixer with a computer?
Yes, if the mixer has a USB audio output or you route its main output into an audio interface. A USB mixer appears as a recording device in your DAW, so you can capture the mixed signal or individual channels on models that support multitrack. Check the sample rate, usually 48kHz, and confirm the mixer sends audio both ways if you want to monitor playback through it. Mixers without USB need an interface in between.
What is the difference between an analog mixer and a digital mixer?
An analog mixer processes sound with physical circuits: every knob and fader maps to one function, and what you see is what you get. A digital mixer converts signals to data, so one fader can control multiple channels, settings save as presets, and built-in effects come standard. Analog units are cheaper to start with and easier to learn. Digital mixers reward anyone who records regularly and wants recallable setups, but they add a menu layer that slows down first-time users.
Setting up a mixer rewards patience more than gear. The people who get clean audio are the ones who set gain correctly, label their cables, and test before recording. That's it.
Perfect Take Gear carries the pieces that make that process easier, from starter kits with matched mics and mixers to wireless systems and monitoring gear. Browse the creator audio range to find a setup that fits how you actually record, and get your first clean take without the trial and error.
