

Beginner Guide to DAW Software for Podcasts
Table of Contents
- What Is a DAW and Why Podcasters Need One
- Essential Equipment: Microphones and Audio Interfaces
- Best Podcast Editing Software for Beginners
- Free Podcast Editing Software Options
- How to Edit a Podcast: Step-by-Step Workflow
- Podcast Audio Editing Tips for Cleaner Sound
- Recording Your First Podcast Episode
- Frequently Asked Questions
Last Updated: October 4, 2026
What Is a DAW and Why Podcasters Need One
A digital audio workstation (DAW) is software that records, edits, and arranges audio on your computer, essentially a virtual recording studio. You plug in a microphone, hit record, and the DAW captures your voice, then trim, clean up, and polish it before sharing.
Podcasters need a DAW to work with a real microphone, fix mistakes, remove background noise, and arrange multiple tracks for interviews or music. It's the difference between sounding amateur and sounding professional.
The beginner guide to DAW software for podcasts requires only three things: software that records clean audio, lets you edit without frustration, and exports in a format your podcast host accepts.
Essential Equipment: Microphones and Audio Interfaces
Your microphone captures sound; your audio interface converts it to digital data. Skip either and your podcast sounds cheap.

Microphones come in two types:
- USB microphones plug directly into your computer. No extra gear needed. They're plug-and-play and work fine for beginners. The downside: they're limited in sound quality and flexibility.
- XLR microphones connect to an audio interface. They sound better and give you more control. The tradeoff: you need to buy the interface separately.
For a first podcast, a USB microphone is practical: no learning curve, no extra cables. When shopping for Cameras, Lighting & Audio Equipment, you'll find options like the USB RGB Condenser Microphone for Streaming & Podcasts at $33.99, including pop filter and tripod stand.

For better sound and growth, the NXG MD21 USB Sound Card - 24-Bit Audio Interface at $124.99 delivers 24-bit audio quality, reduces latency, and includes an external power adapter for improved stability.
Best Podcast Editing Software for Beginners
The best podcast editing software for beginners balances ease of use with real editing power, cutting mistakes, reducing noise, and arranging tracks without requiring audio engineering expertise.
For podcasting, you want a DAW that handles multitrack recording, basic noise reduction, and quick exports with an intuitive interface.
The key features to look for:
- Timeline editing, see your audio as a waveform and click to cut
- Noise reduction, remove hum and background noise with one or two clicks
- Multitrack support, layer multiple microphones or add music underneath speech
- One-click export, save to MP3 without 10 dialog boxes
- Built-in effects, basic EQ and compression to make voices sound professional
The MAONO AM200-S1 Podcast Bundle - Mixer + Mic at $142.99 pairs a portable audio interface with a condenser microphone, 8 preset sound effects, and built-in EQ, handling recording and basic editing in one device.
For more control, the Tenlamp Y300-P15B Podcast Mic & Sound Board Bundle at $49.99 gives you a sound board with 12 built-in effects, voice changer, and noise reduction. It connects to your computer via USB, Bluetooth, or auxiliary cable.
Free Podcast Editing Software Options
Many podcasters use free DAWs entirely. The catch: steeper learning curve and fewer features. If you're starting out and don't want to spend money, free options exist.
Common free DAWs include Audacity (open-source), GarageBand (Mac), and Reaper (60-day trial).
The real limitation of free software is support: no customer service when you get stuck.
The practical move: start with a bundle pairing microphones and mixers. The Tenlamp G10-P15B Audio Mixer Bundle with Microphone at $186.99 includes active noise reduction and 16 customizable presets, no separate DAW needed. Investing in quality Content Creator Gear & Equipment upfront often saves time and frustration compared to piecing together free tools.

How to Edit a Podcast: Step-by-Step Workflow
Editing a podcast follows a predictable workflow that cuts editing time in half once mastered.
Step 1: Import Your Recording
Open your DAW and import the audio file (MP3, WAV, or M4A). The waveform appears on your timeline, showing peaks and silence.
Step 2: Trim the Fat
Mark and remove stumbles, long pauses, and "um"s. Don't obsess over perfection; a few imperfections sound human.
Step 3: Reduce Background Noise
Select 1-2 seconds of silence or hum, tell the DAW to learn the pattern, then apply noise reduction to the whole track.
Step 4: Add Levels and Balance
Normalize your voice track to peak at -3 dB. Lower music underneath speech so it doesn't compete.
Step 5: Add Intro and Outro
Import intro and outro music, place at start and end, and fade in/out to avoid abrupt starts or stops.
Step 6: Export with Podcast Specifications
Before you export, understand the technical requirements your podcast host expects. This step separates amateur submissions from distribution-ready files.
Export format: Save to MP3. This is the universal standard across all podcast platforms (Apple Podcasts, Spotify, Google Podcasts). WAV and FLAC are lossless but create files 5-10 times larger; hosts accept them but listeners download slower.
Bitrate: Export at 128 kbps (kilobits per second). This is the industry standard for speech-heavy content. It balances file size and quality. Music podcasts sometimes use 192 kbps, but 128 kbps is sufficient for voice and saves bandwidth for your listeners.
Sample rate: Use 44.1 kHz (44,100 Hz). This is the standard for all podcast platforms. Your DAW may default to 48 kHz (common in video); if so, resample down to 44.1 kHz during export. Mismatched sample rates don't break playback but waste file size.
Mono vs. stereo: Export in mono (single channel). Podcasts are voice-only in nearly all cases. Stereo files are twice the size for no benefit to a listener wearing headphones or earbuds.
NXG MD21 USB Sound Card - 24-Bit Audio Interface →
Loudness: Aim for an average loudness of -16 LUFS (loudness units relative to full scale). This is the standard recommended by Spotify and Apple Podcasts. Most DAWs include a loudness meter or metering plugin.
Metadata: Before uploading, add ID3 tags to your MP3 file. Include the episode title, podcast name, episode number, and publication date. Most DAWs let you add these during export; if not, use a free tool like ID3 tag editor to add them after export.
| Step | Action | Time |
|---|---|---|
| Import | Load audio file into DAW | 2 min |
| Trim | Remove mistakes and long pauses | 10-15 min |
| Noise reduction | Apply noise gate or noise profile | 5 min |
| Levels | Normalize and balance tracks | 5-10 min |
| Intro/outro | Add opening and closing music | 5 min |
| Export | Save to MP3 at 128 kbps, 44.1 kHz, mono, -16 LUFS | 2 min |
This workflow takes 30-60 minutes for a 30-minute episode once practiced.
Podcast Audio Editing Tips for Cleaner Sound
Clean audio is the difference between sounding amateur and sounding professional. These tips take your podcast from "sounds like a bedroom recording" to "sounds like a real show."
Use a pop filter. This foam screen catches plosives (harsh "P" and "B" sounds). Most microphones include one.
Record in a quiet space. Close the door, turn off fans, mute your phone. Prevention beats any noise reduction plugin.
Gain stage properly. Set your microphone level so peaks hit -6 dB to -3 dB. Too quiet adds noise when boosted; too loud causes clipping.
Use compression. This evens out loud and quiet parts. Use a 4:1 ratio and adjust the threshold until the loudest peaks are tamed.
EQ to taste. Cut 100-200 Hz to remove rumble; boost 3-5 kHz for clarity. Small adjustments sound professional.
Recording Your First Podcast Episode
Your first episode is the test run. You're learning the process, not launching a masterpiece.
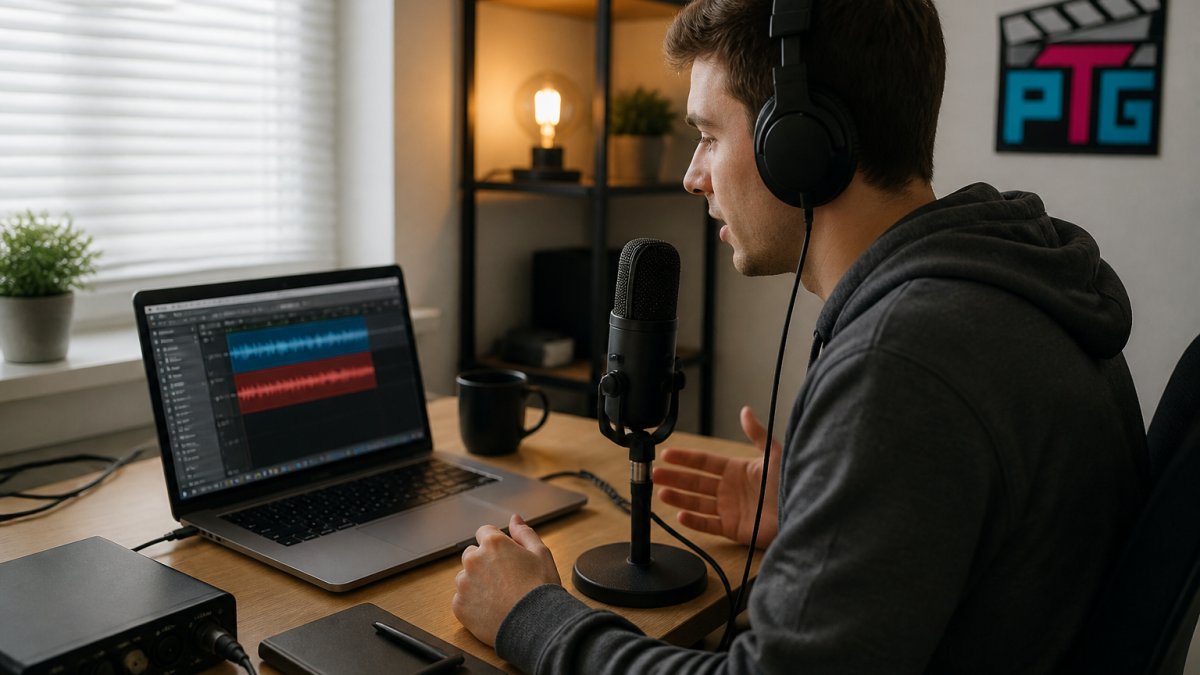
Set up your space. Find a quiet room and close the door. Hang blankets or foam on walls to absorb sound. Avoid empty rooms; they echo.
Test your levels. Speak at normal volume and adjust distance or input level so peaks hit -6 dB. Record a 30-second test and play it back.
Hit record. Speak naturally and pause between thoughts. If you mess up, pause 3 seconds and restart the sentence.
Record 15-20 minutes. Short is better for learning and faster editing.
Save and back up. Save your project file and export as WAV. Upload to cloud storage to prevent data loss.
Troubleshoot Common Recording Problems
Problem: Audio is clipping (distorted, harsh peaks)
Clipping occurs when input is too loud. Fix: Lower your microphone input level so peaks hit -6 dB. If clipping indicators appear, reduce input gain by 3-6 dB and test again.
Problem: Latency (you hear yourself delayed in headphones)
Latency is lag between speaking and hearing yourself. Fix: Enable "input monitoring" or "direct monitoring" in your DAW's audio settings. Try a different USB port or enable "direct monitoring" on your audio interface.
Problem: DAW doesn't detect your microphone
Fix: Check that your microphone is plugged in and powered on. Restart your DAW. If it still doesn't appear, go to Preferences > Audio Devices and manually select your microphone. On Windows, open Sound Settings and set it as default.
Problem: Background noise is too loud (hum, fan, traffic)
Fix: Move to a quieter room or record at a quieter time.
Problem: One side of a stereo recording is silent
Fix: Change your DAW's project settings from stereo to mono, or pan both channels to center in the mixer. If using an audio interface, ensure the microphone is plugged into the correct input (usually Input 1).
Edit following the workflow above. Trim, reduce noise, balance levels, add intro/outro, export to MP3.
Upload to your podcast host. Services like Spotify for Podcasters, Buzzsprout, or Anchor accept your MP3. They handle distribution to Apple Podcasts, Spotify, and other apps.
Your first episode is live. You're a podcaster now.
Frequently Asked Questions
What is the best DAW software for beginners starting a podcast?
The best DAW for beginners depends on your budget and operating system. Free options like Audacity offer basic recording and editing. Paid DAW software provides more advanced features like multitrack recording, built-in effects, and professional export settings. For podcasters, look for software with a clear timeline interface, easy audio editing tools, and support for multiple audio tracks. Many beginners start with free software to learn the basics before investing in paid options.
Do I need a DAW to record a podcast?
Technically, you can record a podcast with basic voice recording apps, but a DAW gives you professional control. A digital audio workstation lets you record multiple tracks, edit audio precisely, apply noise reduction and equalization, and export in podcast-ready formats. For solo podcasts, you need at least basic recording capability. For interviews or multi-person shows, a DAW's multitrack recording features become essential for managing separate voices and editing flexibility.
What equipment do I need to start podcasting besides a DAW?
You need a microphone to capture your voice clearly. USB condenser microphones are beginner-friendly and plug directly into your computer. An audio interface improves recording quality by handling audio conversion and providing dedicated microphone inputs. The NXG MD21 USB Sound Card offers 24-bit audio quality with a dedicated microphone input at $124.99. You'll also want headphones for monitoring and a pop filter to reduce breath noise. Start simple, a quality microphone and your computer's built-in audio can work, but an audio interface upgrades your sound significantly.
What podcast audio editing tips help beginners create professional-sounding episodes?
Start by setting proper audio levels during recording to avoid clipping and distortion. Use noise reduction to remove background hum or room noise. Apply gentle equalization to boost clarity in speech frequencies. Add compression to even out volume inconsistencies between sections. Trim silence between sentences and remove filler words like 'um' and 'uh' for a tighter edit. Export at the correct format and bitrate for your podcast platform. Practice these techniques on one section first, then apply them across your full episode for consistent sound.
Starting a podcast feels overwhelming. It's not. Pick a microphone from Perfect Take Gear, choose a free or affordable DAW, and record your first episode this week. The learning happens by doing, not by planning. Ready to capture your perfect take?