

How to Create a Professional Studio Look at Home in 2026
Table of Contents
- Start With the Room, Not the Gear
- The Best Lighting for a Home Studio
- DIY Photography Backdrop Ideas That Look Expensive
- Camera Settings for Studio Portraits
- Tethered Shooting: See the Shot Before You Commit
- Cable Management and Safety in a Small Studio
- Making Clients Comfortable in a Home Studio
- Conclusion
- Frequently Asked Questions
Last Updated: September 17, 2026
Start With the Room, Not the Gear
A professional studio look starts with the room, not the equipment. A quiet, dark room with one good light beats a bright room with three cheap ones.
Turn Off the Ceiling Lights
Overhead lights are the enemy of a studio look: they cast hard shadows, flatten features, and mix color temperatures. Kill them first.
- Turn off every ceiling fixture in the shooting room
- Close blinds or hang a dark curtain over windows
- Check for light leaks under doors and from hallways
- Use one lamp or a small LED panel to move around safely
Make the Space Quiet
Sound matters as much as light. Bare walls and hard floors create echo that makes voiceovers and interviews sound cheap.
The Best Lighting for a Home Studio
The best lighting for a home studio is a three-point setup: a key light, a fill light, and a rim light. This gives you control over shadows, depth, and separation from the background.
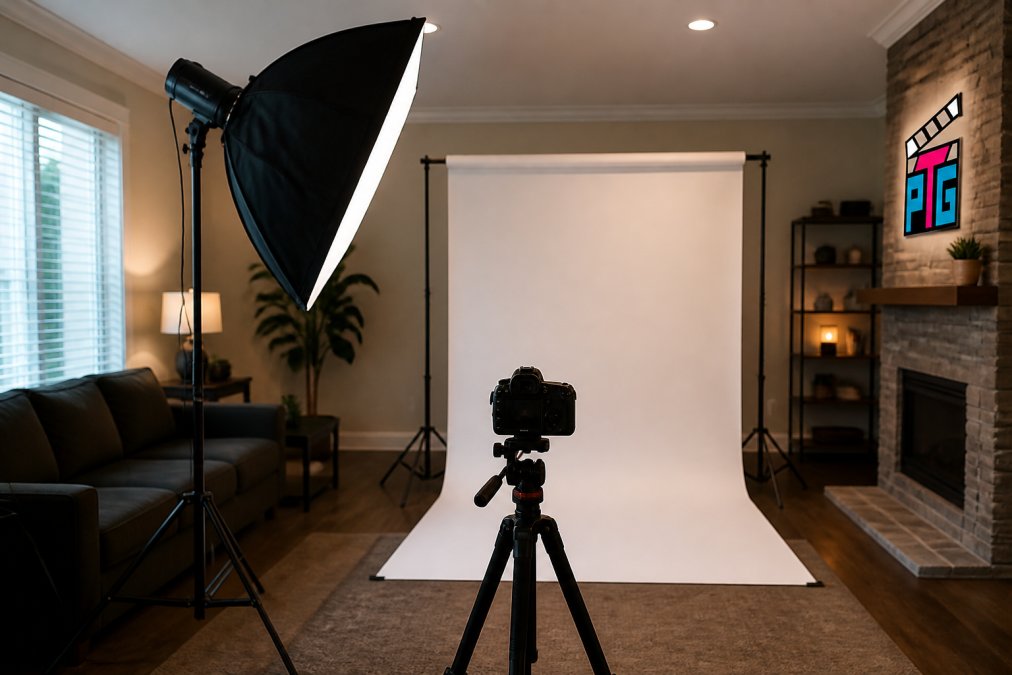
Key, Fill, and Rim Light
The key light is your main source. Place it about 45 degrees off the subject's face and slightly above eye level for the classic cheekbone shadow.
A few practical notes:
- Keep the ratio between key and fill around 2:1 for a natural look
- Move the key closer for softer shadows, farther for harder ones
- Watch the inverse square law: doubling the distance cuts light to a quarter
- Set white balance manually instead of trusting auto
DIY Photography Backdrop Ideas That Look Expensive
DIY photography backdrop ideas do not have to look cheap. A taut seamless paper roll, a steamed muslin cloth, or a painted wall panel all read as professional when the light hits them right. The difference between a $30 backdrop and a $300 one is tension, distance, and how the surface interacts with your key light.
Match the Surface to the Light
Backdrop material behaves differently depending on how you light it, the part that separates a clean shot from a muddy one.
- Seamless paper is matte and absorbs light, so it stays neutral and does not throw color back onto the subject. It is the safest choice for headshots and product work, but it tears at the roll edge and shows every scuff, so keep a fresh section rolled forward for client work.
- Muslin cloth has a woven texture that catches light and adds subtle depth. It wrinkles, so it needs steaming before every session. A 10x20-foot muslin on a dual crossbar gives you enough fabric to sweep the floor and still have slack.
- Vinyl wipes clean and resists creasing, making it the practical pick for high-volume or food shoots. It reflects more light than paper, so watch for a sheen on the subject's cheek if your key is close.
- Painted foam board or MDF gives you a hard, flat surface with no falloff. Matte black reads as a true black void; matte white bounces your key light back as a soft fill. Spray paint in thin coats to avoid orange-peel texture under hard light.
The Distance Rule That Fixes Shadow Spill
Keep the backdrop at least three feet behind the subject. Closer than that and your key light throws the subject's shadow onto the backdrop, flattening the separation you paid for with a rim light. If the room is tight, push the subject forward instead.
- Use a backdrop stand with dual crossbars to keep fabric flat and stop sway
- Steam or iron muslin before every shoot, then clip the slack
- Hang seamless paper so it curves from wall to floor with no crease
- Keep the backdrop at least three feet behind the subject to avoid shadow spill
- Match backdrop color to the mood, not the trend
- Add a background light when you need the backdrop to hold a specific tone
Camera Settings for Studio Portraits
Camera settings for studio portraits start simple: manual mode, ISO 100, aperture between f/4 and f/8, and shutter speed at or below your sync speed. Studio shooting inverts natural-light logic, you are not chasing light, you are adding it, so every setting becomes a deliberate choice.

| Setting | Starting Point | Why It Matters |
|---|---|---|
| ISO | 100 | Lowest noise, cleanest file |
| Aperture | f/4 to f/8 | Sharp face, controlled depth of field |
| Shutter speed | 1/125s to 1/200s | Stays under flash sync speed |
| White balance | Manual, matched to light | Stops color shifts between frames |
| Focal length | 50mm to 85mm | Natural face shape, no distortion |
| Focus mode | Single AF, eye detect | Locks on the near eye |
Why the Shutter Speed Ceiling Exists
The shutter speed cap is the setting most home shooters get wrong. With strobes, the flash fires in a fraction of a millisecond and the shutter must be fully open when it does, your sync speed, typically 1/200s or 1/250s. Go faster and the second curtain starts closing before the flash finishes, producing a black band across the frame.
18-Inch RGB Ring Light Kit with 1.86m →
Aperture, Depth of Field, and the Backdrop
Aperture does two jobs in a studio: it controls depth of field and how much of your backdrop stays in focus.
- At f/2.8, the backdrop blurs into a soft wash and the subject pops. Good for beauty and headshots, but the near eye must be perfectly focused because the margin is thin.
- At f/5.6, the face is sharp and the backdrop still has slight separation, the safest all-around portrait aperture.
- At f/8, the backdrop is sharp and the whole frame is crisp. Use this for group shots or when the backdrop is part of the composition.
White Balance and Consistency Between Frames
Auto white balance is the enemy of a consistent set. It re-evaluates every frame, so a slight change in subject position or a hand entering the frame can shift color temperature and leave you with mismatched images.
- The aperture controls depth of field, so f/2.8 blurs the backdrop and f/8 keeps it sharp
- Shutter speed only controls ambient light when you are using strobes
- ISO stays low because you are adding light, not chasing it
- A light meter removes guesswork and keeps exposures consistent
- Lock white balance manually and do not let auto drift between frames
Tethered Shooting: See the Shot Before You Commit
Tethered shooting connects the camera to a laptop so you see every frame on a big screen the moment you take it, the single biggest workflow upgrade a home studio can make.
- Run a USB-C or USB 3 cable from camera to laptop
- Use a tripod with a cable channel so nothing dangles
- Set the capture software to save to a folder you can find fast
- Turn on focus peaking and highlight warnings in the live view
- Keep a spare battery in the camera, tethering drains power faster
Cable Management and Safety in a Small Studio
Cable management protects your gear and your clients. A home studio has less floor space than a commercial one, so every loose cable is a trip hazard, and a light stand that tips onto a camera ends the shoot and the gear.
- Tape every cable run to the floor with gaffer tape
- Use a c-stand or sandbag every light stand, especially tall ones
- Keep power strips off the floor and away from foot traffic
- Coil spare cables and hang them, do not pile them
- Label each cable so you can swap fast when something fails
Making Clients Comfortable in a Home Studio
Clients relax when the space feels intentional. A home studio can feel more personal and less intimidating than a commercial one, but only if you set it up that way.
- Greet the client at the door and walk them to the shooting area
- Offer water, a seat, and a few minutes to settle before the camera comes out
- Show them one tethered frame so they know what the shot looks like
- Keep the room warm, quiet, and free of clutter behind the camera
- Explain each step so nothing feels rushed
Conclusion
Building a professional studio look at home comes down to controlling the room before you touch the gear. Kill the ceiling lights, quiet the space, then add one good light and shape it with a key, fill, and rim setup. Everything else builds on that foundation.
Frequently Asked Questions
What equipment do I need for a professional home studio?
You need three core pieces: a light source with a modifier, a backdrop system, and a camera you can control manually. A handheld COB LED light like the COLBOR W60 or W100 gives you adjustable color temperature and enough output for portraits, while a double crossbar backdrop stand keeps fabric taut and flat. Add a tripod and a light meter if you want repeatable results. You do not need to buy everything at once. Start with one light and one backdrop, then add a fill light or reflector once you understand how shadows fall on your subject.
How can I achieve professional lighting in a small home space?
Work with one light and shape it carefully. Place your key light at roughly 45 degrees from your subject and slightly above eye level, then use a reflector or a white foam board on the opposite side to lift the shadows. Keep the light close to your subject and use the inverse square law to your advantage: moving a light from 3 feet to 6 feet cuts its intensity significantly, so you can control brightness by distance alone. Turn off ceiling lights and block window light with a blackout curtain if you need consistent results.
What is the best backdrop for a professional studio look?
Seamless paper gives you the cleanest, most controllable surface because it has no texture or pattern to distract from your subject. Muslin works well when you want subtle texture or a painted effect. For a DIY option, a plain white or gray bedsheet stretched tight on a backdrop stand reads as neutral and professional on camera. Whichever you choose, keep it at least 4 to 6 feet behind your subject so you can throw it slightly out of focus and avoid casting shadows onto it.
What are the best camera settings for studio-quality photos?
Start with ISO 100 to minimize noise, an aperture between f/4 and f/8 for sharp portraits with controlled depth of field, and a shutter speed at or below your camera's sync speed (usually 1/160 to 1/250 second) if you are using strobes. Set white balance manually to match your light's color temperature rather than relying on auto. If you are using continuous lighting, you can push shutter speed higher, but watch for ambient light creeping into your exposure. A light meter helps you confirm your key-to-fill ratio before you shoot.