

Choosing the Best Lighting for Small Studio Spaces
Table of Contents
- Why Small Studio Lighting Fails Before You Buy a Single Fixture
- Color Temperature, CRI, and Lux: The Three Specs That Decide Everything
- The 3-Point Lighting Setup for Small Rooms
- Best Compact LED Lights for Creators Working in Tight Spaces
- How to Diffuse Light in a Small Studio Without Losing Output
- Fixture Placement and Electrical Load in a Small Footprint
- Smart Lighting Control and Hybrid-Use Studio Setups
- Conclusion
- Frequently Asked Questions
Last Updated: September 16, 2026
Why Small Studio Lighting Fails Before You Buy a Single Fixture
Most creators buy lights before understanding their room, then wonder why footage looks flat. Choosing the best lighting for small studio spaces starts with the space itself: ceiling height, wall color, window position, and outlets all constrain what works.
A tight room punishes bad decisions faster than a large one: light bounces off nearby walls, a single overhead fixture creates harsh shadows, and one overloaded circuit trips mid-shoot.
The three-point lighting setup for small rooms fails most often because the room was never measured. Note dimensions, count outlets, and check what shares the circuit before spending anything.
Color Temperature, CRI, and Lux: The Three Specs That Decide Everything
Color temperature is the warmth or coolness of light, measured in Kelvin. CRI measures how accurately a light renders color compared to natural daylight. Lux measures how much light actually reaches your subject.
These three numbers decide whether footage looks professional, regardless of spend. Match color temperature across every fixture: mixing 3200K and 5600K in one frame produces a color cast no edit fixes cleanly.
Aim for CRI 95+ for skin tones and product color. For lux, position matters more than raw output in a small room: a light two feet from your subject needs far less power than one across the room.
| Spec | What It Measures | Target for Small Studios |
|---|---|---|
| Color temperature | Warmth/coolness (Kelvin) | Match all fixtures; 2700K-6500K adjustable |
| CRI | Color rendering accuracy | 95+ for skin and product work |
| Lux | Light reaching the subject | Depends on distance and diffuser |
| Lumens | Total light output | Higher for bounce, lower for direct key |
The 3-Point Lighting Setup for Small Rooms
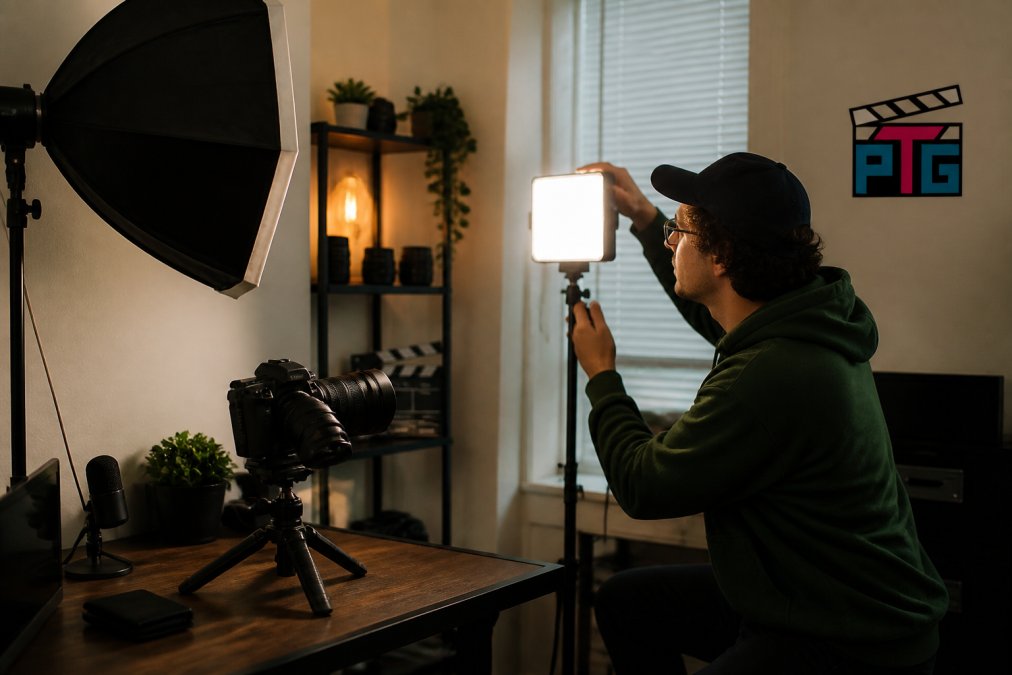
A three-point lighting setup for small rooms uses a key light, fill light, and back light to shape your subject without a large footprint. The key is your primary source, the fill softens its shadows, and the back light separates subject from background.
Key, Fill, and Back Light in a 10x10 Space
In a 10x10 room, place the key about 45 degrees off your subject's face and slightly above eye level, the fill opposite at lower intensity, and the back light behind your subject angled toward their shoulders.
The mistake most creators make is overpowering the fill.
Layering Ambient, Task, and Accent Light
Light layering separates a room that looks lit from one that looks designed: ambient sets the base level, task lighting illuminates your work, and accent lighting adds depth behind your subject.
Best Compact LED Lights for Creators Working in Tight Spaces
Compact LED lights solve the core small-studio problem: professional output without a professional footprint. The right fixture balances power, size, and control.
Panels vs. COB Lights vs. Strobes
LED panels spread soft, even light across a wide beam angle, suiting talking-head and product work. COB lights concentrate output into a single point, punching harder through modifiers. Strobes fire brief bursts for stills but offer no continuous output for video.
| Type | Best For | Trade-off |
|---|---|---|
| LED panel | Interviews, livestreams, even fill | Softer output, less punch through diffusion |
| COB light | Video, modifier work, key lighting | Needs diffusion to avoid harsh shadows |
| Strobe | Still photography, freezing motion | No continuous output for video |
How to Diffuse Light in a Small Studio Without Losing Output
Diffusion softens shadows and reduces harsh specular highlights, but it costs light. Budget-friendly DIY options let small-studio creators soften output without expensive modifiers.
Fixture Placement and Electrical Load in a Small Footprint
The Circuit Math Most Guides Skip
Electrical load is the constraint most creators ignore until a breaker trips mid-take. The math is simple once you know where to look.
18-Inch RGB Ring Light Kit with 1.86m →
Now add up what actually sits on that circuit:
| Device | Typical Draw | Notes |
|---|---|---|
| 100W COB key light | 100W | Nameplate wattage, not equivalent output |
| 60W fill panel | 60W | Lower draw than the key |
| 40W back/hair light | 40W | Often the smallest fixture |
| Desktop computer + monitor | 200-400W | Gaming rigs run higher |
| Space heater | 1,000-1,500W | The single biggest breaker killer |
| Window AC unit | 500-1,400W | Seasonal, easy to forget |
How to Map Your Outlets
Before your first shoot, walk the room and identify which outlets share a breaker by flipping breakers one at a time and noting which outlets go dark. In most homes, every outlet on one wall shares a circuit, and adjacent rooms often share the same one, a converted-bedroom studio may share with the hallway, bathroom, or room next door.
Once mapped, assign roles:
- Circuit A (studio wall): key, fill, and back lights plus camera and monitor.
- Circuit B (adjacent room): space heater, kettle, or anything high-draw that does not need to be in frame.
- Dedicated circuit: if your building has one, reserve it for the highest-draw fixture and any computer that cannot tolerate a brownout.
Power Strips vs. Dedicated Circuits
A power strip does not create capacity; it only extends reach. Three 100W fixtures on one strip is fine electrically, but that same strip on a circuit already carrying a space heater is not. Surge protectors guard against voltage spikes, not overload. If you routinely run more than 1,000 watts continuous, the answer is a second circuit, not a heavier strip.
Heat and Placement
Modern LED fixtures draw far less power than tungsten, making a multi-light setup realistic in a small room. LED panels and COB lights also run cooler, so you can pack them into tight corners. Keep a few inches of clearance around any fixture's vents, and avoid boxing a COB into a closed cabinet or shelf.
Smart Lighting Control and Hybrid-Use Studio Setups
Smart lighting integration lets you adjust color temperature, brightness, and effects from a phone instead of walking to each fixture. In a small studio that matters more: fixtures sit in awkward corners, behind desks, or above shelves where a switch is hard to reach. App control turns a five-minute repositioning ritual into a two-tap preset.
The Three-Scene Framework for a Hybrid Room
A hybrid-use studio serves as office, shoot space, and living area in the same square footage. The trick is not buying more lights; it is programming the ones you own into distinct scenes.
What to Look For in Smart-Capable Fixtures
Not every app-controlled light is worth building a scene system around. Three features separate the useful ones from the gimmicks:
- Wide color temperature range. A fixture that only does 3200K-5600K cannot serve living mode. Look for 2500K-9000K or similar spread.
- Flicker-free dimming. Cheap dimmers introduce banding that shows up on camera even when your eye misses it. Test at low brightness before trusting a fixture on video.
- Scene memory. The ability to save and recall a full multi-light setup, not just adjust one light at a time.
Voice Control and Physical Switches
Voice assistants and smart plugs add convenience, but they are not a substitute for a physical switch you can hit in the dark. A common pattern: wire the main ambient fixture to a smart plug for voice control, keep studio lights on app control for precision. The room works as a room first, a studio second.
Conclusion
Small rooms expose every weak decision in a lighting setup, from mismatched color temperature to a circuit that can't handle the load. Getting the specs right, matching Kelvin across fixtures, and choosing compact fixtures built for tight spaces solves most of it.
Frequently Asked Questions
What is the best lighting setup for a small studio?
Start with a three-point setup: one key light at roughly 45 degrees to your subject, a fill light on the opposite side at lower intensity, and a back light behind the subject for separation. In tight rooms, compact LED panels or COB lights work better than large strobes because they take up less floor space and run cooler. Keep color temperature consistent across all three fixtures so skin tones stay even.
Are LED panels better than softboxes for small spaces?
LED panels win on footprint. A panel like the Ulanzi P40 is 40W, bi-color from 2700K to 6500K, and runs on USB DC power with a built-in battery, so it can sit on a shelf or clamp to a stand without a bulky modifier. Softboxes still give softer, more wraparound light, but they need depth. In a cramped room, pair a panel with a cheap diffusion sheet instead of a full softbox.
How do you diffuse light in a small studio without losing too much output?
Move the diffusion as close to the subject as safely possible, then raise the light's power to compensate. A 110W fixture like the COLBOR CL100X has enough headroom to lose a stop or two through diffusion and still deliver usable lux levels. White shower curtains, parchment paper, and 5-in-1 reflector discs all work as budget diffusers. Avoid stacking multiple diffusion layers, since each one cuts output.
What color temperature is best for home studio lighting?
Match your fixtures to 5600K if you shoot daylight-balanced footage and want to blend with window light. Use 3200K for warmer, tungsten-style looks. The safest move is a bi-color light that covers both, such as the Ulanzi LT003 with its 2500K to 9000K range. Keep every light on the same setting so color temperature consistency holds across the frame.