

How to Light TikTok Videos Without a Ring Light
Last Updated: November 2, 2026
Quick Summary
The best ring light alternatives for TikTok videos are window light, clip-on LEDs, LED panels, softboxes, and portable COB lights. Window light is free and flattering, clip-on LEDs start at $21.99 for filming anywhere, and LED panels or softboxes give you a controlled, repeatable look.
- Position your phone so a large window sits to your side or slightly in front, never behind you.
- The Roreta Clip-On LED Selfie Light costs $21.99 and offers three modes and five brightness levels.
- The Ulanzi P40 40W Bi-Color LED Panel Light costs $113.99 and has a built-in battery.
- Pick one color temperature for the whole scene and match every fill and accent light to it.
- Raise the key light above eye level and move it 30 to 45 degrees off camera axis to cut glasses glare.
Table of Contents
- Why Ring Lights Aren't Your Only Option for TikTok
- The Best Lighting for TikTok Videos: A Quick Comparison
- Natural Lighting for Videos: Using Windows and Sunlight
- Clip-On Lights and Portable Lighting for On-the-Go Creators
- Softboxes vs. LED Panel Light for Video: Which Is Right for You?
- Color Temperature and Kelvin Settings for Accurate Skin Tones
- Lighting for Spectacle Wearers and Smartphone Camera Settings
- Build Your Perfect Take Setup with Perfect Take Gear
- Frequently Asked Questions
Why Ring Lights Aren't Your Only Option for TikTok
The ring light has become the default TikTok purchase, yet it is one of the least flattering choices for most creators. That bright circle around the phone throws flat, even light with a telltale catchlight ring in the eyes, and it flattens the face instead of shaping it. This guide from Perfect Take Gear walks through the ring light alternatives for TikTok videos that working creators actually reach for, from a free window to a compact panel light. Below, you'll see exactly how each option changes your footage and what it costs to get there.
The core problem is contrast. A ring light sits at camera axis, so it lights everything equally and kills the shadows that give a face dimension. Move the light off to one side, soften it, and the same phone camera suddenly produces footage that looks shot by someone who knows what they're doing.
Wired's guide to lighting a video at home makes the point that direction and softness matter more than raw brightness. That single idea drives every alternative below.
The Best Lighting for TikTok Videos: A Quick Comparison
The best lighting for TikTok videos depends on where you shoot: window light for free and flattering results, clip-on lights for portability, and softboxes or LED panels for control. The table below matches each ring light alternative to the creator it suits, so you can pick a lane before spending anything.
| Option | Best For | Setup Effort | Typical Cost |
|---|---|---|---|
| Window light | Beginners, zero budget | None | Free |
| Clip-on LED | Filming anywhere, phone-only | Seconds | $21.99 |
| LED panel light | Controlled, repeatable look | Minutes | $66.99-$113.99 |
| Softbox kit | Product and portrait shoots | 10-15 minutes | $130.99 |
| Portable COB light | On-location, high output | Minutes | $190.99+ |
For a deeper look at kit options before committing, the affordable lighting kits guide breaks down what each tier actually gets you.
Natural Lighting for Videos: Using Windows and Sunlight
Natural lighting for videos is the cheapest upgrade available, and it beats a cheap ring light on skin tone almost every time. A large window acts like a giant softbox: it wraps light around the face and reduces harsh shadows. Position your phone so the window is to your side or slightly in front, never directly behind you.
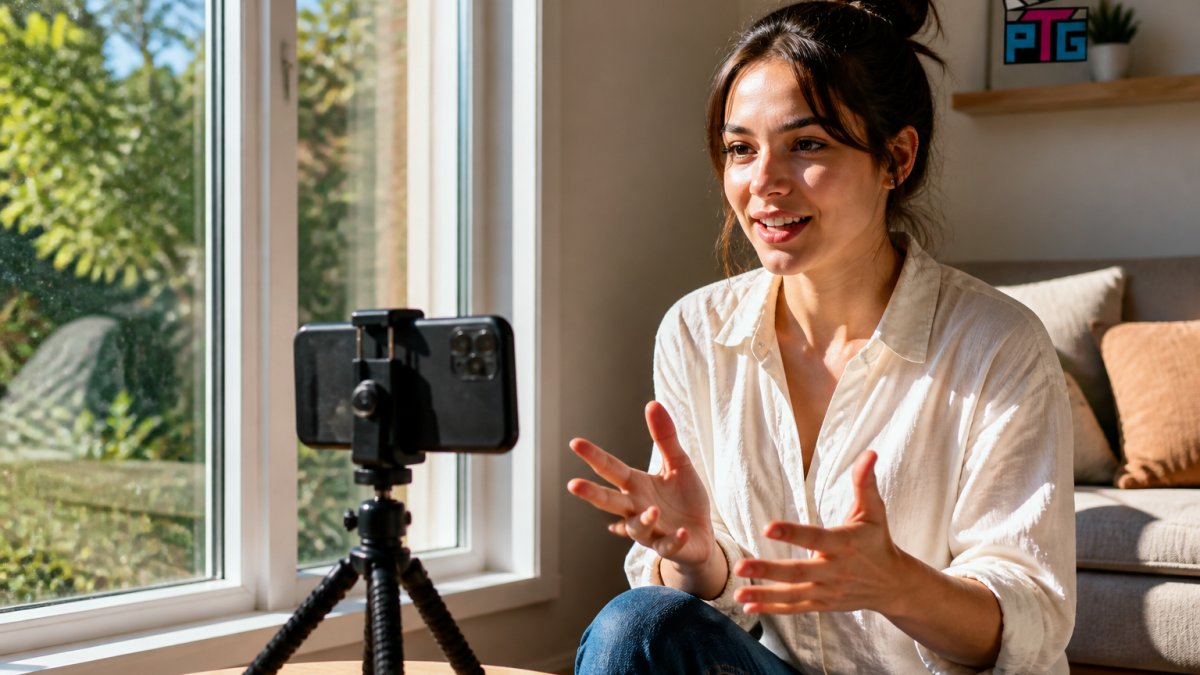
Timing matters. Midday sun is hard and unflattering, while morning and late afternoon light is softer and warmer. Overcast days are secretly ideal because clouds diffuse the sun for free. If the window light is too strong, hang a sheer white curtain in front of it as diffusion.
Watch out: shooting with a bright window behind you turns your face into a silhouette. Turn around so the light hits you, not the wall behind you.
For a full beginner walkthrough of building around window light, see the budget home studio guide.
Clip-On Lights and Portable Lighting for On-the-Go Creators
Clip-on lights solve the one thing window light cannot: shooting away from home. These small LED units clamp onto a phone and add a soft fill that lifts shadows without the flat ring-light look. The Roreta Clip-On LED Selfie Light ($21.99) offers three modes (cold, natural, warm) and five brightness levels, with a soft side-lighting design.
For creators who want more punch, the COLBOR W60/W100 Handheld COB LED Light ($212.99 and up) is a pocket-sized COB unit with bi-color output from 2800K to 6500K, app control, and CRI 97+ for accurate skin tones. It weighs 345g and mounts to a camera or stand.
- Best for: creators filming in cars, on location, or in rooms with bad overhead light.
- Skip if: you only ever shoot in one spot with good window light.
Portable lighting has improved fast. DPReview's coverage of compact LED lighting tracks how small these battery-powered units have become without losing output.
Softboxes vs. LED Panel Light for Video: Which Is Right for You?
Softboxes win on softness and LED panels win on portability. A softbox spreads light through a large diffused front, which is why portrait and product photographers rely on them for flattering, shadow-reducing output. An LED panel light is smaller, runs on battery, and fits on a desk or tripod for quick video work.
The Ulanzi P40 40W Bi-Color LED Video Panel Light ($113.99) covers 2700K to 6500K with 1-100% brightness and a built-in battery. If you want a full studio spread, the Photography Lighting Kit with Umbrellas and Background Stand ($130.99) includes softboxes, umbrellas, stands, and backdrops for product and portrait shoots.
Softboxes take longer to set up and need more space. Panels clip to a stand and go. For a home setup that doubles as a desk, a panel is the practical pick.
Color Temperature and Kelvin Settings for Accurate Skin Tones
Color temperature is the warmth or coolness of light, measured in Kelvin, and it decides whether skin looks natural or sickly.
The practical rule is simple: pick one color temperature for the whole scene and make every light match it.
Roreta Clip-On LED Selfie Light with Adjustable Color Temperature →
Here is the workflow that works:
- Set the key light first. Choose your main source, window, panel, or clip-on, and note its Kelvin rating. Window daylight is roughly 5600K; a bi-color LED lets you dial in an exact number.
- Match every fill and accent light to the key. If your panel is at 5600K, set the second light to 5600K. Do not eyeball it; use the fixture's display.
- Lock white balance on the phone. In most smartphone camera apps, tap and hold the subject to trigger AE/AF lock, then adjust the white balance slider manually rather than leaving it on auto. On iPhones this lives in the AE/AF lock controls; on many Android camera apps it is a separate WB slider. Locking prevents the camera from drifting mid-take as you move.
- Check skin on screen, not in the room. Your eyes adapt to warm light and make it look neutral. Judge the preview image, and compare against a known reference like a white sheet of paper in frame.
Bi-color fixtures make this easy because you can dial the exact Kelvin instead of guessing. The Ulanzi LT003 RGB Panel ($66.99) spans 2500K to 9000K with CRI above 95, and the Ulanzi UA20 Inflatable Tube Light ($81.99) covers 2700K to 6500K with soft, wraparound output.
A common mistake is mixing a cool LED with warm room lamps and then correcting in editing. Fix it on set instead: turn the room lights off and light the scene yourself, or swap the bulbs to match your key. Correction in post costs time and still leaves color casts in shadows.
Watch out: high CRI is not the same as correct color temperature. A light can render colors accurately and still be the wrong Kelvin for your scene, so check both specs before you buy.
Adobe's guide to white balance and color explains how to judge warmth on screen before you record.
Lighting for Spectacle Wearers and Smartphone Camera Settings
The fix is geometry, not gear: move the light higher and to one side so the reflection angles away from the lens, and tilt the glasses down slightly by lowering your chin a touch.
Here is the placement sequence that works for glasses:
- Raise the key light above eye level. A light at or below eye level reflects directly into the lens. Above eye level pushes the reflection up and out of frame.
- Move it 30 to 45 degrees off camera axis. Side placement keeps the reflection off the lens surface while still shaping the face.
- Soften the source. A diffused panel or a window spreads the reflection into a dim wash instead of a bright dot.
- Angle the glasses down slightly. A small chin dip changes the lens angle enough to move the reflection away from the camera.
On the phone side, lock exposure and focus before recording so the camera stops hunting as you move. Tap and hold your subject until the AE/AF lock indicator appears, then drag the exposure slider down slightly, most phone cameras overexpose faces under bright light, and pulling exposure down preserves skin detail.
Lighting and camera settings work together: good light lets the camera use cleaner settings. If you are shooting under a dim clip-on light, the phone raises ISO and you get grain; a brighter, softer key light lets you keep ISO low and the image clean.
Adobe's guide to white balance and color explains how to judge warmth on screen before you record.
If you wear glasses, placing a panel high and angled down can help reduce reflections, and locking exposure before you record helps keep takes clean.
Build Your Perfect Take Setup with Perfect Take Gear
Getting off the ring light is mostly about direction, softness, and matching your light to the room. Start with a window, add a clip-on for mobility, then step up to a panel or softbox when you want a repeatable look. Every option here costs less than a full studio rental and works with the phone you already own.
Perfect Take Gear offers creator lighting, camera, and audio gear to build that setup in one place. If you are weighing a lighting upgrade against a new phone or microphone, browsing the Content Creator Gear & Equipment range alongside the Cameras, Lighting & Audio Equipment selection makes it easier to see how the pieces fit together. The Ulanzi P40 panel and COLBOR handheld light are two of the most versatile starting points, and the magnetic phone light covers quick filming on the move.


Frequently Asked Questions
What are the best ring light alternatives for TikTok videos?
The best alternatives depend on your setup. For portability, clip-on lights like the Roreta Clip-On LED are great. For a professional look, softboxes or LED panels like the Ulanzi P40 offer more control over diffusion and color temperature. Natural window light is a free option that provides flattering, soft illumination. Many creators combine a key light with a reflector to reduce shadows.
Can I use natural lighting for videos instead of a ring light?
Yes, natural lighting for videos can be very effective. Position yourself facing a window with indirect sunlight. This provides a large, soft light source that is flattering and reduces harsh shadows. Avoid direct sunlight, which can cause squinting and strong contrast. You can use a sheer curtain as a diffusion sheet to soften the light further.
Are softboxes or LED panels better than ring lights for TikTok?
Softboxes and LED panels offer more control than ring lights. Softboxes provide soft, diffused light that is ideal for portraits, while LED panels are versatile and often have adjustable color temperature. Ring lights create a distinctive circular catchlight and even illumination, but they can be less flattering for some face shapes. The best choice depends on your desired look and budget.
How can I improve my TikTok lighting without buying a ring light?
You can improve lighting without a ring light by using a desk lamp with a diffuser, like a white sheet or parchment paper, to soften the light. Position the lamp at a 45-degree angle to your face. You can also use a reflector, such as a white foam board, to bounce light into shadows. For a portable option, a clip-on LED light is a budget-friendly alternative.
The challenge is not finding gear, it is choosing the right first piece. Perfect Take Gear offers affordable creator lighting, professional-grade studio modifiers, and starter kits built for new creators, so you can turn any room into a studio without overspending. Get started with Perfect Take Gear and light your next TikTok like a pro.
