

How to Optimize Your Streaming Setup for Low Bandwidth
Last Updated: November 6, 2026
Quick Summary
To optimize your streaming setup for low bandwidth, measure your upload speed at your normal streaming hour and set your bitrate at 75-80% of the lowest result, dropping to 50-70% if the connection is variable. Then lower resolution to 720p, use a hardware encoder with CBR, and verify dropped frames after going live.
- Run an upload speed test three times and use the lowest result as your working number.
- A stable connection can run bitrate at 75-80% of the lowest upload result.
- Lower resolution before frame rate when the picture looks blocky.
- Set OBS to CBR with a 2-second keyframe interval and hardware encoding.
- A high VBV buffer size can cause bandwidth spikes and dropped frames on limited connections.
Table of Contents
- Why Low Bandwidth Breaks Your Stream (and What to Check First)
- Run an Internet Speed Test for Streaming Before You Change Anything
- Find the Best Bitrate for Streaming on Slow Internet
- Streaming at 720p vs 1080p on a Limited Connection
- Recommended OBS Settings for Twitch When Upload Speed Is Tight
- Fix Unstable Connections: Ethernet, Wi-Fi, and Cellular Fallback
- Tune Your Gear and Scene Complexity Before You Buy More Bandwidth
- Build Your Low-Bandwidth Streaming Kit with Perfect Take Gear
- Frequently Asked Questions
Why Low Bandwidth Breaks Your Stream (and What to Check First)
A live stream fails when upload speed drops below what the encoder needs to send video out. Most internet connections have enough download speed for streaming, but upload speed is the bottleneck that causes buffering, lag, and dropped frames. This guide walks through the fixes, from speed tests to encoder settings, so a low bandwidth connection can still produce a clean, watchable stream.
The first thing to check is not your bitrate. It is your upload speed, measured at the same time of day you plan to stream.
The 80% Upload Rule
The 80% upload rule means a stream's bitrate should never exceed 80% of your measured upload speed. According to Nerd or Die's OBS stream settings guide, a connection with a 7 Mbps maximum upload speed should not run a bitrate above that 80% threshold. The remaining headroom absorbs network congestion, background applications, and jitter so the stream does not collapse the moment another device on the network wakes up.
Run an Internet Speed Test for Streaming Before You Change Anything
An internet speed test for streaming measures upload speed, not just download speed, because upload capacity is what carries your video to the platform. Run the test three times: morning, evening, and during your usual streaming hours. Use the lowest result as your working number.
Test on the same connection you stream from, with Wi-Fi off if possible. A wired Ethernet test gives the truest reading. If the numbers swing wildly between runs, that variance itself is the problem, and no bitrate setting will fix an unstable connection.
Find the Best Bitrate for Streaming on Slow Internet
The best bitrate for streaming on slow internet is not a single number pulled from a chart. It is the highest value that survives your worst realistic upload measurement with headroom left over. Broad ranges are common; the more reliable approach is to convert your own numbers into a setting using a short, repeatable calculation.
Step 1: Establish your working upload number
Run an upload speed test at least three times: once in the morning, once during evening peak, and once at the exact hour you normally stream. Record every result. Your working number is the lowest of the three, not the average. If the spread between your highest and lowest result is large, treat that spread as a warning sign and read the stability section below before you set anything.
Step 2: Reserve headroom for jitter and background traffic
The 80% rule is a starting point, not a guarantee. On a connection that fluctuates, reserve more. A practical decision tree:
- Stable connection (results within roughly 10% of each other): set bitrate at 75-80% of your lowest upload result.
- Moderately variable (results swing 10-25%): drop to 65-70% of the lowest result.
- Highly variable (results swing more than 25%, or you see jitter and packet loss): drop to 50-60% and fix the connection before raising it again.
Worked example: if your three tests return 6.2, 5.1, and 4.4 Mbps, your working number is 4.4 Mbps. On a moderately variable line, 65-70% of 4.4 lands you near 2.9-3.1 Mbps. Round down to 3,000 kbps and test from there.
Step 3: Match resolution and frame rate to the bitrate you can afford
Bitrate, resolution, and frame rate are a three-way trade. Once you know your bitrate ceiling, pick the combination that looks cleanest at that number rather than the largest number the platform allows.
| Working Upload (lowest test) | Stability | Target Bitrate | Suggested Resolution / FPS |
|---|---|---|---|
| 3 Mbps | any | ~1.5-1.8 Mbps | 720p at 30 fps |
| 5 Mbps | stable | ~3.5-4 Mbps | 720p at 60 fps |
| 5 Mbps | variable | ~2.5-3 Mbps | 720p at 30 fps |
| 7 Mbps | stable | ~5 Mbps | 1080p at 30 fps |
| 10 Mbps | stable | ~7-8 Mbps | 1080p at 60 fps |
| 10 Mbps | variable | ~5-6 Mbps | 720p at 60 fps |
Lower resolution before you lower frame rate when the picture looks blocky; lower frame rate before resolution when motion looks stuttery. Dropping 60 fps to 30 fps frees roughly half the bitrate demand with less visible harm than crushing resolution, but fast-motion content (games, action) suffers more from a frame-rate cut than a talking-head stream does.
Step 4: Verify, then adjust by one variable at a time
After you apply a setting, stream for at least 15-20 minutes at your normal hour and check your encoder's dropped-frame counter and the platform's stream health indicator. If dropped frames climb, lower bitrate by about 10-15% before touching anything else. Change one variable per test so you know what actually helped.
Watch out: a high VBV buffer size can cause bandwidth spikes that choke a limited connection and produce dropped frames, as noted in an OBS Project forum discussion on low bandwidth streams.
Streaming at 720p vs 1080p on a Limited Connection
Streaming at 720p is the better choice on a limited connection because it needs far less bandwidth than 1080p while still looking sharp on most screens. A 1080p stream at a low bitrate turns blocky and soft, while a 720p stream at the same bitrate stays clean.
Match the camera to that budget. A webcam with adjustable field of view lets a streamer frame the shot without pushing extra resolution the connection cannot carry, like the NearStream Full HD 1080p 60fps USB webcam with its adjustable FOV and built-in noise-cancelling mic. Lower resolution first, then frame rate.
Recommended OBS Settings for Twitch When Upload Speed Is Tight
Recommended OBS settings for Twitch on a tight upload speed start with a hardware encoder, CBR rate control, and a 2-second keyframe interval. Hardware encoding offloads compression to the GPU, which protects CPU capacity for the game or scene itself. But settings alone are not the goal, the goal is a verified, healthy ingest, so this section pairs the values with the checks that confirm they are working.
Base encoder values
Set these in OBS under Settings > Output (switch Output Mode to Advanced first):
- Rate control: CBR
- Bitrate: your calculated target from the section above, not a platform maximum
- Keyframe interval: 2 seconds
- Encoder: hardware (NVENC or AMD) if available; fall back to x264 only if hardware encoding is unavailable
- Audio bitrate: 96-128 kbps (stereo music benefits from 128; voice-only can sit at 96)
- Resolution: 720p, scaled down if needed
- Preset: quality-leaning but not maximum, so the GPU keeps pace
Respect the platform ceiling, not just your connection
Twitch caps ingest bitrate for most accounts well below what a fast connection can carry, and the cap differs by account tier and by whether you are streaming to a single destination. Check your account's current ingest limit in the Twitch dashboard before you set a number, and never set bitrate above both your connection headroom and the platform limit, the lower of the two wins. Streaming above the cap does not improve quality; it produces rejected frames and a worse experience for viewers.
Verify ingest health after you go live
Do not judge a setting by how it looks on your own preview. After starting the stream, open the Twitch stream health / inspector view and watch for two to three minutes:
- Dropped frames (network): should stay near zero. A rising count means your bitrate exceeds what the connection sustains, lower it.
- Dropped frames (encoding): means the encoder itself is overloaded, lower the preset or reduce scene complexity rather than the bitrate.
- Bitrate readout: should hold steady near your target. A line that sawtooths up and down signals congestion or jitter.
- Stream health rating: use it as a trend, not a single snapshot; watch it across your whole session.
Reduce what the encoder has to send
A PTZ webcam with AI tracking, such as the OBSbot Tiny 2 Lite 4K webcam, keeps the picture framed and steady while the bitrate stays low, so quality holds up without extra bandwidth. Fewer animated overlays, fewer browser sources, and a single camera instead of a multi-cam scene all lower the bitrate needed for the same perceived sharpness.

Watch out: changing bitrate, resolution, and encoder preset all at once makes it impossible to tell which change fixed or broke the stream, adjust one setting, verify for a few minutes, then move to the next.
Fix Unstable Connections: Ethernet, Wi-Fi, and Cellular Fallback
An unstable connection needs a stability fix before a settings fix. Plug in a wired Ethernet cable first. If that is not possible, move to the 5 GHz Wi-Fi band and cut the distance to the router.
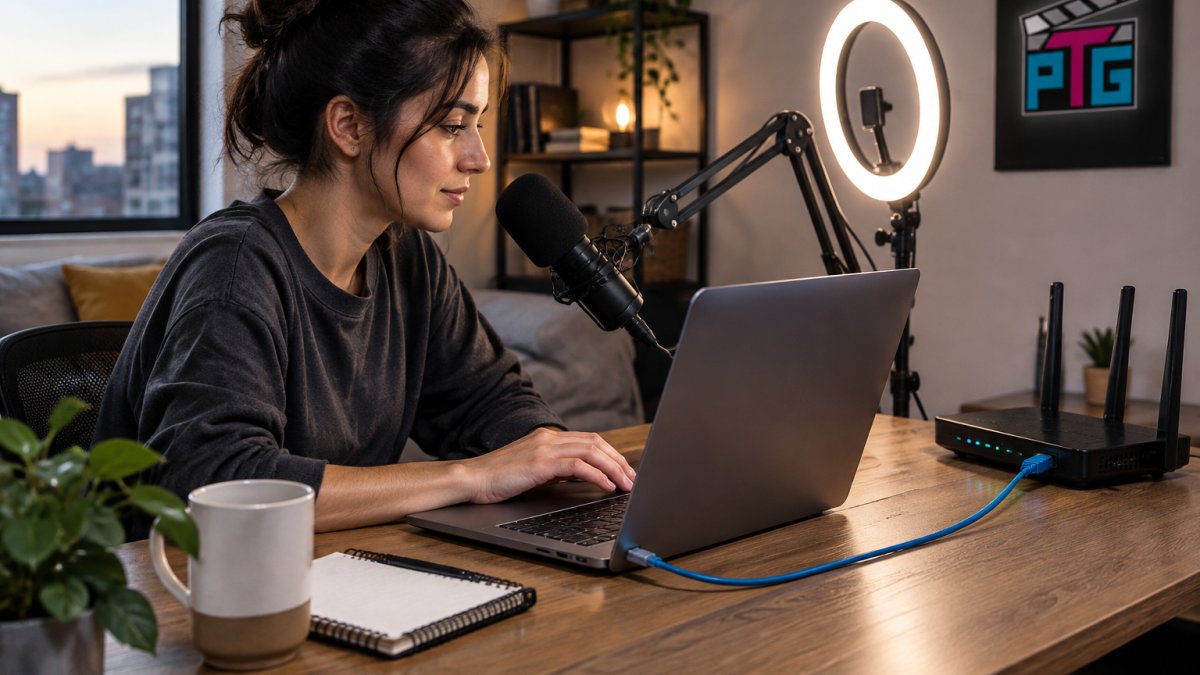
A flexible tripod like the Fotopro UFO2 tripod lets a phone or camera sit where the signal is strongest, not just where the desk is. Test packet loss and jitter alongside raw speed.

Tune Your Gear and Scene Complexity Before You Buy More Bandwidth
Scene complexity eats into encoding headroom before it ever touches bandwidth. Cut the number of browser sources, animated overlays, and high-resolution images in your scenes. Each one adds CPU load and can push the encoder into dropped frames even when upload speed looks fine.
For a deeper look at organizing the physical setup, this guide to ergonomic desk setups for streamers covers cable routing, monitor placement, and gear layout that keep a low bandwidth studio tidy and reliable.
Build Your Low-Bandwidth Streaming Kit with Perfect Take Gear
The right kit makes a low bandwidth stream look intentional rather than compromised. A USB microphone with gain control and noise reduction rounds out a setup without adding any bandwidth cost.
Perfect Take Gear offers creator gear, cameras, lighting, and audio equipment, including Content Creator Gear & Equipment and Gaming Gear & Accessories for streamers who want their setup sourced in one place.

A low bandwidth connection does not have to mean a bad stream. It means matching your bitrate, resolution, and gear to the speed you actually have.
Frequently Asked Questions
How much upload speed do I need to livestream?
Aim for upload speed that leaves headroom above your bitrate. A common rule is to keep your bitrate at or below 80% of your measured upload speed. If your upload tests at 7 Mbps, cap your bitrate around 5.6 Mbps. For 720p at 30 fps, 2,500 to 4,000 Kbps is usually enough. Run an internet speed test for streaming during the same hours you plan to go live, since evening congestion can drop your real upload capacity below what a midday test shows.
What OBS settings work best for a slow internet connection?
Start with the x264 encoder at a preset between veryfast and faster, set your video bitrate to roughly 80% of your tested upload speed, and keep your keyframe interval at 2 seconds. Lower your output resolution to 720p at 30 fps if 1080p causes dropped frames. Set the audio bitrate to 128 Kbps and avoid an oversized VBV buffer, which can cause bandwidth spikes that choke the connection. Test a short private stream before going live to confirm stability.
Does using Ethernet improve livestream stability?
Yes. A wired Ethernet connection removes the interference and signal drops that Wi-Fi introduces, which matters most on low bandwidth where every lost packet shows up as lag or buffering. If running a cable is not practical, move closer to the router or use a powerline adapter. Keep background applications like cloud backups and game downloads closed during a stream, since they compete for the same upload capacity and cause packet loss and jitter.
Should I stream at 720p or 1080p on limited bandwidth?
On a tight connection, 720p at 30 fps usually looks better than 1080p because you can allocate enough bitrate per pixel to avoid compression artifacts. Streaming at 720p vs 1080p is really a trade-off between resolution and clarity. A 1080p stream squeezed into a low bitrate turns blocky during motion, while 720p holds up. Drop to 480p only if your upload speed cannot sustain roughly 1,500 to 2,500 Kbps without dropped frames.
