

How to Use a Camera as a Webcam on Your Computer
Quick Summary
You can use a camera as a webcam by connecting it to your computer with a USB data cable and switching the camera to its webcam or USB streaming mode. Cameras without that mode need an HDMI capture device or the manufacturer's utility software instead.
- Check your camera's manual or support site for a USB streaming or webcam mode first.
- Use a USB data cable, because a charge-only cable will not carry video.
- Choose HDMI plus a capture device when your camera lacks a USB streaming mode.
- Set focus, exposure, and white balance manually to keep the image steady during calls.
- Use continuous power for calls longer than an hour to avoid a mid-meeting shutdown.
Table of Contents
- Check Whether Your Camera Can Work as a Webcam
- What You Need: Cables, Capture Hardware, and Software
- How to Use a Camera as a Webcam via USB
- How to Use DSLR as Webcam Without a Capture Card
- Setting Up Canon EOS Webcam Utility Step by Step
- Using a Phone Camera as a Webcam as a Backup
- Start Your First Video Call With the Camera Connected
- Frequently Asked Questions
Check Whether Your Camera Can Work as a Webcam
Many mirrorless and DSLR cameras can work as a webcam, but not all of them do it the same way. If you are unsure whether your camera suits webcam use, you can compare beginner vlogging cameras before deciding. Your camera model, its firmware, and the software you plan to use decide whether the setup works. Before you buy cables or install software, check these three things.
Start by looking up your camera model on the manufacturer's support site. Search for "webcam" or "USB streaming" in the specifications or the firmware notes. Many newer models support a built-in USB mode, while older models need an extra device.
Next, confirm the camera has a clean video output. Check the manual for any limit on how long the camera can stream.
Finally, match the camera to your computer and the video apps you use. Zoom, Microsoft Teams, and OBS each handle camera input a little differently. Make a short list of the apps you need before you start.
Quick check: If your camera has a USB port and a "PC Remote" or "USB Streaming" option in its menu, it can likely work as a webcam without extra hardware.
What You Need: Cables, Capture Hardware, and Software
Your setup depends on which connection method your camera supports. Most setups use one of three paths, and the right choice comes down to cost, image quality, latency, and setup complexity.
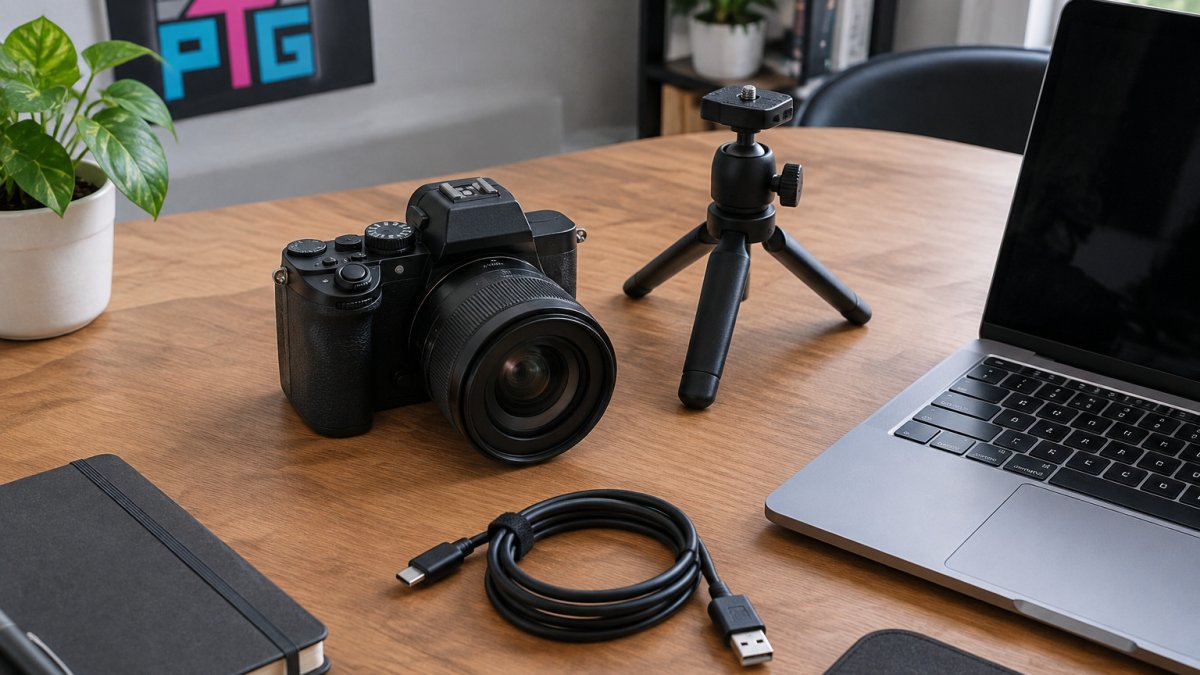
- USB data cable: It connects the camera directly to the computer. Use a data cable, not a charge-only cable. The camera must support a USB streaming or webcam mode.
- HDMI capture device: Needed when the camera has no USB streaming mode. It takes the HDMI output and turns it into a USB video feed. This path adds a device, a second cable, and a small amount of latency. Look for a capture device that advertises the resolution and frame rate you need, and confirm it works with your operating system.
- Manufacturer utility software: Some camera manufacturers offer free programs that let the computer recognize the camera as a webcam. Check the manufacturer's supported model list before relying on one.
A practical decision guide:
- Check whether your camera has a built-in USB streaming mode. If it does and the image looks good enough in a test call, start there. It is the least expensive and least complex path.
- If the USB mode is missing, capped at a low resolution, or unstable, move to HDMI plus a capture device.
- Use manufacturer utility software only when your exact model appears on the supported list. Do not assume a similar model will work.
Compatibility checks before you buy:
- Confirm the camera's USB mode name in the manual, such as "USB Streaming," "PC Remote," or "Webcam."
- Confirm the capture device lists your operating system and your conferencing app as supported.
- Confirm the cable type your camera needs, such as USB-C to USB-A or micro-USB, and that it is a data cable.
- Confirm the camera can output a clean HDMI signal without on-screen icons if you plan to use a capture device.
You will also need a power source. A camera that runs on a battery for a long time may overheat or shut off during a long call. A wall adapter or dummy battery keeps it running. For sessions longer than an hour, plan on continuous power rather than battery.
Finally, a mount helps you hold the camera steady at eye level. A small tripod or desk mount works for most people, and lighting and audio gear from Cameras, Lighting & Audio Equipment can round out the desk setup if you want a more polished look.
Watch out: A charge-only USB cable will power the camera but will not carry video, and it is the most common reason a camera does not appear in a video app.
How to Use a Camera as a Webcam via USB
USB is the easiest method when your camera supports it. Follow these steps.
- Turn the camera on and open the menu.
- Find the USB or PC connection setting and select the webcam or streaming mode.
- Connect the camera to your computer with a USB data cable.
- Open your video app and choose the camera from the list of video sources.
- Check the image in the app's preview window.
A common mistake is using a cable that only charges the camera. If the computer does not show the camera, try a different cable before you change any settings.
The steps below cover the most common setup and the mistake that causes most failures.
| Problem | Cause | Fix |
|---|---|---|
| Camera does not appear in the computer | Charge-only USB cable | Try a different cable that carries data |
| Camera does not appear in the video app | Camera not set to webcam or streaming mode | Select the webcam or streaming option in the camera menu |
| Image looks choppy | Frame rate or picture size set too high | Lower the picture size or frame rate in the app's settings |
| Camera shuts off during a long call | Battery drain or overheating | Use continuous power and shorten sessions if needed |
How to Use DSLR as Webcam Without a Capture Card
Some DSLR models can stream video through USB without any extra hardware. Check the manual for your model to confirm.
If your DSLR lacks this feature, you may still get a usable picture with a free utility or a third-party program. These programs send the camera's live view to the computer, though the frame rate and quality may be lower than a dedicated webcam.
Battery life is a concern for DSLRs during long calls. Use continuous power if you plan to stream for an extended session.
Setting Up Canon EOS Webcam Utility Step by Step
Canon offers a webcam utility for supported Canon cameras. Use it as follows.
- Download the utility from Canon's support website and install it on your computer.
- Connect a compatible Canon camera to the computer with a USB cable.
- Set the camera to the mode the utility requires, usually shown in the camera menu.
- Open the video app and choose "Canon EOS Webcam Utility" as the camera.
- Adjust the picture size and frame rate in the app's settings if the image looks choppy.
Check Canon's list of supported models before you install. Not every camera works with the utility.
Using a Phone Camera as a Webcam as a Backup
If your main camera fails or is not supported, a smartphone can serve as a backup. Both iPhone and many Android phones can connect to a computer and act as a webcam.
Mount the phone at eye level with a clamp so the picture stays steady.
A phone is handy when you need a quick setup, but it may not match the image quality of a dedicated camera.
Start Your First Video Call With the Camera Connected
Before your first call, test the setup. Open your video app, select the camera, and make a short test call. Check the framing, focus, and lighting on your screen.
Image-quality settings to check:
- Focus mode: Switch the lens to manual focus and set it once on your face. Autofocus can hunt during a call, especially when you move or when the background is busy.
- Exposure: Use manual exposure if your camera allows it. Auto exposure can brighten and darken the image as light changes behind you.
- White balance: Set a fixed white balance instead of auto so skin tones stay consistent.
- Frame rate and resolution: Match the frame rate to your app. Match the frame rate to the requirements of your video app. If the image flickers under indoor lights, try 30 frames per second or adjust the shutter speed.
- Flicker: Indoor lights can cause banding at some shutter speeds. If you see rolling bands, change the shutter speed or frame rate until they disappear.
Audio routing and synchronization:
- Decide whether to use the camera's built-in microphone, a separate USB microphone, or a headset. A separate microphone usually sounds better than a camera's built-in mic.
- In your video app, select the correct microphone input separately from the camera selection.
- If audio and video drift apart, check whether the capture device or utility adds delay, and prefer a direct USB or HDMI path with the lowest latency you can get.
- If you hear echo, mute the camera's microphone and use only one audio source.
Long-session power and heat:
- Use continuous power for calls longer than an hour. A dummy battery or wall adapter avoids a shutdown mid-meeting.
- Watch for heat. Check the manual for the maximum recording time for continuous video.
- Give the camera airflow and avoid enclosing it. If it shuts off repeatedly, shorten sessions or lower the resolution.
Privacy and teardown:
- When you finish, close the video app and disconnect the camera so it is not left in streaming mode.
- Restore any settings you changed, such as focus, exposure, and white balance, so the camera is ready for normal photography.
- If you share the computer, check the app's camera permissions so the camera is not available to apps you do not expect.
Look at the light on your face first. A window or lamp in front of you usually looks better than one behind you.
If you want a simpler setup, a ready-made webcam is an option. Some readers prefer a plug-and-play device for everyday calls, while a camera setup suits those who already own one. Gamers who stream alongside calls may also find Gaming Gear & Accessories useful for pairing with a camera-based setup.
Save your settings once the camera works. Note the mode, cable, and app settings so you can repeat the setup quickly the next time.
Frequently Asked Questions
How do I turn my camera into a webcam?
Connect the camera to your computer with a USB data cable, turn the camera on, and set its USB mode to webcam or PC streaming if it has one. Then open your video app, such as Zoom or Microsoft Teams, and select the camera as the video source. Some cameras need a free manufacturer utility installed first. If the camera does not appear, confirm the cable carries data rather than only charging, and that the camera is not in playback mode.
Can I use a DSLR as a webcam without a capture card?
Many recent DSLR and mirrorless cameras can, but only with a USB connection and a manufacturer webcam utility, such as the Canon EOS Webcam Utility. Support depends on the camera model, the operating system, and the software version, so check the manufacturer's compatibility list before you buy anything. Cameras without USB streaming support need an HDMI capture device instead, which adds hardware cost and a second cable.
Can I use my phone camera as my webcam?
Yes. Phone webcam apps and some built-in desktop features can send the phone's camera feed to your computer, usually over USB or Wi-Fi. Use USB when you can, because it tends to be more stable than wireless. Keep the phone charged or plugged in during long calls, since heat and battery drain are common problems. A phone works well as a backup when your main camera is unavailable.
Why is my camera not showing up as a webcam?
The most common causes are a charge-only USB cable, a camera left in playback or storage mode, a missing or outdated webcam utility, and an app that is still using a different video source. Check your video app's camera setting first, then restart both the camera and the app. If the camera still does not appear, try another USB port or cable, and confirm your model supports USB webcam output.
