

How to Set Up Mobile Lighting for Videos That Look Pro
Last Updated: November 8, 2026
Quick Summary
To set up mobile lighting for videos, start with a key light at a 45-degree angle slightly above eye level, soften it with a diffuser, then add a fill light at about half the key's power on the opposite side. Add a backlight behind the subject for a full 3 point setup, and lock exposure and white balance on your phone before recording.
- A practical mobile lighting kit has four pieces: a key light, a fill light, a stand system, and a diffuser.
- Moving a light closer to your subject makes the light softer and fixes most beginner lighting problems.
- Run the fill light at roughly 50 percent of the key light's power to keep depth in the face.
- Lock focus and exposure on the subject's face, then switch to a 30 or 60 frame rate to avoid LED flicker.
- Practice your setup until it takes under five minutes.
Table of Contents
- What You Need Before You Position a Single Light
- Start With a One Light Video Setup
- Add a Fill for a 2 Point Lighting Setup for Video
- Build a Full 3 Point Lighting Setup
- Dial In Your Phone: Exposure, White Balance, and Flicker
- Cheap Lighting for YouTube Videos That Still Looks Good
- Fix It on Location: Shadows, Mixed Light, and Skin Tones
- Pack Your Mobile Lighting Kit With Perfect Take Gear
- Frequently Asked Questions
What You Need Before You Position a Single Light
Good mobile lighting is not about owning a lot of gear. It is about controlling three things: where light comes from, how hard or soft it lands, and how your phone reads color.
The gear list is shorter than most people expect. Here is what has to be in the bag before the first light goes up.
- Two light sources. One main light and one fill light cover most shots.
- Two stands. Tabletop or full height, depending on your room.
- A diffuser. A softbox, a scrim, or even a white shower curtain works.
That is the whole starting point. Everything else is an upgrade.
The Four-Piece Mobile Lighting Kit
A practical mobile lighting kit has four pieces that work together: a key light, a fill light, a stand system, and a way to soften the beam. Skip any one of these and the setup fights you.
The key light does most of the work. It sits to one side of the subject and shapes the face. The fill light opens up the shadows on the other side.
If you want a kit that already covers the key light, stand, and color control in one box, the Bowens Video Studio Kit 90 pairs a dimmable LED head with a 2-meter tripod and a 3000K to 6000K color range.
Power, Weight, and Packing Order
Battery-powered lights change how you shoot outside a studio. No outlet, no problem. The trade-off is weight and runtime, so pack with that in mind.
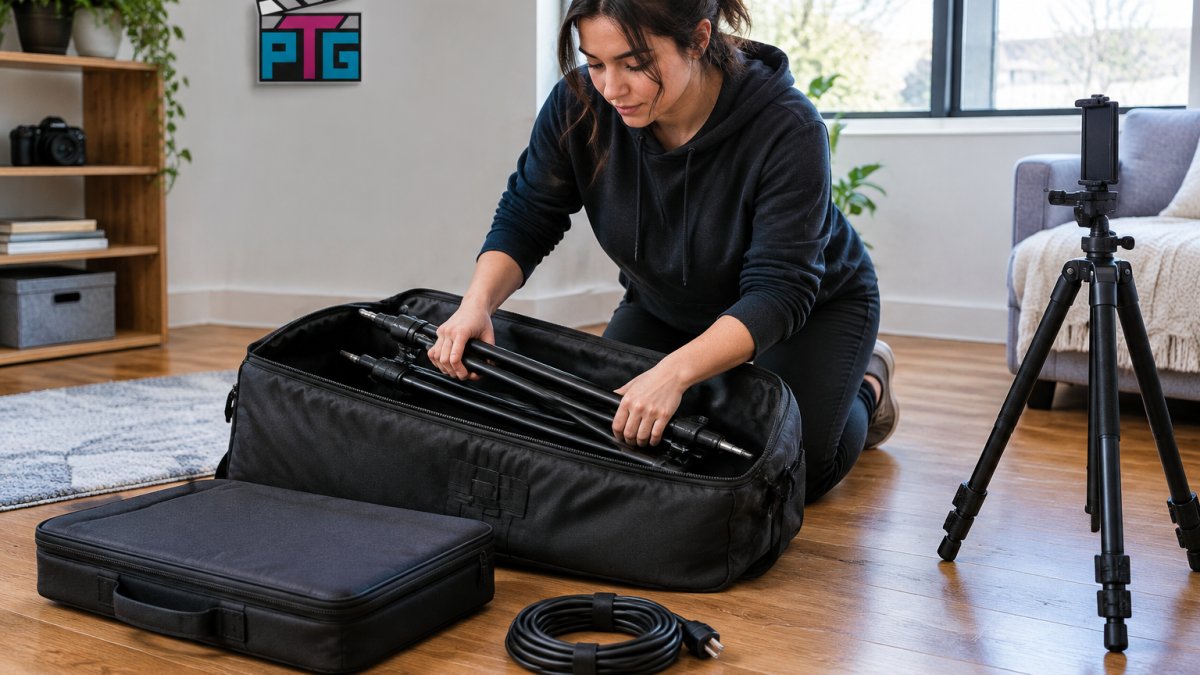
Load the bag in this order:
- Heaviest items at the bottom, close to your back.
- Stands strapped to the outside, not buried inside.
- Lights in padded cases, wrapped separately from stands.
- Cables and chargers in one pouch, so nothing gets lost.
A lightweight phone tripod rounds out the kit and keeps the whole bag manageable. This guide to a cheap tripod for phone vlogging covers the options that pack flat.
Start With a One Light Video Setup
A one light video setup is the fastest way to improve a shot. One light, placed well, beats three lights placed badly.
Here is the sequence:
- Put the light at a 45-degree angle to your subject, slightly above eye level.
- Aim it at the face, not the wall.
- Soften it with a diffuser or bounce it off a white wall.
- Check the shadow under the nose. If it is harsh and dark, move the light closer.
Closer means softer. That single rule fixes most beginner lighting problems.
A clip-on LED light works well for this when space is tight. The Roreta Clip-On LED Selfie Light offers three color modes and five brightness levels, and its side-lighting design provides indirect illumination for a softer, more even look.

Add a Fill for a 2 Point Lighting Setup for Video
A 2 point lighting setup for video adds a fill light on the opposite side of the key. The fill does not need to be bright. Its job is to lift the shadows so the face does not go half-dark.
Set the fill at roughly half the intensity of the key. If the key is at full power, run the fill at about 50 percent.
For a battery-powered fill that travels well, the Ulanzi LT003 RGB panel covers 2500K to 9000K with a high color rendering index, which keeps skin tones natural.
Watch out: putting the fill at the same power as the key flattens the face and kills all depth. Keep it lower.
Build a Full 3 Point Lighting Setup
A 3 point lighting setup adds a backlight behind the subject. That third light separates the subject from the background and adds a rim of light along the shoulders and hair.
The classic arrangement:
- Key light: 45 degrees to one side, slightly above eye level.
- Fill light: opposite the key, lower power.
- Backlight: behind and above the subject, aimed at the back of the head.
Keep the backlight out of frame. Flag it with a piece of black card if it spills into the lens.
Dial In Your Phone: Exposure, White Balance, and Flicker
Phone cameras lie about exposure when a bright light enters the frame. Lock exposure and white balance before you record, or the image will drift mid-take.
The fix takes ten seconds:
- Tap and hold on the subject's face to lock focus and exposure.
- Drag the exposure slider down slightly so highlights do not clip.
- Set white balance manually to match your light's color temperature.
- Switch to a 30 or 60 frame rate to avoid LED flicker.
Flicker comes from a mismatch between your light's pulse and your shutter. If bands roll across the screen, change the frame rate. It usually clears up immediately.
Not sure whether a phone is enough? This breakdown of whether a smartphone is good enough for YouTube covers what phones do well and where they fall short.
Cheap Lighting for YouTube Videos That Still Looks Good
Budget lighting works when you spend on placement instead of power. A cheap light in the right spot beats an expensive one in the wrong spot.
Three low-cost moves that pay off:
- Bounce instead of buy. Aim a bare light at a white wall or foam board.
- Use one light well. A single soft source reads more professional than two hard ones.
- Diffuse everything. A sheet of diffusion material costs little and changes a lot.
The Ulanzi M10 magnetic phone light fits this approach. Its bendable gooseneck and five color temperature levels let you shape a small light without buying a stand.
American Society of Cinematographers lighting guidance
Fix It on Location: Shadows, Mixed Light, and Skin Tones
On-location shoots throw problems a studio never does. Windows, overheads, and streetlights all fight your lights, and the conditions change while you shoot. The fix is a repeatable workflow, not more gear.
The 60-Second Location Scan
Before you unpack a single light, walk the room and answer four questions in order:
- Where is the dominant light coming from? Find the brightest window or overhead and note its direction. That is your starting key direction, whether you like it or not.
- What color is it? Daylight through a window runs cool and blue; tungsten overheads run warm and orange. Note the mix before you add your own lights.
- What is behind the subject? A bright window or a busy wall will fight your subject for attention. Plan to move the subject or the camera, not just the lights.
- What is reflective? Glossy tables, whiteboards, and windows bounce light back into the lens. Note them so you can flag or angle away from them.
Do it every time the location changes.
Workflow for Mixed Daylight and Changing Conditions
When daylight is your key, your added lights become fill and backlight. Match them to the window, not the other way around.
- Set white balance to the dominant source first. If the window dominates, white balance to daylight and warm your added lights to match. If overheads dominate, do the reverse.
- Use your key light as fill when the window is strong. A window at 45 degrees is already a key. Add a low-power fill on the shadow side and a backlight behind the subject.
- Re-check as the sun moves. A window that lit the face at 10 a.m. may be behind the subject by 2 p.m. Re-scan and reposition rather than pushing light power higher.
Watch out: raising light power to fight a bright window usually blows out the subject's face before it balances the background. Move the subject away from the window or diffuse the window instead.
Symptom-to-Fix Table
| Problem | Cause | Fix |
|---|---|---|
| Hard shadow on the wall | Light too close and bare | Add diffusion, move light back |
| Orange and blue mix | Daylight plus tungsten | Match color temperature on all lights, or kill one source |
| Shiny forehead or glasses | Direct frontal light | Raise the light, angle it down, add diffusion |
| Flat, washed-out face | Fill too strong | Drop fill power by half |
| Green tint on skin | Mixed sources, often fluorescent | Set white balance manually, or replace the source |
| Rolling bands on screen | LED pulse vs. shutter | Change frame rate to 30 or 60, or dim the light |
| Blown highlights on cheekbones | Exposure set for the background | Lock exposure on the face, lower the key |
| Dark, muddy shadow side | No fill or fill too far away | Move fill closer, bounce it off a white wall |
Lighting Different Skin Tones and Reflective Subjects
Skin tones need extra care because the same light reads differently across subjects. Deep skin tones show harsh specular highlights more easily, so soften the key with a diffuser and add a subtle fill to keep detail in the shadow side.
Reflective subjects, glasses, bald heads, glossy tables, and screens, need the light moved, not dimmed. Raise the key and angle it down so the reflection bounces toward the floor instead of the lens.
American Society of Cinematographers lighting guidance
Pack Your Mobile Lighting Kit With Perfect Take Gear
A mobile lighting kit only helps if it travels well and sets up fast. Build around two lights, two stands, one diffuser, and a phone mount, then practice the setup until it takes under five minutes.
Perfect Take Gear offers Content Creator Gear & Equipment, including the individual lights below. The Ulanzi LM19 MagSafe video light attaches magnetically to the back of an iPhone, adjusts from 2500K to 8500K, and its 180° flip design doubles as a phone stand. The UEGOGO 63-inch LED tripod bundles a tripod, a 12-inch three-color light, and dual phone holders in one setup.

For creators who want a compact on-camera fill, the rechargeable magnetic mini LED light for DJI Osmo Pocket 3 attaches magnetically and includes a storage bag.

The gap between a flat video and a professional one usually comes down to light placement, not budget.
Frequently Asked Questions
Can you make good videos with one light?
Yes. A single LED panel placed at roughly a 45-degree angle to your subject, slightly above eye level, gives soft directional light with one clean shadow side. Put a white wall or a $10 foam board opposite the light to bounce a little fill back in. One light works best in a small room where walls bounce light naturally, and it is the fastest mobile lighting setup to break down when you shoot alone.
Where should you place lights when filming with a phone?
Treat the phone as your camera position and place the key light 45 degrees to one side, about 3 to 5 feet away and slightly above eye level. Keep the phone's rear camera facing the subject, not the screen. If you add a backlight, put it behind the subject and out of frame so it separates hair and shoulders from the background. Never place a light directly behind the phone unless you want flat, shadowless footage.
How do you avoid harsh shadows in mobile videos?
Move the light closer and diffuse it. Distance makes a light source relatively smaller, which hardens shadow edges, so a panel 2 feet away with a diffuser gives softer results than the same panel 8 feet away bare. Bounce light off a white ceiling or wall, and add a fill source on the shadow side at about half the key light's brightness. If shadows still look harsh, raise the light slightly and tilt it down toward the subject.
What phone settings should I change before recording under LED lights?
Lock exposure and white balance by tapping and holding on your subject in the camera app, then drag the exposure slider down slightly so highlights on the face do not clip. Set white balance manually to match your light's color temperature, around 3200K for warm indoor setups and 5600K for daylight-balanced panels. If you see banding or rolling lines, switch the light to a lower brightness level or change your shutter speed, since some LEDs flicker at certain dimming levels.
