

How to Film TikTok Videos With Natural Light
Last Updated: November 4, 2026
Quick Summary
To film TikTok videos with natural light, place your phone between you and a window, then face the daylight so your face is bright and evenly lit. Soften direct sunlight with a sheer curtain, check the phone preview, and lock focus and exposure on your face before recording if your camera app supports it.
- Use a white foam board opposite the window to bounce light toward the shadowed side of your face.
- For product demos, turn slightly toward the window to show texture.
- Keep the phone and subject in the same positions across takes.
- Add gentle LED fill when daylight is too weak or uneven.
Table of Contents
- How to Get Good Lighting for TikTok Videos
- How to Film With Window Light
- Best Time of Day to Film Videos With Natural Light
- How to Avoid Shadows When Filming TikTok Videos
- Step 1: Lock Exposure, Focus, and Framing
- Step 2: Keep Natural Light Consistent Across Takes
- Step 3: Choose a Setup for Your Next TikTok Shoot
- Frequently Asked Questions
How to Get Good Lighting for TikTok Videos
According to TikTok’s natural-light phone setup tutorial, placing the subject in front of a window helps light the face, while filming toward the window can leave the subject underexposed. This guide from Perfect Take Gear explains how to film tiktok videos with natural light using a phone, a window, and simple adjustments. Natural light is daylight used as the main source of light for a video. The goal is not fancy gear; it is a bright, even face and a clear frame.
A common mistake is to chase a perfect setup before checking where the light falls. Start with the window, then add a light only if the room needs it. The 2026 Indie Shorts Mag guide to natural light in cinematography also stresses planning and light control.
Use this quick setup guide:
| Situation | Try this | Watch for |
|---|---|---|
| Bright window | Face the window | Squinting |
| Direct sun | Add a sheer curtain | Hard shadows |
| Dim room | Add gentle LED fill | Mixed color tones |
For creators asking how to get good lighting for TikTok videos, the best first move is to face a window and check the preview.
How to Film With Window Light
To film with window light, place the phone between you and the window, then face the daylight. Keep the window just behind or beside the phone, not behind your head. This simple position gives the camera a clear view of your face and helps avoid dark backlighting.
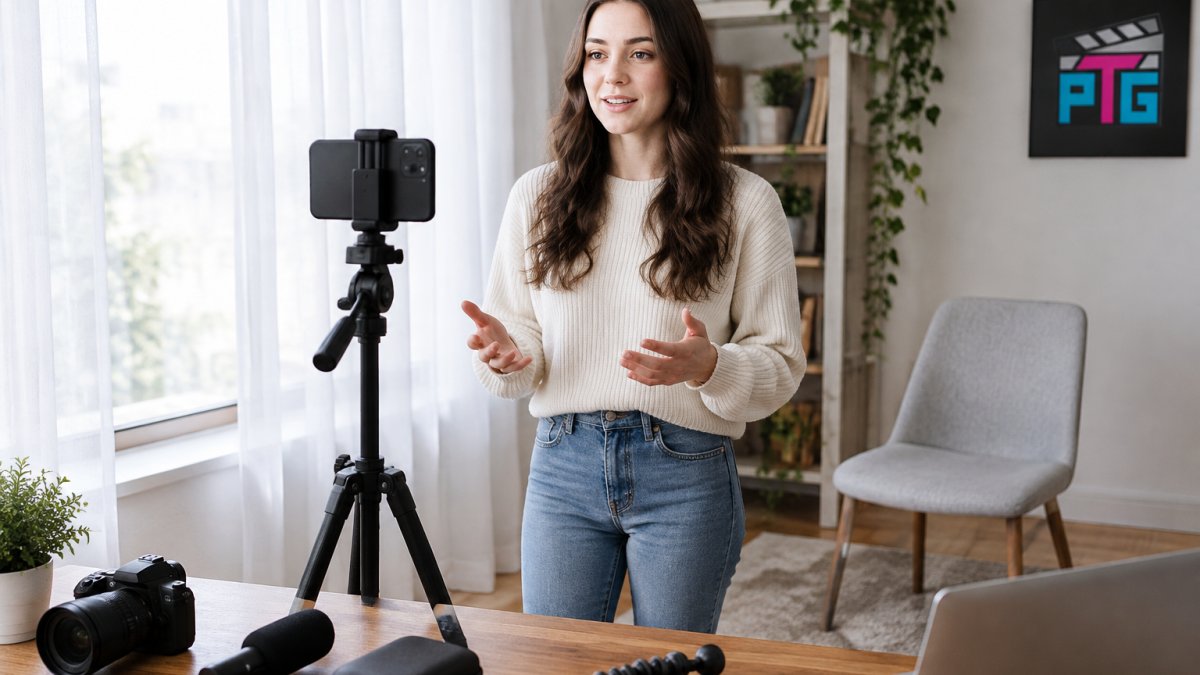
A sheer curtain acts as a diffuser, softening direct sunlight. If the light falls unevenly, use a white reflector such as a plain foam board opposite the window to bounce some light back toward the shadowed side of the face.
For how to film with window light, match the setup to the video style:
- Talking head: Face the window for soft, even light.
- Product demo: Turn slightly for side lighting and visible texture.
- Lifestyle clip: Move with the action, but keep the light on the subject.
Perfect Take Gear’s guide to lighting TikTok videos without a ring light offers more window-friendly options.
Best Time of Day to Film Videos With Natural Light
The best time of day to film videos depends on the window, weather, and room, not a fixed clock time. Golden hour can give warm, gentle light, while a cloudy sky often softens daylight. Midday sun can look harsh, so use a curtain or move away from direct sunlight.
A common mistake is filming several takes as the sun shifts across the room. The face can change from bright to dim between clips. Check the light on your face before each take, and keep the phone and subject in the same spots.
- Golden hour: Try it for warm, softer scenes.
- Cloudy daylight: Use it for steady, diffused light.
- Direct midday sun: Soften it or choose another spot.
The 2026 natural-light guidance from FixThePhoto recommends gentle, spread-out LED light when daylight is too weak or uneven.
How to Avoid Shadows When Filming TikTok Videos
To avoid distracting shadows, first identify what is casting them and where the main light is coming from. A shadow is not always a problem: soft side light can add shape, while a sharp shadow across the eyes or a dark patch on the background can pull attention away from the subject.
- Dark eye sockets or a shadow under the nose: Turn your face more toward the window, or move closer to it. If the light is direct, hang a sheer curtain between the window and the subject to soften the beam.
- One side of the face is much darker: Place a white foam board or other matte white surface on the shadow side, just outside the frame. Move it closer to the face for a stronger bounce; move it farther away for a subtler lift.
- A hard shadow on the wall: Move the subject farther from the wall, then adjust the phone and subject so the window lights the face rather than casting a crisp silhouette behind it.
- A bright window and a dark face: Turn the subject toward the window and reframe so the window is not directly behind them. Tap and hold on the face to lock focus and exposure if the phone camera supports it, then check that the face is bright without washing out the skin.
For a talking-head video, aim for soft, even light across the eyes and face. For a product demo, a little side shadow can show texture and shape; use a reflector only if the shadow hides important detail. For a lifestyle clip, prioritize light that stays usable as the subject moves, rather than trying to eliminate every shadow.
Watch out: A reflector can brighten the shadow side, but a glossy or strongly colored surface may create an unwanted bright spot or tint the skin; use a matte white surface and review a short test clip.
Before recording, check the face, the wall behind it, and the brightest part of the frame in the phone preview. If the light changes, make one adjustment at a time, subject position, curtain, or reflector, so you can see which change actually fixes the problem.
Ulanzi M10 Magnetic Flexible Phone Light →
Step 1: Lock Exposure, Focus, and Framing
Lock exposure and focus on the face before recording, then check that the vertical frame leaves room for movement. Exposure lock keeps the phone from brightening or darkening the image as the scene changes. Focus lock helps keep the face sharp.
Tap and hold the face on the phone preview if the camera app supports locking. Then adjust exposure so skin looks clear without losing detail in bright areas. Turn on grid lines to keep the eyes near the upper part of the frame.
A stable phone also helps keep each take consistent. Perfect Take Gear’s adjustable desktop phone stand is an option for a fixed filming position.

- Clean the lens before recording.
- Check highlights on the face and window.
- Keep enough space above the head.
Step 2: Keep Natural Light Consistent Across Takes
Daylight changes as clouds move and the sun shifts, so consistency starts before editing. Mark the phone and subject positions, keep the same window and curtain setup, and record a short test whenever you return to the scene. If the face or background looks different from the previous take, pause and match the setup before continuing.
Set focus and exposure on the face when your camera app allows it. If the app offers manual white balance, set it for the scene and keep it fixed across takes; otherwise, avoid changing rooms or mixing daylight with a warm lamp, which can make skin color shift between clips. When a cloud passes, wait for the light to settle or record the affected shots together so the change is easier to manage in editing.
A simple color-correction pass in CapCut
After importing the clips into CapCut, compare shots side by side and correct the most obvious mismatch before adding a creative look:
- Match brightness first. Use the preview to check whether the face is too dark or the window is losing detail. Adjust exposure or brightness gently; lowering highlights can help retain detail in bright areas, while lifting shadows can reveal detail on the darker side of the face.
- Correct the color cast. If skin looks too orange, blue, or green compared with another take, adjust temperature and tint in small steps. Use the same visual reference, the subject’s skin and a neutral white or gray object, when comparing clips.
- Match neighboring clips. Apply similar adjustments to shots from the same setup, then review them in sequence. A correction that looks good on one clip may look wrong on another if the daylight changed.
- Keep the finish natural. Add saturation or a filter only after exposure and color are close. Strong filters can exaggerate differences in skin tone and make daylight look artificial.
This capture-to-edit workflow is useful when a cloud or small setup change creates a mild mismatch. It cannot restore detail that was clipped to pure white or buried in deep shadow, so correct the lighting and exposure before recording whenever possible.
Watch out: Editing controls and labels can vary by app version, and heavy shadow lifting can make phone footage look noisy; make small changes and review the exported video on the same phone you used to film.
Step 3: Choose a Setup for Your Next TikTok Shoot
Choose the simplest setup that fits the video: a window for a talking head, softened daylight for close-up demos, or gentle LED fill when natural light is not enough. A ring light can add adjustable fill, but it is not the first step. Good blocking and a steady frame matter more than extra gear.
Use this checklist before recording:
- Face the window or main light source.
- Soften direct sunlight with a curtain.
- Lock focus and exposure on the face.
- Check the frame and background.
- Record a short test and review shadows.
Perfect Take Gear carries [Content Creator Gear & Equipment] and [Cameras, Lighting & Audio Equipment] for setups that need more control. For changing daylight, start with the window, then add a fill light only when the preview shows a clear need.
Frequently Asked Questions
How do you film TikTok videos with natural light?
Place your phone at eye level and position yourself facing a window or another broad natural light source. Check that the brightest area is lighting your face rather than sitting behind you, then tap your face on screen to set focus and exposure. Record a short test, check for clipped highlights or deep shadows, and adjust your position before filming the full take.
Where should you stand when filming with window light?
Stand facing the window, with the phone between you and the window so the light falls across your face. Move farther from the glass if direct sunlight creates harsh highlights, or soften it with a sheer curtain. For a more dimensional look, turn slightly so the window provides side lighting, then check that the shadow on the far side of your face remains visible but not too dark.
What time of day is best for filming TikTok videos in natural light?
The best time depends on the direction of your windows and the weather. Golden hour often gives warm, softer light, while midday sun can create strong contrast and hard shadows. Try filming when daylight is steady in your room, then record a short test to check skin tone and exposure. On a cloudy day, the sky can act as a broad, soft light source.
How do you film TikTok videos when there is not enough natural light?
Move closer to the window and remove obstacles that block daylight. If the room still looks dim or the light changes between takes, add a gentle LED fill rather than raising exposure until highlights lose detail. A phone-mounted light can provide adjustable brightness and color temperature; match its color to the room's ambient light to avoid a noticeably mixed look.
Changing daylight can make matching TikTok takes harder than expected. Perfect Take Gear offers creator gear, lighting, and mobile video equipment to help build a setup around the way you film. Get started with Perfect Take Gear and find the gear that fits your next shoot.
