

Affordable Vocal Booth Solutions for Home Studio
Table of Contents
- Why Vocal Booth Solutions Matter for Home Recording
- DIY Vocal Booth Plans You Can Build This Weekend
- Soundproofing vs Acoustic Treatment: What Your Booth Actually Needs
- Acoustic Treatment for Home Studio Setup
- Budget-Friendly Materials and Where to Source Them
- Essential Recording Gear to Pair With Your Booth
- Ventilation, Cable Management, and Booth Comfort
- Conclusion: Start Recording Better Vocals Today
- Frequently Asked Questions
Last Updated: September 21, 2026
Why Vocal Booth Solutions Matter for Home Recording
Affordable vocal booth solutions for home studio setups have become essential for anyone serious about recording clean vocals. A proper vocal booth eliminates ambient noise, controls room reflections, and creates a dry signal that works beautifully in post-production. Without one, every recording picks up unwanted hum, echo, and background interference that no amount of editing can fully remove.
You don't need a $5,000 commercial booth to capture professional-quality vocals. A strategic approach to sound isolation and acoustic treatment delivers results on any budget.
DIY Vocal Booth Plans You Can Build This Weekend
Building your own vocal booth requires no special skills or tools. Here are three proven approaches. Here are three proven approaches.
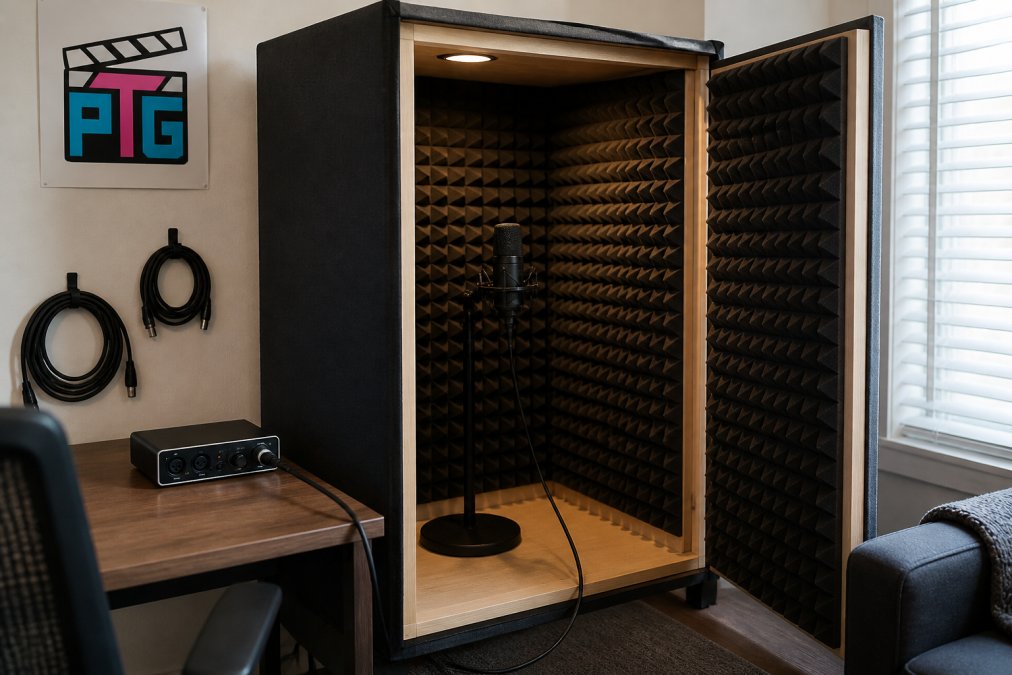
The Closet Booth: Fastest Setup
The closet booth is the quickest solution. Closets naturally isolate sound through their small, enclosed design and soft materials that absorb reflections.
Clear the space and hang acoustic panels or heavy blankets on the back wall and sides. Position your microphone at mouth level, 6-8 inches away. A cardioid microphone like the Tenlamp PKPRO Large Diaphragm Condenser Microphone focuses pickup on your voice while rejecting side and rear reflections.


This approach works best for sessions under 30 minutes. For quick takes and demos, it's unbeatable for speed and cost.
The Box-Within-a-Box Design
The box-within-a-box construction uses an outer frame (PVC or wood) lined with acoustic material, then an inner frame with additional absorption. The air gap between layers significantly reduces sound transmission.
This design takes a full day to build. Ensure every sound path passes through at least two absorption layers. Use VEVOR Fiberglass Acoustic Panels with an NRC rating of 0.95. The self-adhesive backing requires no tools.
This approach works well for permanent installations.
Portable Frame Booth for Flexibility
A portable frame booth uses collapsible PVC or aluminum tubing with removable panels, letting you set up in different rooms or disassemble when needed.
The advantage is flexibility. The disadvantage is slightly lower isolation than fixed construction.
Soundproofing vs Acoustic Treatment: What Your Booth Actually Needs
Understanding the difference between soundproofing and acoustic treatment prevents wasted money and poor results.
Soundproofing prevents sound from traveling between spaces using mass and dense materials. Acoustic treatment controls reflections within your booth by absorbing sound bouncing off hard surfaces.
Most home recordists need both. A booth needs soundproofing to isolate vocals and prevent leakage, plus acoustic treatment to control reflections and create a dry recording.
Acoustic Treatment for Home Studio Setup
Acoustic treatment absorbs sound energy at specific frequencies. A complete strategy uses multiple material types.
Absorption Panels and Foam
Absorption panels reduce mid-to-high frequency reflections. The VEVOR panels use 100% fiberglass with an NRC rating of 0.95 and mount easily without consuming excessive space.
Mount panels directly on walls or suspend them 2-4 inches away. Self-adhesive backing requires no drilling.
Mount panels on the walls opposite your microphone first, then add panels to side walls. The back wall needs less treatment than the front.
Use 4-6 panels per booth to cover primary reflection points.
VEVOR Fiberglass Acoustic Panels →
Bass Traps and Diffusion
Bass frequencies require thicker materials or specialized construction. Place bass traps in room corners where bass energy accumulates. Rockwool or fiberglass batts in corner cavities work well. Diffusion is less critical in small booths.
Budget-Friendly Materials and Where to Source Them
Fiberglass insulation batts require framing and fabric covering. Heavy blankets provide reasonable absorption and are reusable. Rockwool handles bass frequencies well. Acoustic foam sheets offer a middle ground between cost and performance. Combine materials for best results: fiberglass or rockwool for bulk absorption, blankets for quick coverage, and commercial panels for visible surfaces.
Essential Recording Gear to Pair With Your Booth
A vocal booth is only half the equation. You need microphones, interfaces, and monitoring equipment that work together to capture clean vocals. Cameras, Lighting & Audio Equipment provides everything from microphones to interfaces designed specifically for home recording.
Microphone Selection for Vocal Clarity
Condenser microphones with cardioid polar patterns are standard for vocal recording. They capture detail while rejecting side and rear sound, essential for isolating vocals in a treated booth.
The Tenlamp PKPRO Large Diaphragm Condenser Microphone delivers professional vocal performance at an accessible price point. The 26mm gold-plated capsule captures vocal presence and clarity. It requires 48V phantom power from a mixer or audio interface, standard equipment in any recording setup. It requires 48V phantom power from a mixer or audio interface, standard equipment in any recording setup. The cardioid pattern naturally isolates vocals from booth reflections.
For streamers and content creators who want simplicity, the FIFINE A8 USB Condenser Microphone offers plug-and-play convenience. USB connectivity means no separate audio interface required, it connects directly to your computer. The cardioid capsule handles vocal recording well, and the 3.5mm headphone jack provides real-time monitoring with zero latency. The detachable metal pop filter cuts plosives and breath noise.
Dynamic microphones like the Maono PD200X Dynamic RGB Gaming Microphone work well for vocals when you want less sensitivity to room noise. Dynamic mics reject ambient sound more effectively than condensers, making them forgiving in less-treated spaces. The PD200X offers dual USB-C and XLR connectivity, so it works with computers or professional mixers. The built-in foam windscreen reduces plosives without requiring a separate pop filter.
Audio Interfaces and Mixers for Clean Signal
An audio interface converts analog microphone signals into digital audio your computer can record. A quality interface reduces noise and maintains signal integrity. The NXG MD21 USB Sound Card delivers 24-bit audio resolution with a dedicated microphone input. The external power adapter keeps the interface running stably without drawing on your USB bus power. This matters for vocal recording.

For creators who need mixing capabilities, portable mixers offer built-in effects and multi-channel control. The Tenlamp G10-P15B Audio Mixer Bundle pairs a 2-channel mixer with a condenser microphone. The active digital noise reduction removes ambient hum, and the 16 customizable sound effects add flexibility for creative recordings. The rechargeable battery enables cordless operation.
The MAONO AM200-S1 Podcast Bundle combines a portable audio interface with a condenser microphone for straightforward setup. The MaonoCaster Lite includes 8 preset sound effects plus customizable slots, and Bluetooth 5.0 connectivity lets you add music accompaniment from a paired device. This bundle works well for creators transitioning from phone recording to computer-based recording.
Ventilation, Cable Management, and Booth Comfort
A vocal booth needs ventilation to maintain air quality during extended recording sessions.
Ventilation strategies depend on your booth design. A closet booth naturally has some air exchange through gaps around the door. A sealed box booth needs intentional ventilation, either through louvers, passive vents, or a small whisper-quiet fan. The key is maintaining air quality without introducing noise into the recording space.
Acoustic louvers allow air to pass while absorbing sound traveling through the opening. For budget-conscious builders, a small computer fan with acoustic ducting works. Position the fan intake outside the booth and the exhaust inside, or vice versa. Use flexible ducting lined with acoustic foam to minimize noise transmission.
Cable management prevents ground loops and reduces mechanical noise transmission. Run microphone cables away from power cables. Use cable ties or conduit to bundle cables neatly, preventing them from vibrating against booth surfaces.
Conclusion: Start Recording Better Vocals Today
Building an affordable vocal booth solutions setup is entirely achievable without professional contractors or five-figure budgets. The core principle remains consistent: control your recording environment through sound isolation and acoustic treatment, then pair it with quality microphones and interfaces that capture clean signal.
| Booth Type | Build Time | Isolation Quality | Best For | Budget |
|---|---|---|---|---|
| Closet Booth | 2-4 hours | Good | Quick vocal takes | Minimal |
| Box-Within-a-Box | 8-12 hours | Excellent | Permanent setup | Moderate |
| Portable Frame Booth | 6-10 hours | Very Good | Flexible space needs | Moderate |
| Commercial Booth | N/A | Excellent | Professional use | High |
Frequently Asked Questions
Do I really need a vocal booth for home recording?
A vocal booth isn't mandatory, but it dramatically improves recording quality. Without one, your vocals pick up room reflections, ambient noise, and echo that are difficult to remove in post-production. Even a budget vocal booth solution reduces these issues, giving you cleaner recordings with better vocal clarity and a lower noise floor. If you're recording voice-overs, podcasts, or singing, a booth makes a noticeable difference in final output.
What's the cheapest way to build a vocal booth at home?
The closet booth is the most affordable option, use an existing closet, add blankets or acoustic foam to walls, and position your microphone inside. Total cost runs $30-$100 depending on materials. For slightly more investment, a box-within-a-box design using PVC pipe and acoustic panels costs $150-$300 and offers better sound isolation.
What's the difference between soundproofing and acoustic treatment?
Soundproofing blocks external noise from entering your room and prevents sound from leaking out, it requires dense, heavy materials and structural changes. Acoustic treatment absorbs reflections and echo inside your space, improving sound quality without blocking outside noise. For a home vocal booth, acoustic treatment is usually what you need: absorption panels and foam reduce room reflections and create a dry signal. Soundproofing is more expensive and complex but necessary only if external noise is severe.
What microphone and audio setup pairs best with a DIY vocal booth?
A cardioid condenser microphone isolates your voice while rejecting side and rear noise, making it ideal for booths. The Tenlamp PKPRO ($62.99) offers studio-quality vocals with XLR connectivity, or the FIFINE A8 ($85.99) provides USB convenience with real-time monitoring. Pair either with an audio interface like the NXG MD21 ($124.99) for 24-bit recording quality. For an all-in-one solution, the MAONO AM200-S1 bundle ($106.99) includes a mixer and microphone, simplifying setup.