

Vlogging Camera Settings for Cinematic Video
Table of Contents
- Vlogging Camera Settings: The Foundation for Cinematic Video
- Choosing a Frame Rate: 24fps, 30fps, 60fps, and Beyond
- Mastering Shutter Speed for Video
- Using Manual Camera Mode for Complete Control
- 4K or 1080p for YouTube: Resolution and Delivery
- Cinematic Phone Video Settings
- Exposure, Aperture, and Depth of Field
- Audio, Focus, and Stabilization: The Complete Setup
- Frequently Asked Questions
Last Updated: October 14, 2026
Vlogging Camera Settings: The Foundation for Cinematic Video
Getting cinematic video from a vlogging camera starts with understanding how frame rate, shutter speed, and manual controls work together. Most creators shoot on autopilot and wonder why their footage looks flat or jerky. The difference between amateur and professional video often comes down to a handful of intentional settings.
Perfect Take Gear helps creators understand these fundamentals so they can capture footage that stands out. Whether you shoot on a dedicated vlogging camera, a mirrorless system, or a smartphone, the principles are the same. This guide covers the core vlogging camera settings that unlock cinematic video quality.
The goal is simple: match your settings to your content style, lighting, and platform. A travel vlogger needs different settings than someone shooting slow-motion action. Once you understand the "why" behind each setting, you'll make smarter choices on every shoot.
Choosing a Frame Rate: 24fps, 30fps, 60fps, and Beyond
Frame rate is the foundation of cinematic video. It controls how motion looks and feels, and picking the wrong one undermines every other setting you dial in.
Using 24fps for a Cinematic Look
24 frames per second is the industry standard for cinema. Film cameras have used 24fps for decades, and audiences expect that frame rate to feel "cinematic." At 24fps, motion appears slightly softer and more artistic than real life, which is why high-end productions default to it.
The trade-off is smoothness. At 24fps, fast camera movement or quick hand gestures can look stuttering or unnatural. That works for narrative filmmaking where the camera is stable and deliberate, but it's less ideal for vlogging where you're constantly moving.
Use 24fps when:
- You want a premium, film-like aesthetic
- Your lighting is controlled and consistent
- You're shooting slower, more intentional movement
- Platform delivery allows it (some platforms have compression issues with 24fps)
Using 30fps for Everyday Vlogging
30 frames per second is the sweet spot for most vlogging. It captures natural motion smoothly without looking overly digital. A person talking to camera, walking down a street, or showing products all look natural at 30fps.
30fps also handles quick movements better than 24fps. Your hand gestures won't stutter. Camera pans feel fluid. This is why broadcast television and most YouTube creators shoot at 30fps.
The cinematic look at 30fps comes from your other settings (shutter speed, color grading, depth of field), not the frame rate itself. You can absolutely create beautiful, professional video at 30fps.
Use 30fps when:
- Shooting vlogging content with natural movement
- Creating content for YouTube, Instagram, or TikTok
- You want smooth motion without the 24fps "film look"
- Recording interviews or talking-head content
Using 60fps or Higher for Slow Motion and Movement
60 frames per second captures twice as much motion data as 30fps. Played back at normal speed, it looks extremely smooth and detailed; slowed to 50%, it creates beautiful slow-motion without losing quality.
120fps and higher give you even more flexibility, letting you slow footage to 25% speed while maintaining smooth playback. This is essential for action vlogging, product demos with quick movements, or any content needing slow-motion moments.
The downside is file size. 60fps and 120fps generate massive amounts of data, raising storage costs and making editing more demanding. Use high frame rates strategically, not for every shot.
Use 60fps or higher when:
- Creating slow-motion sequences for impact
- Shooting fast movement (sports, action, dancing)
- Recording product demonstrations with quick gestures
- You have storage space and editing power available
Mastering Shutter Speed for Video
Shutter speed controls how much motion blur appears in your footage. Many creators either leave it on auto (which varies constantly) or set it wrong, getting too much blur or too little.
Applying the 180-Degree Shutter Rule
The 180-degree shutter rule is the golden standard for natural motion. Your shutter speed should be double your frame rate: 1/48 second at 24fps, 1/60 second at 30fps, and 1/120 second at 60fps.
This rule mimics how film cameras work, producing motion that looks natural and cinematic. Too much blur (slower shutter) looks mushy; too little (faster shutter) looks stuttering or unnatural.
The math is simple:
- 24fps = 1/48 second shutter speed
- 30fps = 1/60 second shutter speed
- 60fps = 1/120 second shutter speed
Most cameras let you set this manually. Some let you dial in shutter angle (180 degrees) directly, which does the math for you automatically.
Setting Shutter Speed Manually
To set shutter speed manually, enter manual mode on your camera, find the shutter speed dial or menu option, and set it to match your frame rate using the 180-degree rule above.
In bright sunlight, 1/60 second at 30fps can cause overexposure even at the lowest ISO and smallest aperture. This is where an ND (neutral density) filter becomes essential: it's like sunglasses for your lens, reducing light without changing color so you can keep proper shutter speed in bright conditions.
Steps to set manual shutter speed:
- Switch your camera to manual (M) mode
- Set your frame rate first (24fps, 30fps, or 60fps)
- Calculate shutter speed using the 180-degree rule
- Dial in that shutter speed on your camera
- If the image is too bright, add an ND filter
- If the image is too dark, increase ISO or open the aperture
Using Manual Camera Mode for Complete Control
Shooting in manual mode is the only way to guarantee consistent, professional-looking footage. Automatic modes constantly adjust based on what the camera thinks is correct, causing flickering, inconsistent exposure, and amateur-looking results.
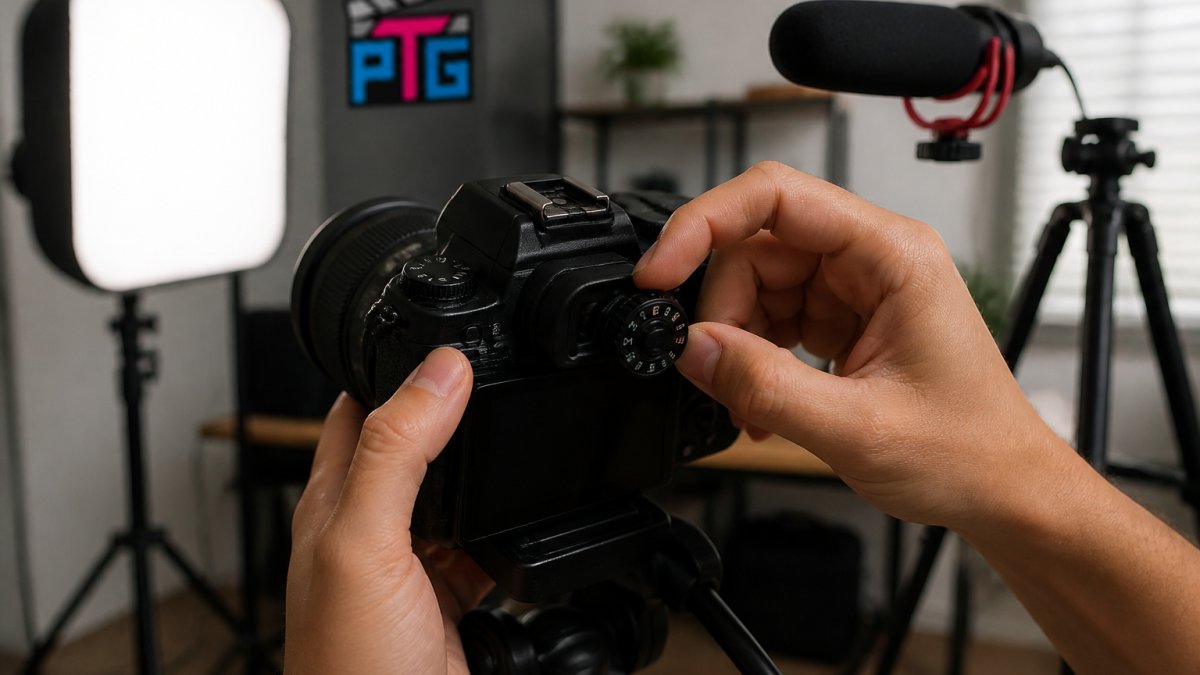
Manual mode requires you to set four things: frame rate, shutter speed, aperture, and ISO. Once dialed in, they stay locked for the entire shot, keeping brightness and motion blur consistent throughout.
Set your frame rate and shutter speed using the 180-degree rule, adjust aperture for your depth of field goals, then adjust ISO for proper exposure.
Manual mode feels intimidating at first, but it's the fastest path to professional results. Once you understand how these four settings relate, you'll shoot faster and with more confidence.
4K or 1080p for YouTube: Resolution and Delivery
Most creators ask whether to shoot 4K or 1080p. The answer depends on your camera, storage, and platform.
DJI Osmo Pocket 3 Vlogging Camera →
4K (3840 × 2160 pixels) captures four times as much detail as 1080p (1920 × 1080 pixels), giving you flexibility in post-production to zoom, crop, or reframe without losing quality. Professional productions shoot 4K whenever possible.
However, 4K requires significantly more storage. A one-hour 4K video at 30fps takes roughly 100-150 GB depending on codec, versus 25-40 GB at 1080p. With multiple takes or long sessions, storage gets expensive fast.
YouTube accepts both 4K and 1080p, and compresses everything anyway, so the difference isn't massive unless viewers watch on a large screen. Most phone viewers won't notice.
The practical choice: shoot 4K if your camera handles it smoothly and you have storage. If you're limited on space or your camera struggles with 4K, 1080p is perfectly professional.
Cinematic Phone Video Settings
Smartphones have become legitimate vlogging tools. Modern phones shoot 4K, stabilize electronically, and handle low light better than many cameras from five years ago.
On most phones, frame rate and resolution are locked together in the camera app. Choose 4K/30fps for everyday vlogging, or 4K/60fps for action and movement where you want slow-motion options.
Most phones don't let you manually set shutter speed.
White balance on phones is usually automatic and works well. If your footage looks too warm or too cool, tap the white balance icon and adjust the color temperature slider.
Phone cameras excel at stabilization. Keep your phone steady and the built-in stabilization handles small movements. For intentional pans or walking shots, move slowly and deliberately; quick jerky movements reveal its limits.
Exposure, Aperture, and Depth of Field
Exposure is how bright or dark your image appears, while aperture controls depth of field (how much of the frame is in focus). Together they create the visual look of your video.
Aperture is measured in f-stops: f/2.8, f/5.6, f/16, etc. Lower f-numbers mean wider aperture and shallower depth of field. A wide aperture (f/2.8) blurs the background and isolates your subject.
For vlogging, a moderate aperture (f/4 to f/8) is usually ideal. It keeps your face sharp while softly blurring the background. This creates depth and visual interest without the extreme blur of cinema lenses.
If bright sunlight overexposes your image, you have three options:
- Close the aperture (raise the f-number)
- Use an ND filter to reduce light
- Increase shutter speed (though this breaks the 180-degree rule)
The best solution is an ND filter. It solves overexposure without forcing you to choose between depth of field and proper shutter speed.
ISO controls sensor sensitivity. Higher ISO brightens the image but adds noise; lower ISO is clean but requires more light. In manual mode, set ISO as low as possible while maintaining proper exposure.
Audio, Focus, and Stabilization: The Complete Setup
Professional-looking video requires more than camera settings. Audio quality, focus accuracy, and smooth movement complete the cinematic look.
Audio is often overlooked but critical. Built-in microphones pick up wind, handling noise, and background rumble.
Focus in video differs from photos: you need continuous focus as you or your subject moves.
Stabilization comes from three sources: the camera's built-in stabilization, a gimbal (motorized stabilizer), or steady hands.
The complete setup for professional vlogging includes quality Cameras, Lighting & Audio Equipment designed for creators, along with a tripod or gimbal for stable footage.
| Setting | 24fps | 30fps | 60fps |
|---|---|---|---|
| Best For | Cinematic narrative | Everyday vlogging | Slow motion & action |
| Shutter Speed | 1/48 second | 1/60 second | 1/120 second |
| Motion Feel | Film-like, artistic | Natural, smooth | Hyper-smooth |
| File Size | Smallest | Medium | Largest |
Getting cinematic video from your vlogging camera is about understanding how settings interact. Frame rate sets the motion feel. Shutter speed controls blur.
Start with 30fps and the 180-degree shutter rule. Shoot in manual mode. Add an external microphone and a stable tripod.
The creators who produce the best work aren't using the most expensive gear; they're using intentional settings matched to their content.
When you're ready to invest in Content Creator Gear & Equipment, the right setup removes barriers to quality vlogging.
Frequently Asked Questions
What are the best vlogging camera settings for a cinematic look?
Start with 24fps for a classic cinematic feel, then set your shutter speed to 1/48 second using the 180-degree shutter rule. Use manual mode to control aperture (f/2.8-f/5.6 for depth), ISO (keep it as low as possible), and white balance. Enable manual focus or autofocus with face detection, and use a camera with stabilization or a gimbal. These vlogging camera settings work across DSLR, mirrorless, and dedicated vlogging cameras.
Should I shoot 30fps or 60fps for vlogging?
Use 30fps for everyday vlogging and talking-head content, it feels natural and matches broadcast standards. Choose 60fps or higher if you plan slow-motion effects, fast movement (walking, hand gestures, transitions), or need flexibility in post-production. Many creators shoot 60fps and slow it to 24fps in editing for a cinematic effect with preserved motion smoothness.
Is 4K or 1080p better for YouTube vlogging?
4K gives you more editing flexibility and future-proofs your content, but requires faster storage and internet for uploads. 1080p is faster to upload, uses less storage, and is perfectly acceptable for YouTube. If your camera handles 4K/30fps smoothly and you have the storage, shoot 4K. For beginners or limited bandwidth, 1080p at 60fps delivers excellent results with faster workflow.
How do I get a cinematic look on my phone?
Enable manual controls in your phone's camera app or use a third-party app like Filmic Pro or FiLMiC. Set frame rate to 24fps, lock exposure and white balance, and shoot in log or flat color profile if available. Use a phone gimbal or stabilizer for smooth movement, keep aperture wide (if adjustable), and frame with foreground elements for depth. Pair phone filming with external lighting and a wireless microphone for polished cinematic phone video settings.