

Professional Studio Gear for Creators: 2026 Guide
Table of Contents
- Essential Professional Studio Gear for Creators: Quick Comparison
- Audio Equipment for Content Creators
- Lighting Setup for Content Creators
- Cameras and Video Capture for Professional-Grade Content
- Home Studio Setup for Creators: Building Your Space
- Beginner Content Creator Kit: Starting Your Journey
- DAW Software and Editing Tools for Your Workflow
- Cables, Connectivity, and Power Management
Professional Studio Gear for Creators: 2026 Guide
Last Updated: July 25, 2026
Professional studio gear for creators has become more accessible than ever, yet choosing the right equipment remains overwhelming. At Perfect Take Gear, we've spent years helping creators at every level build studios that elevate their production value without breaking the bank. Below, we'll walk you through the essential equipment categories, real-world recommendations, and the specific gear that separates amateur content from professional-grade output.
Essential Professional Studio Gear for Creators: Quick Comparison
The foundation of any creator studio rests on four pillars: audio capture, lighting, video recording, and post-production tools. Each category has entry-level, mid-range, and professional options, and the right choice depends entirely on your content format, budget, and growth timeline.
| Category | Best Budget Option | Best Mid-Range Pick | Best Professional Choice | Key Consideration |
|---|---|---|---|---|
| Microphone | USB condenser mic | Shure SM7B | Shure SM7B with preamp | Dynamic mics reject background noise better |
| Audio Interface | Focusrite Scarlett 2i2 | Focusrite Scarlett 4i4 | Universal Audio Apollo Twin X | Preamp quality directly impacts vocal clarity |
| Lighting | LED panel kit | Aputure Amaran 100x S | Professional bi-color system | Color accuracy matters more than brightness |
| Camera | Used mirrorless body | Sony A6700 | Sony Alpha a7S III | Low-light performance is non-negotiable for video |
| DAW/Editing | DaVinci Resolve (Free) | Adobe Premiere Pro | DaVinci Resolve Studio | Integration with your existing tools matters |
Audio Equipment for Content Creators
Sound quality determines whether viewers stay or bounce within the first 10 seconds. A creator with professional-grade audio and a smartphone camera will outperform someone with a cinema camera and terrible microphone audio every single time.
Microphones: Types and Selection
Dynamic microphones reject ambient noise aggressively, making them ideal for podcasting, streaming, and voiceovers in untreated rooms. The Shure SM7B is the gold standard, used by radio broadcasters and podcasters for decades because it delivers warm, natural vocals with exceptional noise rejection. Dynamic mics require a quality preamp or audio interface with sufficient gain.
Condenser microphones capture more detail and nuance, ideal for singing, acoustic instruments, and ASMR content. They're more sensitive to room noise, requiring either treated acoustics or a quiet recording environment. USB condensers like the Audio-Technica AT2020 offer plug-and-play simplicity but sacrifice the sound quality of XLR-connected models.
Lavalier and shotgun microphones serve specialized purposes. Lavalier mics clip to clothing for interviews or on-camera presentations. Shotgun mics mount on camera rigs and isolate dialogue from surrounding noise, essential for filmmaking.
The selection framework is simple: if you're recording in an untreated home space, choose a dynamic mic. If you have treated acoustics and need pristine detail, go condenser. If you're creating video content, use a shotgun mic as your secondary capture device.
Audio Interfaces and Preamps
Your audio interface is the bridge between microphone and computer, and its preamp quality directly determines how clean your recordings sound. A poor preamp introduces noise and requires excessive gain, amplifying background hum and room noise.
The Focusrite Scarlett 4i4 represents the best value at the mid-tier ($279.99). Its fourth-generation preamps deliver clean, transparent sound with an "Air" mode that adds high-end sparkle to vocals. It includes two XLR inputs plus two line inputs, making it flexible for multiple microphone setups or instrument recording.
For creators demanding the highest sound quality, the Universal Audio Apollo Twin X Duo Heritage Edition ($1,199.00) includes built-in UAD processing, allowing professional-grade effects like vintage compressors and EQs in real time during recording.
Studio Monitors and Reference Headphones
Studio monitors let you hear exactly what your audience hears. The Sennheiser HD 600 ($499.95) has been the reference standard since 1997, offering neutral frequency response with ±3dB flatness across the audible spectrum. Open-back design reveals mix issues instantly but provides zero sound isolation, making them unsuitable for recording vocals while monitoring.
Lighting Setup for Content Creators
Lighting transforms mediocre video into professional-looking content faster than any other single investment. Poor lighting makes skin look sallow, shadows obscure facial expressions, and harsh light creates unflattering glare.
LED Panels and Softboxes
LED panels offer consistent, flicker-free light with adjustable color temperature. The Aputure Amaran 100x S ($199.00) delivers exceptional color accuracy (CRI 95+), meaning skin tones look natural and products appear true to color. Bi-color capability (2700K to 6500K) lets you match ambient light or create specific moods. Pair it with a softbox to diffuse light and eliminate harsh shadows.
LED panels run cool and consume minimal electricity. A 2x3 foot softbox works for close-up talking-head videos. For full-body shots or group recordings, step up to a 4x6 foot softbox.
Ring Lights and Mounting Solutions
Ring lights produce a distinctive circular catch light in the eyes and provide even illumination across the face. They excel for beauty content, makeup tutorials, and close-up talking-head videos. The main limitation is a flat, two-dimensional look because light comes directly from the camera's perspective.
Quality mounting solutions matter as much as the light itself. A boom arm holds your microphone steady without vibration, while a monitor arm positions your second screen at eye level. A sturdy tripod with a fluid head enables smooth pans without jerky movements.
Cameras and Video Capture for Professional-Grade Content
Camera selection depends on your primary content format. Vloggers, filmmakers, and streamers have different requirements.
Mirrorless and DSLR Options
The Sony Alpha a7S III ($3,495.00 body only) represents the gold standard for creators prioritizing low-light performance and advanced video features. Its 12.1-megapixel sensor excels in darkness, enabling broadcast-quality 4K video in dimly lit rooms. The 4K 120p capability enables smooth slow-motion with real-time eye tracking autofocus.
For creators on tighter budgets, the Sony A6700 ($1,398.00 body only) delivers 80% of the a7S III's capabilities at half the price. It shoots 4K 60p with excellent autofocus and low-light performance.
Stabilization: Tripods, Gimbals, and Stabilizers
Shaky video reads as amateur instantly. A quality tripod with a fluid head ($200-400) enables repeatable framing and smooth pans. The fluid head is essential, it dampens movement so pans feel cinematic rather than jerky.
For most creators, a simple slider or dolly ($100-300) provides enough motion to look professional without complexity. A slider creates linear movement that's subtle but effective for B-roll and product shots.
Home Studio Setup for Creators: Building Your Space
Your physical space determines your production ceiling. A poorly treated room with bad acoustics and unflattering lighting will limit your content quality regardless of gear cost.
Acoustic Treatment and Sound Control
Untreated rooms create echo and reverberation that makes dialogue sound hollow. Acoustic panels absorb sound energy instead of reflecting it, eliminating this problem.
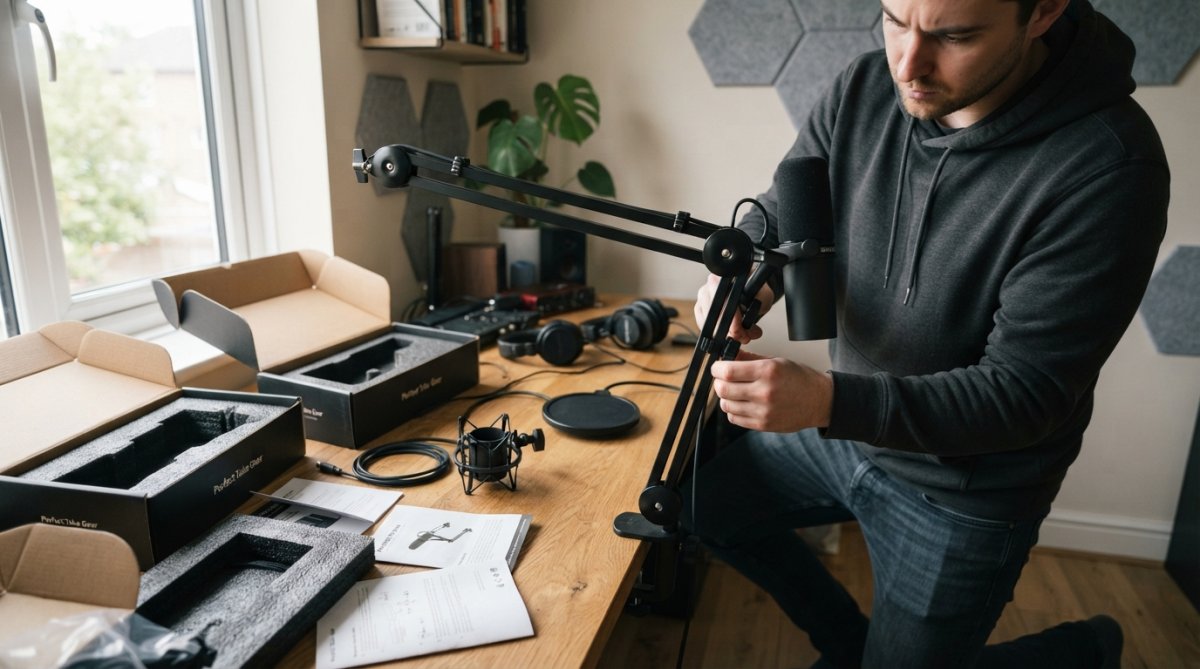
Strategic placement works: place panels behind your microphone to absorb reflections, add panels on the wall opposite your microphone to prevent echo, and treat the ceiling if you have high ceilings (over 9 feet). Most creators start with 4-6 panels.
Bass traps address low-frequency issues. Build DIY panels using rockwool insulation wrapped in fabric ($20-30 per panel) versus $80-150 for commercial panels. The acoustic performance is identical.
Ergonomics, Desk Setup, and Cable Organization
Recording for 4-6 hours daily in a poorly designed workspace leads to neck pain, back strain, and wrist issues. Your monitor should be at eye level using a monitor arm. Your keyboard and mouse should sit at elbow height. Your chair should support your lower back.
Cable management prevents tangled messes and safety hazards. Use cable clips or raceways to bundle cables along the back of your desk. Label cables at both ends so you know what connects where.
Invest in a quality surge-protected power distribution unit with separate circuits instead of overloading a single power strip.
Beginner Content Creator Kit: Starting Your Journey
New creators often overspend on equipment they don't need while skimping on fundamentals. Start with essentials, test your content format, then upgrade strategically.
Core Gear Essentials for New Creators
The minimum viable setup for YouTube, podcasting, or streaming includes: a microphone ($100-400), an audio interface ($150-300), a camera or smartphone, one light source ($50-200), and basic editing software (free options exist).
Perfect Take Gear offers starter kits that bundle these essentials at better prices than buying individually. Start with a USB condenser microphone if you're recording in a quiet space. The Audio-Technica AT2020 USB ($99) delivers surprising quality for the price. If you're in a noisier environment, invest in a dynamic mic like the Shure SM7B ($399) paired with the Focusrite Scarlett 4i4 ($279.99).
One quality light beats three cheap lights. A single LED panel positioned correctly creates professional-looking video.
Growth Path: From Starter to Professional
Upgrade in phases based on what actually limits your production.
Phase 1 (Months 1-3): Microphone, audio interface, one light, camera/smartphone, free editing software. Cost: $600-1,000.
Phase 2 (Months 4-6): Add a second light, acoustic treatment, a quality tripod. Cost: $400-800.
Phase 3 (Months 7-12): Upgrade to a professional camera if video is your primary format, invest in paid editing software, add a gimbal or slider. Cost: $1,500-3,000.
Phase 4 (Year 2+): Specialized gear based on your content format, teleprompter for talking-head videos, green screen for gaming streams, wireless microphone systems for on-location content.
DAW Software and Editing Tools for Your Workflow
Post-production is where raw footage transforms into polished content. Your choice of software determines your editing speed, final quality, and ability to add effects.
Video Editing and Color Grading
Adobe Premiere Pro ($22.99/month) remains the industry standard because of its integration with After Effects, Photoshop, and the entire Creative Cloud ecosystem.
DaVinci Resolve Studio ($295 one-time purchase) offers exceptional value. The free version includes professional-grade color grading, video editing, and audio post-production. The paid Studio version adds AI-powered features like object removal and facial recognition. For creators on a budget, DaVinci's free tier is genuinely production-ready.
Color grading separates amateur from professional video. It establishes mood, directs viewer attention, and ensures consistency across multiple shots.
Streaming Software and Graphic Design Tools
OBS Studio (free, open-source) remains the most popular streaming software because it's powerful, flexible, and has zero cost. It handles multi-camera switching, scene management, and direct streaming to major platforms.
The Blackmagic Design ATEM Mini Pro ($295.00) simplifies multi-camera streaming by handling switching and effects in hardware instead of relying on your computer.
Canva ($14.99/month or free tier) offers templates specifically designed for YouTube thumbnails, Twitch overlays, and social media graphics.
Cables, Connectivity, and Power Management
Quality cables and proper management prevent disasters during live streams or important recordings.
XLR cables connect microphones to audio interfaces. Shielded cables ($10-20 each) prevent electromagnetic interference. Buy cables slightly longer than you need, coiling excess cable neatly is better than running cable too tight.
USB cables for audio interfaces should be high-quality, shielded cables. Budget USB cables introduce noise and connection drops.
Power cables should be rated for the total amperage of all connected devices. Distribute load across multiple circuits or invest in a quality power distribution unit.
Cable labeling saves hours of troubleshooting. Use a label maker to identify each cable at both ends. Wireless microphone systems add convenience but introduce complexity, charging requirements, latency, and potential signal drops. Start with wired systems, then add wireless only if your workflow genuinely requires it.
Creating professional-quality content requires understanding how each piece of equipment serves your specific workflow. The gear itself matters less than how intentionally you've chosen it. Perfect Take Gear specializes in curating equipment combinations that work together seamlessly, from starter kits for new creators to professional systems for established channels. Focus on mastering your current setup, identify your actual bottlenecks, and upgrade strategically. Start with quality audio and lighting, add a reliable camera, and build from there. Your audience will notice the difference immediately.
Frequently Asked Questions
What is the essential audio equipment for content creators starting out?
New creators typically need a USB microphone or dynamic microphone with an audio interface, pop filter, and shock mount. The Shure SM7B ($399) is a professional-grade dynamic microphone ideal for podcasting and streaming, while the Focusrite Scarlett 4i4 ($279.99) offers flexible audio interface options. Start with a single quality microphone rather than multiple mediocre ones, sound quality directly impacts viewer retention.
How do I set up a professional home studio setup for creators on a budget?
Begin with essential lighting setup for content creators: one adjustable LED panel (like the Aputure Amaran 100x S at $199) positioned at 45 degrees. Add acoustic treatment using foam panels on walls behind your recording area. Invest in a quality microphone before expensive cameras. Use your smartphone initially if needed, viewers forgive video quality but not audio quality. Build gradually, adding equipment as your channel grows and revenue increases.
What software do professional studio gear for creators require?
Video editing requires either Adobe Premiere Pro ($22.99/month) or DaVinci Resolve Studio ($295 one-time purchase). For streaming, use OBS Studio (free) or Blackmagic ATEM Mini Pro ($295) for multi-camera switching. Graphic design tools like Canva or Adobe Photoshop help create thumbnails and overlays. Choose software compatible with your operating system and camera codec to ensure smooth workflow integration.
Can I mix different brands of professional studio gear for creators?
Yes, professional gear is designed for cross-brand compatibility. XLR microphones work with any audio interface using standard connectors. LED lights mount on universal tripods. Cameras output HDMI to any compatible switcher. However, verify connector types (XLR, USB, HDMI, Thunderbolt) before purchasing. Some interfaces require specific drivers, check compatibility with your computer's operating system before buying.
How long does it take to learn a beginner content creator kit setup?
Basic setup typically takes 1-2 hours: mounting the microphone, positioning lights, connecting cables, and configuring software. Most equipment includes straightforward guides. Audio interfaces and cameras have steeper learning curves, budget 3-5 hours to understand preamp gain, XLR levels, and camera settings. Streaming software like OBS requires scene setup (1-2 hours). Start simple: microphone, one light, and basic editing before adding advanced features like multi-camera switching.
This article was written using GrandRanker