

Mixing and Mastering on a Budget: Beginner's Guide
Table of Contents
- Why Budget Mixing and Mastering Matters for Creators
- Essential Home Studio Gear Without Breaking the Bank
- Mixing vs Mastering Explained
- Best Free VST Plugins for Mixing
- Gain Staging and Signal Chain Fundamentals
- Audio Mastering Checklist for DIY Musicians
- Exporting for Streaming Services and LUFS Standards
- Common Mistakes Beginners Make
- Frequently Asked Questions
Last Updated: September 24, 2026
Why Budget Mixing and Mastering Matters for Creators
Mixing and mastering budget constraints don't have to mean sacrificing quality. Content creators, musicians, and streamers face a real challenge: professional audio production equipment costs thousands of dollars, but bedroom producers and solo streamers often lack the capital to invest in traditional studio setups. The gap between amateur and professional sound has narrowed dramatically over the past five years, thanks to affordable gear and free software that rivals expensive alternatives.
At Perfect Take Gear, the team understands that aspiring producers need practical solutions. Mixing and mastering on a budget is no longer a compromise, it's a legitimate pathway to professional-sounding results. The key is knowing which tools deliver real value and which ones waste money. This guide walks through the essentials: gear selection, software choices, technical fundamentals, and workflows that beginners can implement immediately.
The difference between a polished track and an amateur one often comes down to understanding signal chain, gain staging, and how to translate mixes across different playback systems. These skills matter more than the price tag on your equipment. A beginner with a solid grasp of mixing fundamentals and a modest setup will outproduce someone with expensive gear and no technical foundation.
Essential Home Studio Gear Without Breaking the Bank
Building a home studio on a budget requires prioritizing the tools that have the highest impact on audio quality. The most important purchases are an audio interface, microphone, and acoustic treatment. Everything else can wait until you've mastered the fundamentals with what you have.
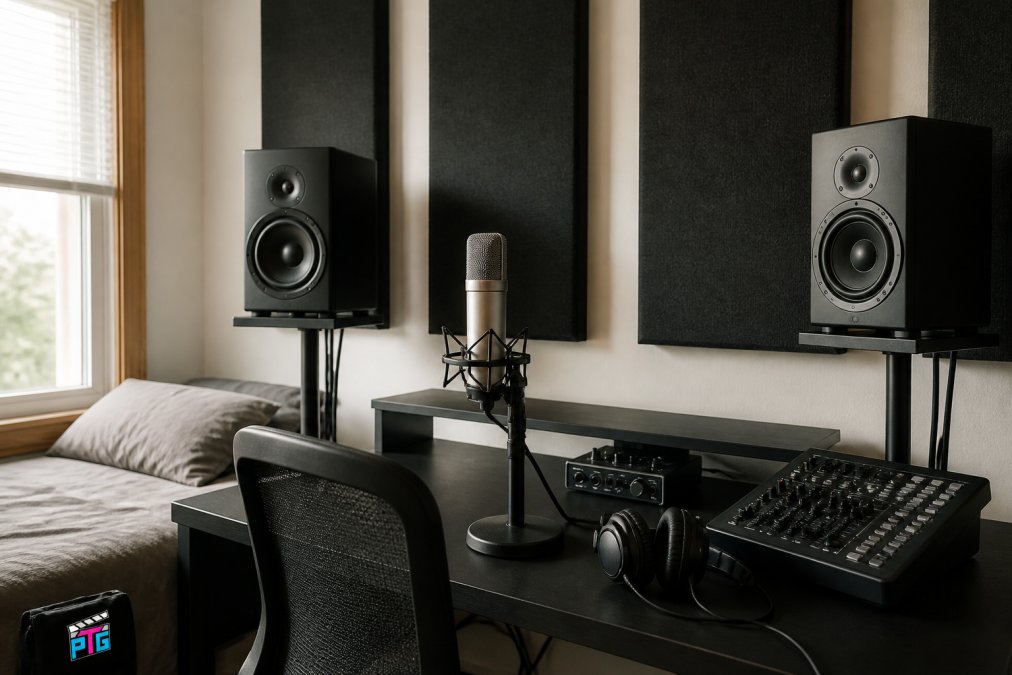
Audio Interface and Mixer Bundles
An audio interface is the bridge between your microphone, instruments, and computer. It converts analog signals into digital audio that your DAW can process. For beginners, bundled solutions offer better value than buying components separately.
The MAONO AM200-S1 bundle pairs a portable audio interface with a condenser microphone, designed specifically for quick setup without complicated configuration. It includes 8 preset sound effects, supports multi-device streaming via Bluetooth 5.0, and connects via 3.5mm to laptops, PCs, and smartphones. At $106.99, this bundle delivers core functionality for streaming, podcasting, and basic recording. It's part of Content Creator Gear & Equipment offerings designed to get creators started without overwhelming complexity.

For creators who want more channels and flexibility, the Tenlamp Y300-P15B offers a live sound board with a 3.5mm condenser microphone, 12 built-in sound effects, and multiple connection options (Bluetooth, USB, Aux, XLR). This setup costs $51.99 and works well for podcasters and streamers who need basic mixing capabilities without phantom power requirements.
If budget allows a bit more, the Tenlamp G10-P15B audio mixer bundle at $186.99 includes active digital noise reduction, 16 customizable sound presets, and a rechargeable battery for portability. The Follow Singing mode keeps backing tracks private while performers hear their own mix, useful for live streaming performances.
Acoustic Treatment on a Budget
Acoustic treatment controls reflections and reduces room noise, making recordings clearer and mixes more accurate. The frequency spectrum of sound bounces off hard surfaces, creating phase issues and muddiness. Treating your space is often more important than upgrading gear.
The VEVOR fiberglass acoustic panels use a 100% white fiberglass core with an NRC rating of 0.95, meaning they absorb 95% of mid-to-high frequency noise. Each panel measures 23.62 x 11.81 x 1.97 inches, and the 3M self-adhesive backing requires no drilling or tools. A 4-pack costs $91.99 and covers roughly 20 square feet of wall space.
Place panels behind your microphone to reduce reflections of your own voice, on the walls adjacent to your listening position, and in room corners where low frequencies accumulate. Start with 4-6 panels and add more if room noise remains a problem. DIY alternatives like bass traps made from rigid fiberglass insulation work but require construction skills and look less professional.
Mixing vs Mastering Explained
Mixing and mastering are distinct processes, and confusing them leads to poor results. Mixing is the process of balancing individual tracks, adjusting levels, panning, equalization, compression, and effects to create a cohesive stereo mix. Mastering is the final step: optimizing that mix for playback on different systems and ensuring loudness normalization meets streaming platform standards.
Mixing happens in your DAW with all tracks visible and editable. The mixing engineer shapes the sound, creates depth through panning and reverb, controls dynamic range with compression, and uses equalization to balance frequencies. The goal is a mix that sounds good on studio monitors, headphones, car stereos, and phone speakers.
Mastering is the final quality check. A mastering engineer listens to your mix on reference-grade equipment, applies subtle processing to enhance clarity and loudness, and ensures the true peak and LUFS (loudness units relative to full scale) meet platform specifications. Mastering is not about fixing a bad mix, it's about optimizing a finished mix for distribution.
Many beginners try to master while mixing, which creates problems. Your ears fatigue, your room acoustics color your perception, and you lose objectivity. The best practice is to finish mixing, take a break of at least 24 hours, then return with fresh ears for mastering.
Tenlamp G10-P15B Audio Mixer Bundle →
Best Free VST Plugins for Mixing
VST plugins are software instruments and effects that run inside your DAW. Free options have improved dramatically and rival paid alternatives for mixing and mastering budget constraints.
Gain Staging and Signal Chain Fundamentals
Gain staging is the process of setting input and output levels at each stage of your signal chain to maximize headroom while preventing clipping. Poor gain staging causes noise floor issues, distortion, and makes mixing much harder.
Start with your microphone level. Set the input gain so that the loudest part of your vocal peaks at around -12dB on your interface's meter. This leaves headroom for processing and prevents clipping. If your level is too low, you'll amplify noise when boosting later. If it's too high, you'll clip and introduce digital distortion.
In your DAW, set track faders to unity (0dB) by default. Process individual tracks (EQ, compression) with enough headroom that you're not pushing plugins into saturation unless that's your intention. Keep your master bus fader at 0dB as well.
The signal chain flows: microphone → audio interface input → DAW track → plugins → track fader → mixer bus → master bus fader → output. Each stage should have adequate headroom. A common mistake is setting everything to maximum levels, which leaves no room for mixing adjustments.
Professional mixes maintain at least 6dB of headroom on the master bus before mastering. This prevents clipping when you add a limiter or compressor during mastering and gives you flexibility to make adjustments without distortion.
Audio Mastering Checklist for DIY Musicians
Mastering on a budget means using your existing DAW and free plugins, but the process matters more than the tools. Follow this checklist to ensure your master meets professional standards.
| Step | Action | Why It Matters |
|---|---|---|
| 1. Reference Track | Import a professionally mastered song in the same genre | Trains your ear to the target loudness and frequency balance |
| 2. Level Match | Adjust your mix so it matches the reference track's loudness | Removes bias from perceived loudness differences |
| 3. Frequency Analysis | Use a spectrum analyzer to compare your mix to the reference | Identifies frequency imbalances before processing |
| 4. Subtractive EQ | Remove problem frequencies rather than boosting | Prevents harshness and maintains clarity |
| 5. Gentle Compression | Apply light compression to glue the mix together | Adds cohesion without destroying dynamics |
| 6. Limiting | Set a limiter to catch peaks and prevent clipping | Protects against accidental distortion |
| 7. Loudness Check | Verify LUFS and true peak meet platform standards | Ensures consistency across streaming services |
| 8. Headphone Test | Listen on multiple playback systems | Confirms mix translates to consumer devices |
The reference track workflow is critical. Import a professionally mastered song in your genre, level-match it to your mix, and compare them side by side. This reveals what you're missing: if your mix sounds thin compared to the reference, boost mid frequencies slightly; if it's muddy, reduce low-mid frequencies. This approach is far more effective than guessing.
Exporting for Streaming Services and LUFS Standards
Streaming platforms normalize loudness to prevent some tracks from playing louder than others. Understanding LUFS (loudness units relative to full scale) and true peak ensures your master meets platform specifications.
Most streaming services target -14 LUFS for loudness normalization. This means if your master is louder, the platform will turn it down automatically, potentially reducing perceived loudness.
Common Mistakes Beginners Make
The biggest mistake is mixing on untreated speakers in an untreated room. Your room's acoustics color the mix, making you over-correct for problems that don't actually exist. Invest in acoustic treatment before expensive monitors.
Frequently Asked Questions
What's the difference between mixing and mastering?
Mixing balances individual tracks, adjusts levels, adds effects, and creates stereo imaging so all instruments sit together in a cohesive sound. Mastering is the final step that prepares your mixed track for distribution across platforms by optimizing loudness, frequency balance, and dynamic range. Mixing focuses on the arrangement; mastering focuses on translation and loudness normalization to meet streaming standards like LUFS targets.
Can you mix and master a song using only free software?
Yes. Free digital audio workstations and VST plugins for equalization, compression, and limiting are sufficient for beginner mixing and mastering. The key is understanding signal chain fundamentals, gain staging, and how to use subtractive EQ and parallel compression effectively. Your room acoustics and monitoring setup matter more than expensive plugins.
What essential gear do I need to start mixing at home?
An audio interface, studio monitors or quality headphones, a microphone, and acoustic treatment are the foundation. Budget bundles like the MAONO AM200-S1 ($106.99) or Tenlamp Y300-P15B ($51.99) provide mixer and microphone pairs. Add fiberglass acoustic panels (like the VEVOR 4-pack at $91.99) to control reflections and reduce echo. A reference track and proper gain staging matter more than expensive gear.
How much loudness should my master reach for streaming?
Most streaming services normalize to -14 LUFS (integrated loudness) for stereo tracks. Aim to master between -14 and -16 LUFS to avoid clipping or over-compression by platform algorithms. Leave at least 1-3 dB of true peak headroom to prevent digital clipping. Check your DAW's metering tools or free LUFS meters to verify loudness before exporting.