

MIDI Controller Recommendations for Beginner Producers
Table of Contents
- What MIDI Controllers Do and Why Beginners Need Them
- Key Specifications That Matter: Keys, Action, and Connectivity
- Best Budget MIDI Keyboard for Home Studio Setup
- How to Set Up MIDI Controller With Your DAW
- MIDI Keyboard Size Guide for Your Space
- Avoiding Common Beginner Mistakes
- Building Your First Setup Without Overbuying
- Frequently Asked Questions
Last Updated: September 22, 2026
What MIDI Controllers Do and Why Beginners Need Them
A MIDI controller is a hardware device that sends musical data to your computer, allowing you to control virtual instruments and software effects. For anyone serious about music production, midi controller recommendations for beginner producers emphasize foundational models that balance playability and affordability.
MIDI stands for Musical Instrument Digital Interface, a standardized protocol that lets your hardware talk to your DAW (digital audio workstation) like Ableton Live, Logic Pro, or FL Studio. When you press a key, it sends data to your computer (e.g., "note C3 at velocity 85"), and your DAW triggers a virtual instrument to play that note.
MIDI controllers give you tactile control over music production. Playing keys feels natural and captures human timing and dynamics better than typing notes into a piano roll. Assignable knobs and faders let you tweak effects and control plug-in parameters without reaching for your mouse.
Most MIDI controllers are class-compliant, meaning they work with any DAW without installing special drivers. Plug in via USB, select it in your DAW settings, and you're ready to play.
Key Specifications That Matter: Keys, Action, and Connectivity
Not all MIDI controllers are built the same. Three specifications will shape your experience more than anything else: how many keys you get, what kind of action they have, and how the device connects to your computer.
Understanding Key Count and Size
Key count determines your playing range and desk footprint. MIDI controllers come in 25, 49, 61, or 88-key versions. Each size serves a different need.
A 25-key controller is the smallest and most portable, ideal for tight desk space. The trade-off: you can't play wide chord voicings or fast runs without using the octave shift button, which interrupts your flow.
A 49-key controller strikes a balance: enough range for most melodies and chords without constant shifting, and reasonable desk footprint. For beginners, 49 keys is often the sweet spot.
A 61-key or 88-key controller gives the full piano experience, but size and weight become real constraints on crowded desks.
Synth-Action vs. Semi-Weighted Keys
Key action describes how the keys feel when you press them. This affects both playability and the price of the controller.
Synth-action keys are light and springy, responding quickly with minimal finger pressure, ideal for fast synth melodies. The downside: they don't teach proper piano technique, making the transition to weighted keyboards jarring.
Semi-weighted keys provide resistance that simulates acoustic piano feel more closely than synth-action. They slow your playing slightly, improving accuracy and control, and feel more natural if you have piano background.
Velocity sensitivity measures how the controller responds to key pressure, gentle presses play quietly, hard presses play loud. Budget models sometimes feel sluggish; poor velocity sensitivity makes playing sound mechanical.
Aftertouch lets you add expression after pressing a key (bending notes, adding vibrato). Most beginner controllers skip it to keep costs down, it's not essential when starting out.
USB, MIDI DIN, and Bluetooth Connectivity
How your controller connects to your computer matters for workflow and reliability.
USB is the standard for modern controllers. Plug in a USB cable and your DAW recognizes it immediately. USB also provides power, eliminating the need for batteries or external supplies.
MIDI DIN is an older five-pin connector standard found on professional hardware synthesizers. For a beginner's first controller, it's overkill.
Bluetooth connectivity lets you play wirelessly, but introduces latency, a slight delay between pressing a key and hearing the sound. If you prioritize responsiveness, stick with USB.
Best Budget MIDI Keyboard for Home Studio Setup
Building a home studio on a tight budget doesn't mean settling for unusable gear. When shopping for your first controller, these midi controller recommendations for beginner producers prioritize:
- 49 keys (practical middle ground)
- Semi-weighted action (if budget allows)
- USB bus power (no extra cables or batteries)
- At least 8 assignable knobs or faders
- Class-compliant driver support
Avoid ultra-cheap controllers with mushy keys or poor velocity sensitivity. Spend a bit more for responsive keys and reliable connectivity. Pairing your MIDI controller with quality Content Creator Gear & Equipment ensures your entire setup works cohesively, from your controller to your audio interface and monitoring solution.

How to Set Up MIDI Controller With Your DAW
Setting up a MIDI controller is straightforward, but the exact steps vary slightly depending on your DAW. The core process is the same across all platforms.
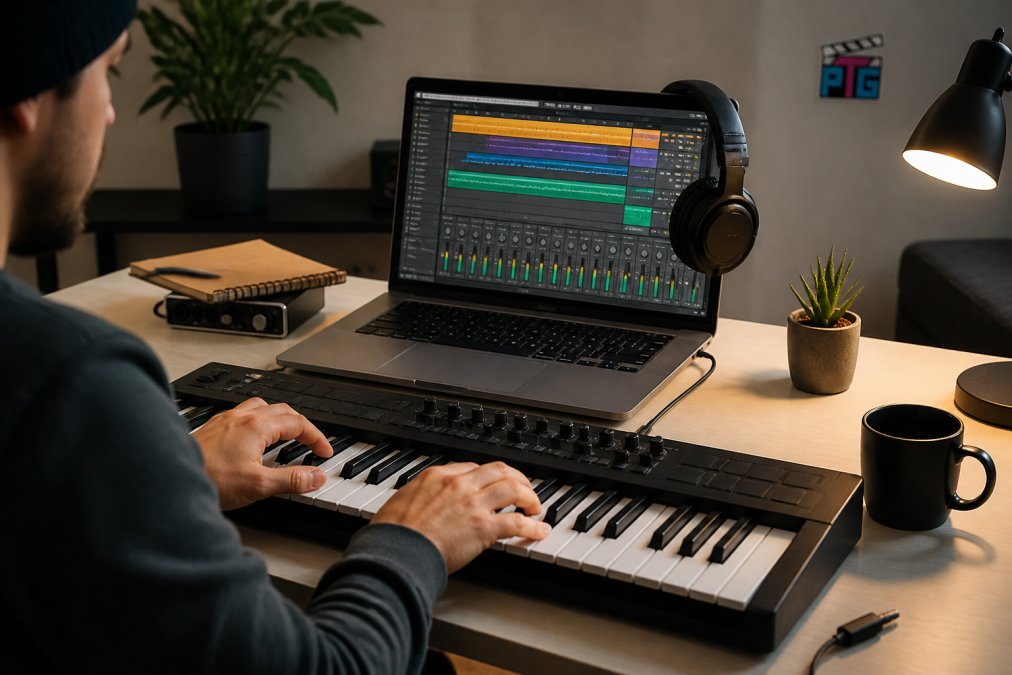
Plug the controller into your computer via USB. Open your DAW, navigate to preferences, and select your controller from the MIDI inputs list. Create a new track, set its input to receive MIDI from your controller, and press a key. You should see MIDI data appear in your DAW's note editor. Test velocity sensitivity by playing softly, then hard, velocities should change accordingly.
DAW-Specific Workflow Optimization
Each DAW handles MIDI controllers slightly differently. Learning your specific platform's workflow saves frustration.
In Ableton Live, MIDI mapping is intuitive: click the MIDI button, then click any parameter and turn a knob on your controller, Ableton learns the mapping automatically. In Logic Pro, the process is more complex but integration is rock-solid. In FL Studio, right-click any knob and select "Link to Controller," then twist the corresponding knob. Spend 15 minutes learning your DAW's MIDI mapping system, that investment pays off every session.
MIDI Keyboard Size Guide for Your Space
Desk space is often the limiting factor when choosing a MIDI controller. Before you buy, measure your actual workspace.
A 25-key controller occupies roughly 24 inches of width. It fits on most desks without displacing your monitor or audio interface. If your desk is under 48 inches wide or already crowded, 25 keys keeps things tight.
A 49-key controller needs about 48 inches of width. Ideally, you want a few inches of clearance on either side for cables and airflow. If your desk is 60 inches wide, a 49-key controller leaves room for your monitor, microphone, and audio interface without feeling cramped.
A 61-key controller starts at 55 inches and extends to 65 inches depending on the model. At this size, you're committing significant desk real estate. Make sure you have the space before ordering.
An 88-key controller is 55+ inches wide and weighs 30-40 pounds. This is a statement piece. You're essentially building a dedicated keyboard station. Most bedroom producers skip this size unless they have a dedicated music room.
Ergonomics matter too. Your elbows should rest at a 90-degree angle when your hands are on the keys. If the controller is too high or too low, you'll develop wrist strain. Use a keyboard stand or desk shelf to adjust height if needed. Your future self will thank you.
Avoiding Common Beginner Mistakes
Most beginners make the same mistakes when setting up their first MIDI controller. Knowing what to avoid saves money and frustration.
The first mistake is buying based on looks or brand name alone. RGB lighting looks cool, but it doesn't make you a better producer. A controller with customizable RGB lighting might cost more than a plain black one with identical keys and action.
Building Your First Setup Without Overbuying
A complete MIDI setup doesn't need to be expensive. Here's how to build a functional home studio without overspending.
| Component | Budget Option | Mid-Range Option | Why It Matters |
|---|---|---|---|
| MIDI Controller | 25-key, synth-action | 49-key, semi-weighted | 49 keys balances range and desk space |
| Audio Interface | USB sound card ($124.99) | 6-channel mixer ($164.99) | Mixer adds real-time effects and monitoring |
| Microphone | USB condenser ($54.99) | Dynamic with XLR ($129.99) | Skip if you're not recording vocals |
| Acoustic Panels | 4-pack ($91.99) | 8-pack ($183.98) | Even 4 panels improve recording quality |
| DAW | Free (Reaper trial) | Paid ($200-300) | Start free, upgrade when you outgrow it |
Frequently Asked Questions
Do I need a MIDI controller to start producing music?
No, but a MIDI controller makes production faster and more intuitive. You can create music with just a DAW and your computer keyboard, but a MIDI controller gives you tactile control over virtual instruments, velocity sensitivity, and real-time parameter adjustment. For most beginners, even a budget option improves workflow significantly compared to clicking notes into a piano roll.

How many keys do I need on my first MIDI controller?
Start with 25 or 49 keys. A 25-key controller fits tight spaces and costs less, making it ideal if desk space is limited. A 49-key gives you a full 4-octave range for playing melodies and chords without octave shifting. Skip 61+ keys unless you already play acoustic piano and need the range; most producers add a larger controller later as they upgrade.
What's the difference between synth-action and semi-weighted MIDI keys?
Synth-action keys are light and springy, responding instantly to fast finger movement. Semi-weighted keys have slight resistance that mimics acoustic piano feel, helping you develop better finger control and dynamics. For electronic music and beat-making, synth-action is fine. If you play piano or want to learn dynamics, semi-weighted is worth the extra cost.
Are MIDI controllers compatible with all DAWs?
Yes. MIDI controllers use a universal standard (MIDI CC, note data, pitch bend), so any controller works with any DAW: Ableton, Logic, FL Studio, Reaper, or others. Some controllers ship with software bundles or templates for specific DAWs, but compatibility is guaranteed. Class-compliant USB controllers need no drivers at all on Windows or Mac.
Building your first MIDI setup is about starting simple and upgrading as you grow. Perfect Take Gear provides affordable, reliable equipment designed for creators who are serious about their craft but mindful of their budget. Choose a 49-key controller with responsive keys, pair it with a basic audio interface, and focus on making music rather than chasing gear. The best setup is the one you'll actually use.