

Improve Stream Quality With Light Diffusion
Table of Contents
- Why Light Diffusion Matters for Streaming
- How to Diffuse Light for Video: Step-by-Step Setup
- Key Light Placement for Streaming Success
- Using an LED Panel Diffuser for Streaming
- How to Reduce Shadows on Webcam
- Camera Settings After Diffusion
- Common Mistakes to Avoid
- Frequently Asked Questions
Last Updated: October 10, 2026
Why Light Diffusion Matters for Streaming
Proper light diffusion streaming is the difference between a stream that looks amateur and one that looks professional. Without it, harsh shadows appear across the face, skin tones look blown out, and viewers focus on the lighting instead of the content.
Light diffusion is the process of spreading light over a larger area to soften harsh shadows and create even illumination. A diffuser sits between the light source and the subject, breaking up direct light rays so they scatter gently across the scene instead of creating dark, defined shadows.
Streamers often skip this step, but it's essential. A light diffusion streaming setup takes 10 minutes to assemble and transforms how the camera captures the subject.
Diffused light makes skin look natural, reduces glare on glasses, and keeps viewers focused on content. The difference between a polished stream and an amateur one.
How to Diffuse Light for Video: Step-by-Step Setup
Light diffusion setup breaks into three steps: choose the material, position it correctly, and adjust the light angle and distance.
Step 1: Choose Your Diffusion Material
Different diffusion materials scatter light at different rates, affecting final image quality.
Common diffusion options:
- Translucent fabric or diffusion paper, The most affordable option. Spreads light evenly and works with any light source.
- Purpose-built diffusion panels, Designed specifically for photography and video. More durable than fabric but cost more.
- Softbox with diffusion layer, A frame with fabric stretched across it. Combines the light modifier and diffuser into one tool.
- DIY options, White bedsheet, wax paper, or frosted plastic. Less effective than commercial options but functional for testing.
For budget streamers, a white bedsheet or translucent fabric works. Stretch it across a PVC frame or buy an affordable softbox kit. The material matters less than having something between light and subject.
The American Cinematographer's technical guidelines recommend using diffusion materials with a CRI (Color Rendering Index) above 90 to preserve accurate color in video. This matters when choosing commercial diffusion panels.
Material thickness affects light loss: thinner materials lose 20-30%, medium materials lose 40-50%, thicker materials lose 50-70%. Plan for light loss by using a brighter light source with thicker diffusion.
Step 2: Position the Diffuser Between Light and Subject
The diffuser must sit between light and subject. Placement precision matters for even light distribution.
The correct positioning:
- Place the diffuser 12-24 inches from the light source
- Keep the subject 24-36 inches behind the diffuser
- Ensure the light source is perpendicular to the diffuser (not at an angle)
Closer distances (12 inches) create softer light; farther distances (24 inches) preserve intensity but create harder shadows. Subject placement affects definition: too close creates soft, undefined light; too far weakens diffusion.
Test positioning by checking the camera feed for even brightness, soft shadows, and no blown-out highlights. Small movements (2-3 inches) create noticeable changes in shadow softness.
Step 3: Adjust Light Distance and Angle
Fine-tune the light source distance and angle to control shadow depth and highlight placement.
Light distance from diffuser:
- Closer (12-18 inches): Softer light, more diffusion, less intensity
- Farther (24-36 inches): Harder light, less diffusion, more intensity
Light angle relative to the subject:
- 45-degree angle (key light position): Creates dimension and natural-looking shadows
- Directly in front (0 degrees): Creates flat, shadowless light (good for product video, less flattering for faces)
- High angle (above eye level): Creates shadows under the eyes and chin (unflattering)
- Low angle (below eye level): Creates shadows on the forehead (unflattering)
The 45-degree angle is standard for streaming because it creates natural-looking light with subtle dimension.
Key Light Placement for Streaming Success
The key light is the primary light source. For streaming, it should sit slightly above eye level and to the side of the camera.

Ideal key light positioning:
- Height: Slightly above eye level (6-12 inches above the top of the head)
- Angle: 45 degrees to the side of the camera
- Distance: 3-4 feet from the subject (adjust based on light intensity)
This position flatters the face and reduces shadows. Avoid placing the key light directly in front (creates flat, boring light) or too high (creates tired-looking shadows). Slightly above eye level at 45 degrees is optimal.
For glasses wearers, the key light angle matters even more. A light positioned too directly in front reflects off the lenses and creates glare. The 45-degree angle minimizes reflections while still lighting the face evenly.
The Society of Motion Picture and Television Engineers (SMPTE) lighting standards define key light placement for professional video production. The 45-degree angle and slight elevation are industry standards because they work consistently across different face shapes and skin tones.
Using an LED Panel Diffuser for Streaming
LED panels are the modern standard for streaming: they stay cool, offer adjustable color temperature, and work well with diffusion.
LED panel advantages: cool operation, dimmable output, adjustable color temperature, compact size, and long lifespan.
Perfect Take Gear offers SH LED Studio Light kits with Bowens-mount compatibility, allowing streamers to attach softboxes or diffusion panels directly to the light. This setup combines the light source and diffuser into a single, easy-to-position tool. When building out your Cameras, Lighting & Audio Equipment setup, LED panels with diffusion compatibility offer flexibility as your streaming needs grow.

LED panels typically range 3000K to 6000K. Warmer light (3000K) looks natural indoors; cooler light (5600K) matches daylight. Adjust to match ambient light.
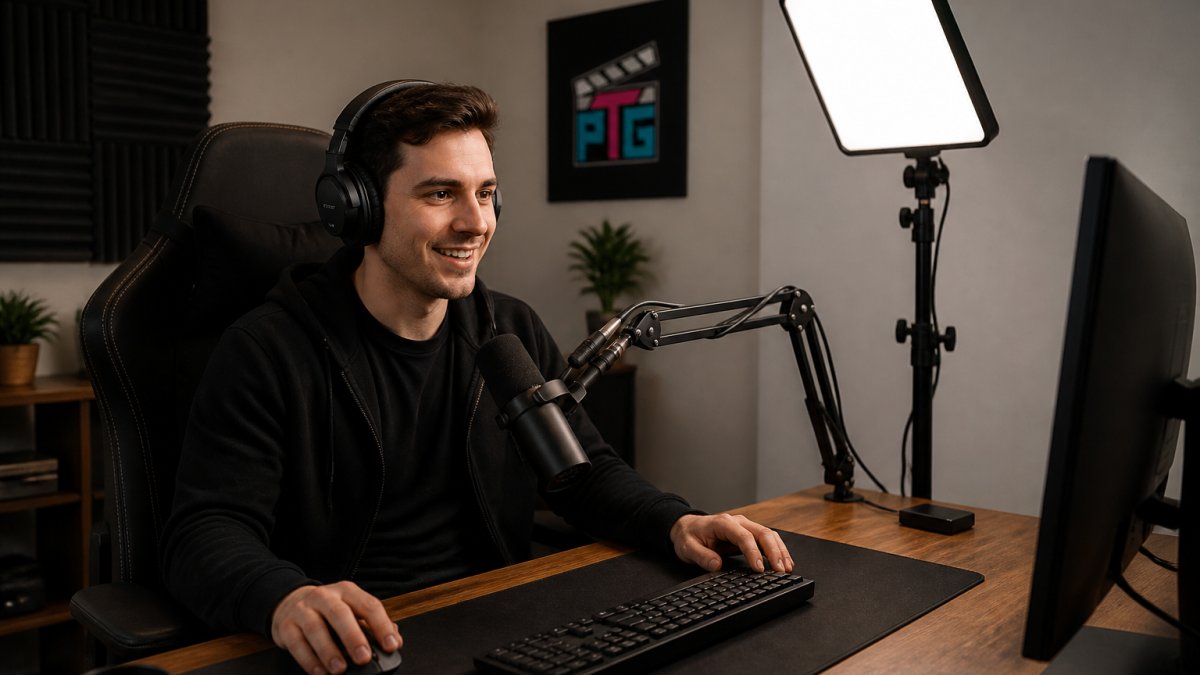
Diffusion options for LED panels include softboxes, honeycomb reflectors, standalone frames, or frosted acrylic sheets. Built-in dimming allows fine-tuning intensity without moving the light source.
SH-TYD-135 Studio Light Kit - 90W/115W/135W →
How to Reduce Shadows on Webcam
Harsh shadows are the most common lighting problem for streamers. They appear as dark lines under the nose, along the jawline, or under the eyes. Diffusion reduces them, but a two-light setup eliminates them almost entirely.
Fill Light and Reflectors
A fill light is a secondary light source positioned opposite the key light to lighten shadows without creating new ones.
Fill light positioning:
- Opposite side from the key light
- Slightly lower in intensity than the key light
- At a wider angle (60-90 degrees from the subject's center line)
The fill light doesn't need to be as powerful as the key light; it just needs to bounce enough light into shadow areas.
A reflector is a simpler alternative to a second light. A reflector is a white, silver, or gold surface that bounces existing light back toward the subject. It costs less than a second light and takes up less space.
Reflector options: 5-in-1 collapsible reflectors, foam board, aluminum foil, or bedsheet. White reflectors bounce light softly; silver bounces more intensely; gold adds warmth. For streaming, white or silver works best.
Position the reflector below and to the opposite side of the key light. Angle it to bounce light back up into the shadow areas under the eyes and chin. The reflector should be invisible in the camera frame.
Negative Fill Techniques
Negative fill blocks light from reaching shadow areas, making shadows darker and more defined. It's useful for dramatic looks or when ambient light is too bright, but less common for streaming than fill light or reflectors.
Negative fill options include black foam board, fabric, or commercial panels. Position on the same side as the key light to block light and create deeper shadows. For most streaming, positive fill produces better results.
Camera Settings After Diffusion
After diffusion setup, adjust camera exposure and white balance for optimal image quality.
Diffused light is often dimmer than direct light, potentially underexposing the image. Check the exposure meter and increase compensation if needed. Test exposure levels to achieve natural-looking results without blown-out highlights.
Adjust white balance to match the primary light source's color temperature. For LED panels, set the light to match ambient room light to simplify white balance adjustment.
Gain and ISO settings: If the image is too dark after diffusion, increase the gain (or ISO on some cameras). Keep gain as low as possible to avoid visible noise in the image.
The Digital Imaging and Communications in Medicine (DICOM) standard for video quality includes recommendations for camera settings in professional video production. While DICOM applies primarily to medical imaging, its principles for exposure and white balance apply to streaming as well.
Common Mistakes to Avoid
Most streaming lighting problems come from common setup mistakes. Knowing what to avoid saves time and frustration.
Mistake 1: Diffuser too close to the light source If the diffuser sits only 4-6 inches from the light, the light spreads too much and loses intensity.
Mistake 2: Subject too close to the diffuser If the subject sits only 12 inches from the diffuser, the light becomes too soft and shadowless.
Mistake 3: Light source at the wrong angle Placing the light directly in front of the camera creates flat, boring light.
Mistake 4: No fill light or reflector A single diffused key light reduces shadows but doesn't eliminate them.
Mistake 5: Using the wrong diffusion material Overly thick diffusion materials block too much light and require a brighter light source.
Mistake 6: Ignoring room ambient light If the room is very bright, the key light competes with ambient light and loses impact.
Mistake 7: Not adjusting camera settings Even with perfect lighting setup, the camera might not capture it correctly.
Proper light diffusion transforms a stream from amateurish to professional in one simple step.
Perfect Take Gear's SH Photography Studio Lighting Kit includes everything needed for a complete diffused lighting setup: softboxes, light stands, reflectors, and backdrops. As part of their Content Creator Gear & Equipment collection, this kit gives streamers a complete foundation to start.
Frequently Asked Questions
How does light diffusion improve stream quality?
Diffusion spreads light across a wider area, softening shadows and reducing harsh highlights that make skin look flat or unflattering on camera. This creates a more professional, cinematic appearance. Diffused light also reduces glare on glasses and reflective surfaces, and allows you to position your light source closer to your face without creating unflattering shadows. The result is an image that looks polished without requiring expensive equipment or heavy post-production editing.
What is the best light diffuser for streaming?
The best diffuser depends on your light source and space. Softboxes work well with continuous LED lights and are available in rectangular, octagonal, or ball styles. For smaller setups, translucent fabric panels or even diffusion paper work effectively. The SH Studio Light Kit options at Perfect Take Gear include compatible softboxes and reflectors designed for streaming and video work. For budget-conscious streamers, DIY diffusion using white bed sheets or wax paper can be effective, just ensure materials don't overheat near your light source.
How far should a diffuser be from a streaming light?
Position the diffuser 6 to 12 inches from your light source to balance softness and brightness. Closer placement softens light more but reduces output; farther placement preserves brightness but creates slightly harsher edges. Experiment with distance to find the balance that works for your camera and room.
Can I reduce shadows on my webcam without buying a full lighting kit?
Yes. Start with one key light positioned at 45 degrees to your camera. Add a reflector or white poster board on the opposite side to bounce light back and fill shadows. If you don't have a reflector, a white wall or sheet works. For harsh overhead lighting, diffuse it with translucent fabric. Adjust your camera's exposure and white balance after adding diffusion to ensure your skin tone looks natural. Many streamers achieve professional results with a single diffused light source and a simple reflector.