

How to Optimize Small Room Acoustics for Recording
Table of Contents
- Why Small Rooms Sound Bad (And What Actually Fixes It)
- Step 1: Find Your Listening Position and Reflection Points
- DIY Acoustic Panels for Beginners: Build Your First Treatment
- Bass Traps Placement Guide: Taming Low-Frequency Buildup
- How to Reduce Echo in a Room for Recording Without Breaking the Bank
- Managing Room Modes and Standing Waves
- Making Treatment Look Good: Aesthetics and Interior Design
- Frequently Asked Questions
Last Updated: September 16, 2026
Why Small Rooms Sound Bad (And What Actually Fixes It)
Small room acoustics is the study of how sound behaves in confined spaces, and in most home studios the problem is not your gear, it is the room. A microphone hears the room as much as it hears you, and a small untreated space adds boom, boxiness, and a metallic ring to every take. This guide covers the fixes in order of importance.
Here is the uncomfortable truth most gear reviews skip: upgrading from a budget microphone to a professional one in an untreated room often makes recordings sound worse. A more sensitive mic captures more of the room's problems. Treatment first, gear second.
Two things wreck small-room recordings. Standing waves are low-frequency buildups that occur when sound bounces between parallel surfaces at a distance matching its wavelength. First reflections are early bounces off your side walls, ceiling, and desk that smear stereo imaging and cause flutter echo, the rapid ringing between two bare parallel walls. Fix those two and you have solved most of what you hear.
The Physics You Need to Know (In Plain English)
Sound is a pressure wave, and every boundary in your room reflects part of it back. In a large room those reflections arrive late enough that your brain tunes them out; in a small room they arrive almost immediately and blur with the direct sound.
The three numbers worth understanding are frequency, wavelength, and reverberation time. Low frequencies have long wavelengths, a 60 Hz bass note is roughly 19 feet long and will not fit in a 10-foot room without bouncing. That is why low-frequency buildup is the hardest problem to solve and why thin foam does almost nothing for it.
Absorption vs. Diffusion: Which Do You Need?
Absorption converts sound energy into heat using porous material; diffusion scatters it in many directions using shaped surfaces. Small rooms almost always need absorption first, because diffusion requires distance between the diffuser and the listener.
A practical rule: if your room is under roughly 12 feet in any dimension, spend your first budget on absorption, then add diffusion behind the listening position once the room no longer rings.
| Problem | Treatment | Where It Goes | Typical Cost Tier |
|---|---|---|---|
| Flutter echo | Absorption panels | Side walls at ear height | Entry |
| First reflections | Absorption panels | Mirror points left and right | Entry |
| Low-frequency buildup | Bass traps | Vertical corners | Mid |
| Harsh ceiling bounce | Cloud panel | Above the mix position | Mid |
| Dead, lifeless back wall | Diffusion | Rear wall | Advanced |
Step 1: Find Your Listening Position and Reflection Points
Start with the mix position, not the walls. Speakers and ears should form an equilateral triangle, with the listening position roughly 38% of the room's length from the front wall, avoiding dead center, where low-frequency buildup is worst.
To find your reflection points, sit in your chair and have someone slide a mirror flat along the side wall. Anywhere you can see a speaker in the mirror needs a panel. Repeat on the ceiling and mark each spot with tape.
The 38% Rule and Why It Works
The 38% rule places your ears where room modes interfere least, flattening the low-end response at the listening position. It is not a cure, but it is a free starting point.
Speaker Placement and Distance from Walls
Pull monitors off the front wall by at least a foot and keep them out of corners unless you want exaggerated bass. Monitor placement near a boundary boosts low frequencies, useful for a thin speaker, disastrous for a boomy room.
VEVOR Fiberglass Acoustic Panels →
DIY Acoustic Panels for Beginners: Build Your First Treatment
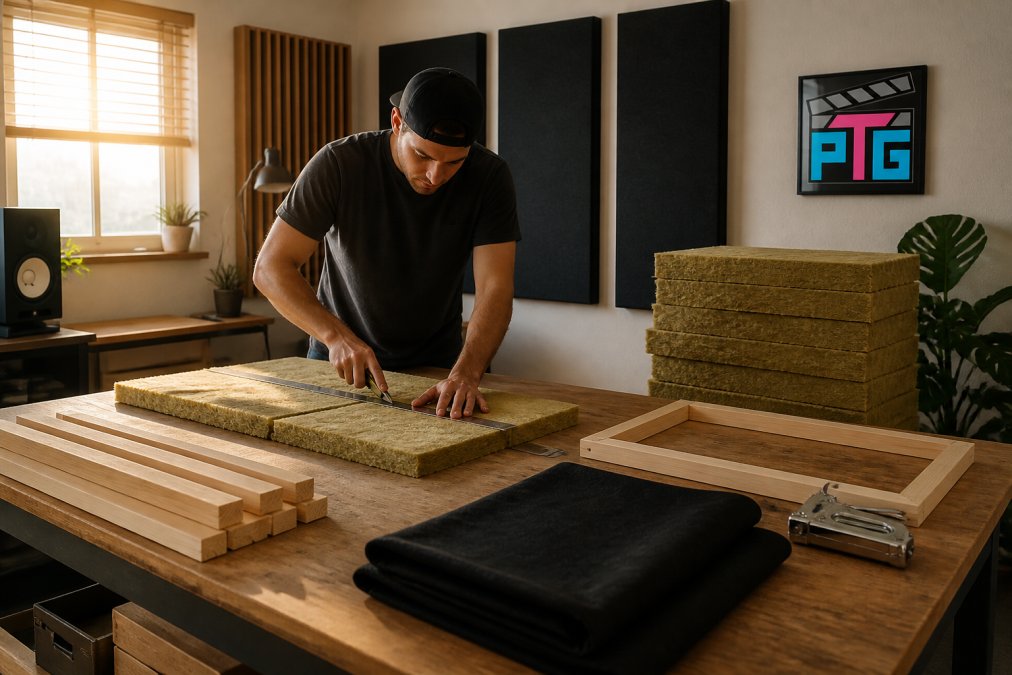
DIY acoustic panels for beginners are simpler than most people expect: a wooden frame, rigid absorptive material, and breathable fabric.

Materials That Actually Work
Mineral wool and rockwool are the standard choices: dense enough to absorb a wide frequency range, rigid enough to hold their shape. Acoustic foam works for highs but is far less effective below roughly 500 Hz.
Step-by-Step Build Instructions
Bass Traps Placement Guide: Taming Low-Frequency Buildup
Bass traps placement guide, in one sentence: put them in corners, floor to ceiling, and stack them.
Why Corners Are the Highest-Value Real Estate
A porous absorber converts the kinetic energy of moving air into heat as sound passes through it, so it is most effective where air velocity is highest, a quarter-wavelength from a hard boundary, not at the boundary itself.
Straddling vs. Filling the Corner
Two common approaches trade cost against low-frequency reach:
- Straddle mount: the panel spans the corner at an angle, leaving a triangular air gap behind it. Cheap, easy to hang, and the air gap extends low-frequency absorption beyond what the panel thickness alone would suggest. Best for most home studios.
- Fill the corner: the entire triangular void is packed with absorptive material, often cut into stacked triangles or wedges. More material, more low-frequency absorption, more cost and weight. Worth it for the two front corners behind the monitors if budget allows.
Where to Put Bass Traps in a Small Room
- Vertical corners: the highest-value spot, especially the two corners behind the speakers.
How Many Traps Do You Actually Need?
- Two traps in the front vertical corners behind the monitors, the highest-impact single purchase.
- Four traps covering all four vertical corners floor to ceiling, the standard recommendation for a dedicated mix room.
- Six or more adding ceiling corners and wall-floor junctions, diminishing returns begin here, and measurement should guide the next purchase.
Verifying That Your Traps Are Working
How to Reduce Echo in a Room for Recording Without Breaking the Bank
Reducing echo comes down to covering the right surfaces with the right material in the right order.
Budget-Tiered Implementation Plans
| Tier | What You Do | What It Fixes | Best For |
|---|---|---|---|
| Entry | 4 panels at mirror points, rug on hard floor | Flutter echo, harsh highs | Voiceover, podcasts |
| Mid | 6 panels plus 4 corner bass traps | Boom, boxiness, imaging | Music recording, mixing |
| Advanced | Full corner treatment plus ceiling cloud and rear diffusion | Room modes, low-end accuracy | Critical mixing work |
Software-Based Room Correction Integration
Managing Room Modes and Standing Waves
Making Treatment Look Good: Aesthetics and Interior Design
A few approaches that work in a small space:
- Choose fabric panels in a color that matches your wall so they visually recede
- Arrange panels in a deliberate grid rather than scattering them randomly
- Use the panel layout to frame a poster, screen, or window
- Mount traps in corners behind furniture where they disappear
Frequently Asked Questions
What is the 38% rule in room acoustics?
The 38% rule suggests placing your listening position about 38% of the way into the room from the front wall. In a 10-foot room, that means sitting roughly 3.8 feet from the wall behind your speakers. This position reduces low-frequency buildup and gives you a more balanced frequency response. It is a starting point, not a hard rule. Small rooms often need adjustment based on speaker placement and furniture. Try it, then move your chair a few inches forward or back to find the sweet spot.
How do I stop sound reflections in a small bedroom studio?
Start by identifying first reflection points. Sit at your listening position and have someone slide a mirror along the side walls. Any spot where you see a speaker in the mirror needs absorption. Place acoustic panels there. For a small bedroom, focus on the wall behind the speakers and the side walls at ear level. Add a thick rug and curtains to reduce flutter echo. Bass traps in corners handle low-frequency buildup. Even three or four panels make a noticeable difference.
Do I need professional acoustic foam for a small recording space?
You do not need expensive foam. Mineral wool or rockwool panels perform better than most acoustic foam, especially for mid and low frequencies. Foam works for high frequencies but leaves bass problems untreated. For a small room, build DIY panels with mineral wool and fabric. If you want a quick solution, self-adhesive fiberglass panels with an NRC rating of 0.95 absorb mid-to-high frequencies effectively. Focus on coverage at reflection points and corners rather than covering every wall.
How can I improve room acoustics for recording on a budget?
Start with free changes: move your desk away from the wall, position speakers at ear level, and add a rug and heavy curtains. Next, build DIY acoustic panels using mineral wool and wood frames for about $30 to $50 each. Place them at first reflection points and in corners as bass traps. A USB audio interface with 24-bit quality, like the NXG MD21, improves recording clarity without room treatment. Software room correction can handle remaining frequency issues for under $100.