

How to Decorate a Home Content Studio on a Budget
Table of Contents
- Plan Your Space Before You Spend a Dollar
- DIY Studio Lighting Ideas That Look Professional
- Best Budget Acoustic Treatment for Home Studio
- Aesthetic Studio Background Ideas for Every Niche
- How to Decorate a Home Content Studio with Cheap Decor
- Cable Management and Desk Setup for a Clean Look
- Conclusion
- Frequently Asked Questions
Last Updated: September 12, 2026
Plan Your Space Before You Spend a Dollar
Most creators buy gear first and figure out the room later. That's backwards, and it's why so many home studio builds end up feeling cramped and chaotic. Learning how to decorate a home content studio on a budget starts with a tape measure, not a shopping cart.
Here's the framework that works: measure your room, pick your filming corner, then map what has to go where before anything gets ordered. A content studio is a dedicated space where lighting, audio, and background are controlled well enough to produce consistent video, photo, or streaming output. The most common setup mistake is buying a light kit before knowing where the camera will actually sit.

Sketch the room on paper. Mark the camera position, the subject position, and where power outlets live. That sketch becomes your shopping list.
DIY Studio Lighting Ideas That Look Professional
The best budget lighting setup uses three sources: a key light, a fill light, and a background light. You don't need expensive fixtures. You need the right positions, the right color temperature, and a modifier that softens the source.
Start with one main light angled 45 degrees from the subject, slightly above eye level. A ring light kit with adjustable color modes covers this job well and doubles as a fill source when you add a second unit later. Diffuse harsh light with a white shower curtain, a sheet of parchment over a wire frame, or a $10 white foam board bounced off a wall. Keep every light in the room at the same color temperature, or your footage will show mixed color casts that are painful to fix in editing.
Match Kelvin to Your Camera and Skin Tone
Color temperature is measured in Kelvin (K), and the number you pick changes how skin renders on camera. Most budget LED panels and ring lights let you dial between roughly 2700K (warm, tungsten-like) and 6500K (cool, daylight-like). A few rules of thumb that practitioners rely on:
- 3200K-4000K: flattering for most skin tones on phone cameras and consumer camcorders, which tend to run warm and benefit from a slightly warmer source. Good default for beauty, lifestyle, and talking-head content.
- 5000K-5600K: neutral daylight. Best when you also have window light in the frame or when you're matching a daylight-balanced practical lamp. Works well on mirrorless and DSLR sensors with a daylight white-balance preset.
- 5600K-6500K: cooler, crisper look. Common for tech, gaming, and product content. On darker skin tones, very cool light can read ashy on cheaper sensors, nudge toward 5000K and add a touch of warmth in post instead.
Set your camera's white balance manually rather than leaving it on auto. Auto white balance will hunt between your key, fill, and any window light, and the resulting flicker is hard to remove. If your camera has a custom white balance mode, shoot a white card under your final lighting and lock it in.
Build a DIY Softbox for Under $25
Hard light creates sharp shadows and highlights texture you may not want on camera. Soft light wraps around the subject. You can soften any budget LED with a homemade modifier:
- Foam board bounce: a 20x30-inch white foam board angled opposite the key light bounces soft fill for a few dollars.
- Shower-curtain diffusion: a white, frosty shower liner clipped to a wire frame in front of the LED cuts harshness without killing output. Keep it at least 12 inches from the light to avoid heat buildup (osha.gov).
- Parchment paper scrim: taped over a ring light, it turns a harsh ring into a soft, even source. Replace it when it yellows.
- Bedsheet backdrop bounce: a white flat sheet hung on a wall behind the camera bounces ambient light back onto the subject for free.
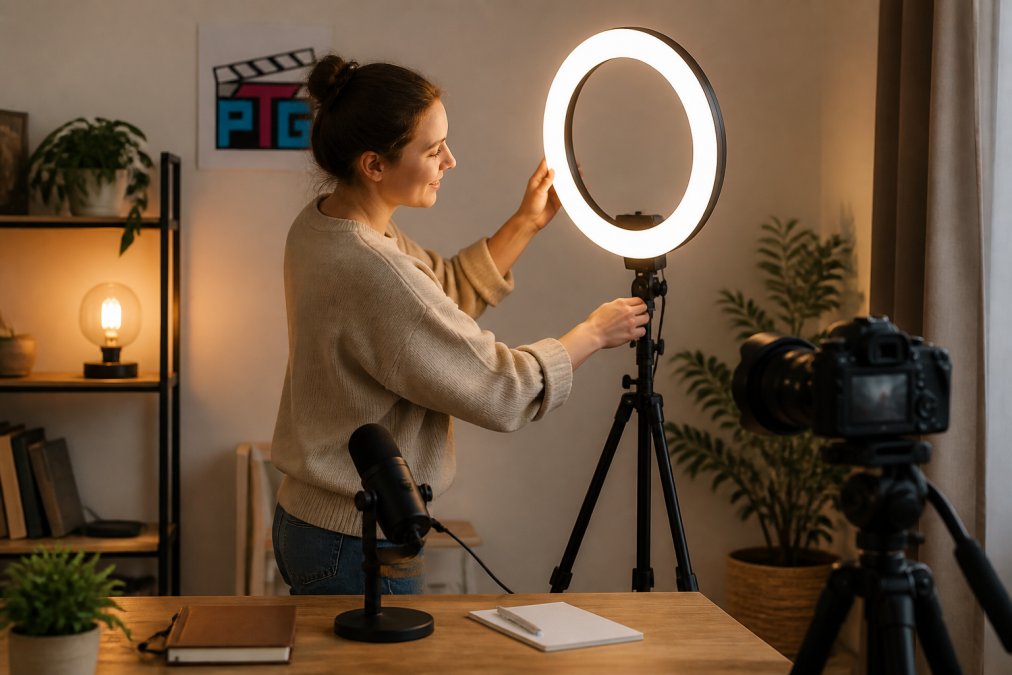
- Key light: main source, 45 degrees off-axis, slightly above eye level
- Fill light: opposite side, lower intensity, softens shadows
- Background light: behind the subject, separates them from the wall
- Practical lights: lamps and LEDs in frame for warmth and depth
Best Budget Acoustic Treatment for Home Studio
Echo is the fastest way to make a good camera look amateur. The fix is absorption, not expensive foam. Acoustic treatment is the practice of reducing reflected sound in a room so recordings capture the voice rather than the room's reverb.
Soft furnishings do more than most people expect. A rug, heavy curtains, a bookshelf, and a fabric couch absorb mid and high frequencies (acousticalsociety.org). For stubborn corners, self-adhesive fiberglass panels with a high NRC rating mount without drilling and can be repositioned as your layout changes.
Place panels at the first reflection points: the walls beside and behind the microphone. You don't need to cover every surface. Three or four well-placed panels beat a wall of cheap foam.
| Problem | Budget Fix | Where to Place It |
|---|---|---|
| Harsh echo | Fiberglass acoustic panels | First reflection points |
| Boomy low end | Corner bass trapping with dense material | Room corners |
| Thin vocals | Moving blanket or thick curtain | Behind the microphone |
| Desk reflections | Felt pads and a desk mat | Under and around the desk |
Aesthetic Studio Background Ideas for Every Niche
A strong background does quiet psychological work: it signals credibility before a viewer hears a word. That's the part most budget guides skip. A cluttered wall reads as chaos; a deliberate one reads as authority. Viewers decide in the first few seconds whether to keep watching, and the background is doing as much of that work as your face or your hook (PubMed).

Why Backgrounds Change Retention
Three principles explain most of the effect:
- Cognitive load: busy backgrounds force the viewer's brain to process competing visual information. A clean background lets attention land on you and your message. This is why minimalist setups outperform cluttered ones for talking-head content even when the cluttered one cost more to build.
- Color and mood: warm tones (terracotta, amber, cream) read as approachable and are common in lifestyle and coaching content. Cool tones (slate, navy, charcoal) read as competent and technical, which is why tech and finance creators gravitate to them. Pick the emotion you want the viewer to feel, then pick the palette.
- Depth cues: a background with layered depth, a plant in front of a shelf in front of a wall, reads as a real space rather than a flat backdrop. Depth keeps the eye moving without distracting.
Pick a Direction and Commit
Minimalist setups use one color palette, a single plant, and negative space. Textured setups layer brick, wood, or fabric for warmth. Chromakey setups use a smooth cotton green screen backdrop so you can swap scenes in editing without rebuilding the room.

- Beauty and lifestyle: soft neutrals, dried florals, warm lamplight
- Tech and gaming: dark palette, RGB accents, shelving with visible gear
- Education and coaching: bookshelf, whiteboard, one accent color
- Fashion: full-length backdrop curtain, consistent lighting, no clutter
Hide the Studio When You Live in the Room
Most home creators don't have a dedicated studio, they have a corner of a bedroom, living room, or dining area that has to do double duty. The trick is to design the studio so it disappears in under five minutes.
A few patterns that work:
- Roll-up backdrop on a wall-mounted rod: a fabric backdrop on a curtain rod above the filming wall rolls up and out of sight when you're done. Choose a neutral color that matches the room's paint so it disappears when rolled.
- A folding screen or room divider: a three-panel screen hides a light stand, a tripod, and a small shelf in one motion. Look for one with a finish that matches your living space, not a studio aesthetic.
- Convertible furniture: a desk that folds flat against the wall, or a rolling cart that holds your lights and camera and tucks into a closet. Rolling carts are the single most common budget solution for creators who film in shared rooms.
- Storage that reads as decor: a woven basket for cables, a lidded ottoman for light stands, a decorative trunk for backdrops. The storage is part of the room's look, not a studio giveaway.
- Wall-mounted cable raceways: paint them to match the wall so the cords vanish when the gear comes down.
How to Decorate a Home Content Studio with Cheap Decor
Budget decor works when it adds texture and visual interest without stealing attention. Thrift stores, clearance bins, and things you already own cover most of it.
Layer a few elements rather than filling every surface. A wooden crate, a stack of books, a trailing plant, and one piece of wall art create depth for very little money. Upcycled pieces, like a repainted shelf or a reclaimed pallet, add character that store-bought decor rarely matches.
Keep the palette to three colors. Rotate props seasonally instead of buying new ones. A small budget goes further when every item supports the same visual story.
Cable Management and Desk Setup for a Clean Look
Visible cable clutter destroys an otherwise professional frame. Cable management is the practice of routing, bundling, and hiding cords so the workspace stays clean on camera and safe in daily use.
Route power and data cables along desk legs and behind furniture. Adhesive clips, velcro ties, and a cable tray under the desk handle most of it. Label both ends of every cable so troubleshooting doesn't mean unplugging the whole setup.
Ergonomics matter too. Set the monitor or camera at eye level, keep the desk height comfortable for long sessions, and leave space for storage solutions like drawers or bins. A tidy desk setup reads as competence on camera, and it makes you faster off camera.
Conclusion
Building a studio that looks expensive without spending like it is comes down to planning, not purchasing power. Measure first, light deliberately, treat the room's sound, and keep the background intentional.
Perfect Take Gear stocks the gear that makes each of those steps easier, from the 18-Inch RGB Ring Light Kit with Tripod to fiberglass acoustic panels and cotton chromakey backdrops. If you'd rather not piece everything together yourself, the Content Creator Gear & Equipment range bundles the cameras, lighting, and audio essentials into one place, and the Gaming Gear & Accessories lineup covers RGB accents and desk-friendly extras for streamers. Start with the essentials, then expand as your content grows. Browse the studio and creator gear range at Perfect Take Gear and turn any corner of your home into a workspace that looks the part.
Frequently Asked Questions
How do I decorate a home content studio on a budget?
Start by planning your space and identifying what appears on camera. Invest in affordable lighting like a ring light kit, add budget acoustic panels to reduce echo, and choose simple backdrops such as fabric or painted walls. Use thrifted decor and cable management to keep the set clean. Focus spending on lighting and audio first, since viewers notice those most.
What are the best budget acoustic treatment options for a home studio?
Self-adhesive fiberglass panels with an NRC rating around 0.95 are effective for reducing echo and reverberation. Place them on walls behind your microphone and at first reflection points. For a lower-cost option, heavy moving blankets or thick curtains can help. Even a few panels can make a noticeable difference in audio clarity for voiceovers and streaming.
How can I make my home studio look professional without spending much?
Use a clean, uncluttered background with intentional decor like a plant, shelf, or wall art. Set up soft, diffused lighting from a key light and fill light to avoid harsh shadows. Hide cables with clips or sleeves. A consistent color palette and a few textured props can make a budget setup look polished on camera without expensive renovations.
What are some DIY studio lighting ideas for small spaces?
Use a ring light with adjustable color temperature as a key light, and bounce it off a white wall for soft fill. Clamp lights with diffusion fabric can work as affordable accents. Position lights at 45-degree angles to your face for flattering shadows. For background interest, add a small RGB light or string lights to create depth without taking up floor space.