

Essential Software for Home Content Creators: 2026 Guide
Table of Contents
- What Home Content Creators Actually Need From Software in 2026
- Best Video Editing Software for Beginners: What to Look For
- Audio Recording, Editing, and Mastering Tools for Home Studios
- Graphic Design and Visual Asset Software for Thumbnails and Branding
- How to Organize Content Creation Projects Without Losing Files
- Content Creator Workflow Automation: Making Tools Talk to Each Other
- System Requirements and Hardware That Keep Software Running Smoothly
- Conclusion
- Frequently Asked Questions
Last Updated: September 13, 2026
What Home Content Creators Actually Need From Software in 2026
Essential software for home content creators is the small set of programs handling video editing, audio cleanup, graphics, file organization, and publishing on one home computer, with no production team. This guide from Perfect Take Gear breaks down the five categories that matter and how to keep them working together.
The biggest beginner mistake is buying five overlapping subscriptions in month one. Pick one tool per category, learn it properly, and add a second only when a real limitation appears.
The Five Software Categories Every Home Studio Runs On
Nearly every home setup runs on the same five categories. Skip one and something downstream breaks.
| Category | What It Handles | Typical Cost Model |
|---|---|---|
| Video editing | Cutting, color, export | Free tier or subscription |
| Audio recording and mastering | Voice capture, noise cleanup | Free or one-time purchase |
| Graphic design | Thumbnails, channel art | Free tier or subscription |
| Project organization | Files, naming, backups | Free or one-time purchase |
| Workflow automation | Moving files between tools | Free or bundled |
Most creators underestimate the last two. Editing gets the attention, but disorganized files and manual handoffs are what slow a weekly upload schedule to a crawl.
Best Video Editing Software for Beginners: What to Look For
The best video editing software for beginners prioritizes fast imports, a forgiving timeline, and clean high-definition export over advanced color tools most people never touch. Three things decide whether it survives past month two:
- Hardware acceleration support, so render times stay reasonable on a laptop without a dedicated graphics card
- A timeline that does not punish mistakes, meaning easy undo and simple clip trimming
- Direct export presets for the platforms you actually publish to
Non-linear editing is the timeline model nearly all of these programs use: clips sit on tracks, you rearrange them freely, and nothing is baked in until export. Learning that one concept removes most of the intimidation.
Free and Open-Source Alternatives Worth Trying First
Free options are genuinely capable now. Open-source alternatives handle cutting, basic color correction, and high-definition export well enough for a first hundred videos. The trade-off is documentation: paid tools have better tutorials, so budget extra time for the learning curve.
A practical rule: stay free until a specific task becomes genuinely painful, then pay for the one tool that fixes it.
Audio Recording, Editing, and Mastering Tools for Home Studios
Audio quality separates channels that feel professional from channels that feel homemade, and it is cheaper to fix than video. Most home studios need three things: a recording application, a noise-reduction step, and light mastering for consistent levels.
Room treatment matters as much as software. Hard walls and bare floors create echo no plugin fully removes. Absorbent panels behind the microphone cut that at the source, and a cardioid pattern microphone rejects sound from behind and beside it, reducing room noise before it reaches your software. If you are still assembling that side of the setup, Perfect Take Gear's Content Creator Gear & Equipment covers microphones, audio interfaces, and the rest of the recording chain.

Graphic Design and Visual Asset Software for Thumbnails and Branding
Thumbnails and channel art drive click-through more than most creators admit, and you do not need a full design suite. You need a tool that handles layered composition, consistent text styling, and export at platform-specific dimensions.
The realistic tool tiers break down like this:
- Free browser-based editors (Canva's free tier, Photopea) handle layered composition, text styling, and preset export sizes. Canva's free plan covers most thumbnail work; the paid tier mainly unlocks brand kits and background removal.
- One-time purchase desktop editors (Affinity Photo, Pixelmator Pro) give full layer control with no recurring fee.
- Subscription suites (Adobe Photoshop, Illustrator) offer the deepest toolset and widest tutorial library, but the monthly cost adds up fast for a solo creator making one thumbnail a week.
For most home creators, the free tier of a browser editor is enough for the first year. Upgrade only when you hit a specific wall, like needing vector logos or precise color management.
Platform Export Dimensions You Should Save as Presets
Rebuilding a thumbnail from scratch every week is the biggest time waste here. Set up export presets once and reuse them:
- YouTube thumbnails: 1280 x 720 pixels, 16:9 aspect ratio, under 2 MB
- Instagram feed: 1080 x 1080 (square) or 1080 x 1350 (portrait)
- Instagram Reels and TikTok covers: 1080 x 1920, 9:16 vertical
- X/Twitter header: 1500 x 500
- Facebook cover: 820 x 312 on desktop
Keep one saved template with fonts and colors locked in, then duplicate it per video. Name exported files with the video title and date so you can find the layered original months later.
The Hidden Cost of Design Subscriptions
This is where solo creators get burned. Adobe Creative Cloud runs roughly $60 per month for the full suite, or about $23 per month for Photoshop alone, $276 to $720 a year for software you may open twice a week (adobe.com). Affinity Photo is a one-time purchase in the $70 range with no recurring fee, and Canva's free tier costs nothing.
The math is simple: for thumbnails and channel art, a one-time purchase or free tool usually wins. If you need vector illustration, advanced retouching, or client-ready files, the subscription earns its keep. Pick based on the work, not the brand name.
For creators who draw or hand-letter their own graphics, a pen display tablet turns a slow mouse-and-keyboard process into something closer to sketching on paper. The Huion Kamvas 13 Gen 3 line is one example of a drawing monitor built for this kind of work, though a basic tablet works fine for simple thumbnail text.
How to Organize Content Creation Projects Without Losing Files
A project organization system is a fixed folder structure plus a naming convention you never break. It prevents the most demoralizing problem in home production: losing a finished file the week it needs to publish.
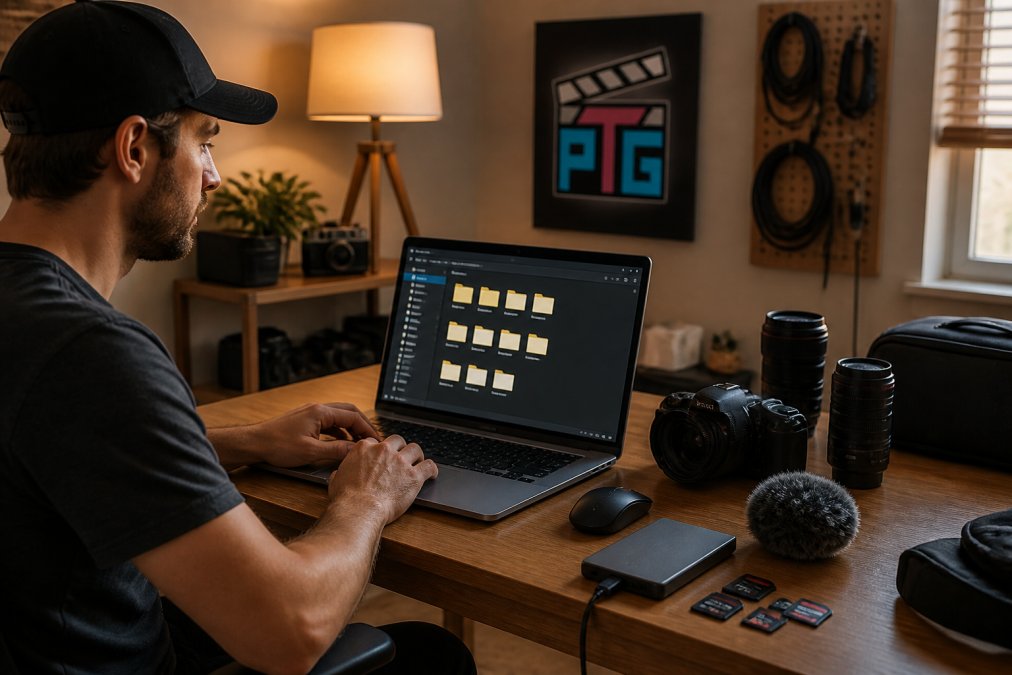
The structure that works for most solo creators:
- One root folder per year
-
One subfolder per project, named
YYYY-MM-DD_project-title -
Inside each project:
raw,audio,graphics,exports -
Never edit a file in
raw; always work from a copy - One external drive holding a second copy, updated weekly
That last checkbox is the one people skip. A single drive is not a backup, it is a single point of failure.
Metadata Tagging and Digital Asset Management Basics
Digital asset management sounds like corporate jargon for a folder system, and mostly it is. The difference is metadata: tags embedded in the file itself rather than the folder name, so a search surfaces every clip of a given subject regardless of where it sits.
Most editing programs let you add keywords and ratings to clips in a bin. Tagging footage as you import takes seconds and saves hours when you need a specific shot six months later. File synchronization tools keep the library consistent across a laptop and desktop, though large video files often exceed free storage tiers.
Content Creator Workflow Automation: Making Tools Talk to Each Other
Content creator workflow automation means setting up your programs so files move between them without manual dragging, where most home setups leave the most time on the table. The goal is a pipeline: record, edit, export, publish, each step triggering the next.
Most guides list tools in isolation. The real value is in how they connect. Here is what that looks like in practice.
The Three Layers of Automation
Layer 1: Watch folders. Nearly every editing program (DaVinci Resolve, Premiere Pro, Final Cut Pro) can monitor a folder and auto-import new files. Point your recorder's output folder at your editor's watch folder and new takes appear without a single drag.
Layer 2: Export presets that write to synced folders. Set your editor's export destination to a Dropbox, Google Drive, or iCloud folder. The moment you hit export, the file syncs to your phone, laptop, and backup drive, no manual upload step.
Layer 3: Cross-app automation. This is the layer almost nobody covers. Tools like Zapier, Make (formerly Integromat), and Apple Shortcuts can chain actions across apps that do not natively talk to each other. A few realistic examples:
- When a new file lands in a Google Drive folder, Zapier can auto-create a row in a Google Sheet with the filename and date, giving you a searchable content log without any manual entry.
- A Shortcut on macOS can rename every file in a folder to your
YYYY-MM-DD_project-titleconvention in one click. - Make can watch a YouTube channel's RSS feed and post a notification to a Discord or Slack channel when a new video goes live, useful once you have a small team.
- Buffer, Later, and Hootsuite all offer scheduling APIs, so a scheduled post can be triggered from a spreadsheet rather than logged into manually.
What to Automate First (In Order of Payoff)
- Watch folders that auto-import new recordings into the editing project
- Export presets that write directly to a synced folder
- Batch processing for resizing one thumbnail into every platform's dimensions
- Scheduled uploads queued in advance rather than posted manually
- Metadata logging (filename, date, topic) into a spreadsheet for later search
Start with the first two. They take under ten minutes to set up and save the most time per week.
The Subscription Fatigue Problem
Automation tools have their own cost trap. Zapier's free tier caps you at a small number of tasks per month, with paid tiers starting around $20 per month. Make's free tier is more generous but has its own limits. Apple Shortcuts is free on macOS or iOS.
A common pattern: stack three or four small subscriptions (scheduling, automation, cloud storage, design) and pay more per month than a single professional suite. Before adding another tool, ask whether the task it automates takes more than a few minutes a week. If not, a manual step is cheaper.
When Collaboration Tools Actually Matter
Cloud-based collaboration tools matter less for solo creators and more once a second person joins, an editor or thumbnail designer. Then shared project folders beat emailing files back and forth. Google Drive, Dropbox, and Frame.io all handle shared review and comment workflows, though Frame.io's paid tiers target teams rather than individuals.
System Requirements and Hardware That Keep Software Running Smoothly
System requirements decide which software you can actually run, and this is where home creators get burned most often. Video editing leans hardest on RAM and storage speed; audio work on processor single-core performance; graphics work on display color accuracy.
Adobe's published system requirements for Premiere Pro is a useful reference point even if you never install it, because it shows the realistic floor for professional-grade editing: dedicated GPU, substantial RAM, and fast storage. Check your machine against that baseline before committing to any heavy editor.
Storage planning deserves a specific number rather than a vague sense of "enough." High-definition footage eats space quickly, and multiple camera angles and audio tracks multiply fast. Two drives minimum: one working drive, one backup, ideally a third offsite copy.
Conclusion
The software stack is only half the setup. The other half is the gear feeding it: a microphone that rejects room noise, lighting that flatters without a full studio build, and a camera or webcam that holds focus while you move. Perfect Take Gear stocks creator gear, cameras, lighting, and audio equipment built for exactly this kind of home setup, from starter kits for first-time creators to individual pieces that mix with equipment you already own. Browse the collection and build the setup your content deserves.

Frequently Asked Questions
What software is best for content creators just starting out?
Start with free or low-cost tools that cover editing, audio, and design before paying for a full creative suite. A free video editor handles cutting and captions, a basic audio recorder or editor cleans up voice tracks, and a free design tool covers thumbnails. Add paid content creator software only when a specific limit, such as export resolution or render times, actually blocks you. That order keeps early spending low while you learn which category matters most for your format.
Do I need expensive editing software to grow on TikTok or YouTube?
No. Most short-form growth comes from pacing, framing, and audio clarity, not from premium plugins. Free and entry-level editors handle trimming, transitions, captions, and vertical export, which covers the bulk of TikTok and Shorts work. Put the money toward a stable camera mount, a decent microphone, and lighting instead. A $129.99 dynamic mic such as the Maono PD200X will improve viewer retention more than a subscription upgrade will in your first year.
How do I organize content creation projects so footage does not get lost?
Use one folder per project with fixed subfolders: footage, audio, graphics, exports, and project files. Name files by date and shoot, not by camera default. Tag media with keywords for topic, location, and talent so asset management searches work later. Back up to a second drive weekly. This structure also makes batch processing and file synchronization easier when you move between a laptop and a desktop editing station.
Can I mix budget gear with the software I already own?
Yes. Most creator software reads standard formats, so USB and XLR microphones, webcams, and gimbals work across editors without brand lock-in. A dual-connectivity mic like the Maono PD200X runs over USB-C into a laptop or XLR into a mixer, which means you can start simple and add hardware later. Check that your computer meets the software's system requirements before buying, since render times and dropped frames usually trace back to hardware, not the app.
Editorial note: software recommendations reflect the categories and selection criteria described above. Always check current system requirements and licensing terms on each vendor's own site before purchasing.