

How Do You Choose a Gimbal for a Mirrorless Camera?
Quick Summary
To choose gimbal mirrorless setups, first weigh your full kit, including camera body, lens, battery, and accessories, then pick a gimbal with at least 25% payload headroom above that figure. Confirm three-axis motorized stabilization, check each axis range, and test balance and follow modes before buying.
- Weigh the complete kit on a kitchen or postal scale, not just the camera body.
- Plan for at least 25% payload headroom above your heaviest setup.
- Check that tilt, roll, and pan ranges cover the moves you plan to shoot.
- Balance each axis one at a time before powering on the gimbal.
- Check that the gimbal explicitly supports mirrorless cameras and vertical shooting if needed.
Table of Contents
- Start With Your Full Camera and Lens Weight
- Check Three-Axis Stabilization and Axis Range
- How to Balance a Gimbal With Your Mirrorless Camera
- Gimbal vs IBIS: When Each One Makes Sense
- Compatibility, Controls and Accessory Mounting
- Pick Your Gimbal and Test It Before Your Next Shoot
- Frequently Asked Questions
Start With Your Full Camera and Lens Weight
Last Updated: November 3, 2026
When you choose gimbal mirrorless setups, the first number to check is the total weight of everything you will mount on it. Manufacturers rate each gimbal for a maximum payload, and that rating only means something when you add up the camera body, the lens, the battery, the microphone, and any monitor or light attached to the rig.
Weigh the complete kit on a kitchen or postal scale, then compare that figure with the gimbal's listed payload. Shoppers often make the mistake of checking only the body, then discovering that a zoom lens or a shotgun microphone pushes the rig past the limit.
How Much Payload Headroom to Plan For
Running a gimbal near its rated payload leaves very little margin for accessories you add later. Adding at least 25% payload capacity above your heaviest setup is a sensible planning margin. For a camera and lens that weigh 1.5 kg, that means a gimbal rated for at least about 1.9 kg, and a model with more headroom is the safer choice.
Plan for the kit you expect to use over the next year, not only the one you own today. If you may add a larger lens or a heavier battery grip, choose gimbal mirrorless models rated for that load now.
Why the Heaviest Lens Sets Your Limit
Your heaviest lens determines the real limit of the gimbal, because you will swap lenses for different shots. A compact prime may be light, but a zoom with a large maximum aperture can add substantial weight at the front of the rig.
Check the weight of each lens you plan to mount, not just the one you use most often. The gimbal has to handle the heaviest combination you will actually use.
The table below summarises the key payload figures from this section so you can check them at a glance.
| Item | Value | Note |
|---|---|---|
| Recommended payload headroom | At least 25% above heaviest setup | Planning margin for future accessories |
| Example camera and lens weight | 1.5 kg | Full-frame body with 24-70mm f/2.8 lens |
| Minimum gimbal rating in example | About 1.9 kg | Calculated from 25% headroom |
| Roomier example gimbal | 3 kg | Offers more headroom for the same lens |
| Weighing tool | Kitchen or postal scale | Weigh the complete kit, not just the body |
| Lens rule | Check every lens you plan to mount | The heaviest lens sets your real limit |
Check Three-Axis Stabilization and Axis Range
Most mirrorless gimbals use motorized three-axis stabilization. Tilt, roll, and pan are the three axes used on most mirrorless gimbals, and each axis corrects a different type of unwanted movement (Shop Portable Phone Gimbals for Stabilized Videos). Tilt controls up-and-down movement, roll controls side-to-side tilt of the horizon, and pan controls left-and-right rotation.
Look beyond the basic claim and check the stated range for each axis. A wider pan range lets you rotate the camera fully around, which matters for orbit shots and 360-degree moves. Confirm that the tilt and roll ranges are wide enough for the angles you plan to shoot, including vertical framing if you film in portrait orientation.
What the Axis Specs Actually Tell You
The axis range figures are mechanical limits, not stabilization performance. A gimbal that lists a 360-degree pan range can rotate continuously, while one capped at roughly 180 degrees will stop and require a re-set mid-orbit.
Motor torque is the other half of the specification. A gimbal with high payload capacity but low torque will hold a heavy lens at rest yet sag or vibrate during a fast pan. A gimbal rated well above the rig weight generally has torque in reserve for acceleration and wind, which is why payload headroom matters for stabilization quality and not only for safety.
Axis Locks, Modes, and Follow Behavior
Physical axis locks let you balance one axis at a time without the others flopping, and they make transport safer because the arms cannot swing freely in a bag. Confirm that all three axes have locks, not just tilt and roll.
Watch out: a gimbal that lists three axes but offers only one follow mode will force you to fight the motors during orbit or tracking shots, and no amount of balancing will fix that.
Vertical Shooting and Axis Range
If you film in portrait orientation for social platforms, the roll axis range becomes the deciding specification. Some gimbals support native vertical mounting through a rotating plate or a dedicated vertical arm, while others require you to re-mount the camera sideways, which shifts the center of gravity and often exceeds the roll axis travel. Check whether vertical mode is a supported configuration in the manual rather than an aftermarket workaround, and confirm that the roll range still covers your framing once the camera is rotated. A gimbal that balances perfectly in landscape can hit its roll limit in portrait, which shows up as a drift or a motor warning on set.
How to Balance a Gimbal With Your Mirrorless Camera
Balancing is the step most beginners skip, and it is the main reason a gimbal shakes or drifts. Balance means the camera's center of gravity sits directly over the gimbal's pivot points on every axis, so the motors do not have to fight gravity.
FeiyuTech SCORP Mini 2 3-Axis Gimbal with AI Tracking Camera Mount →
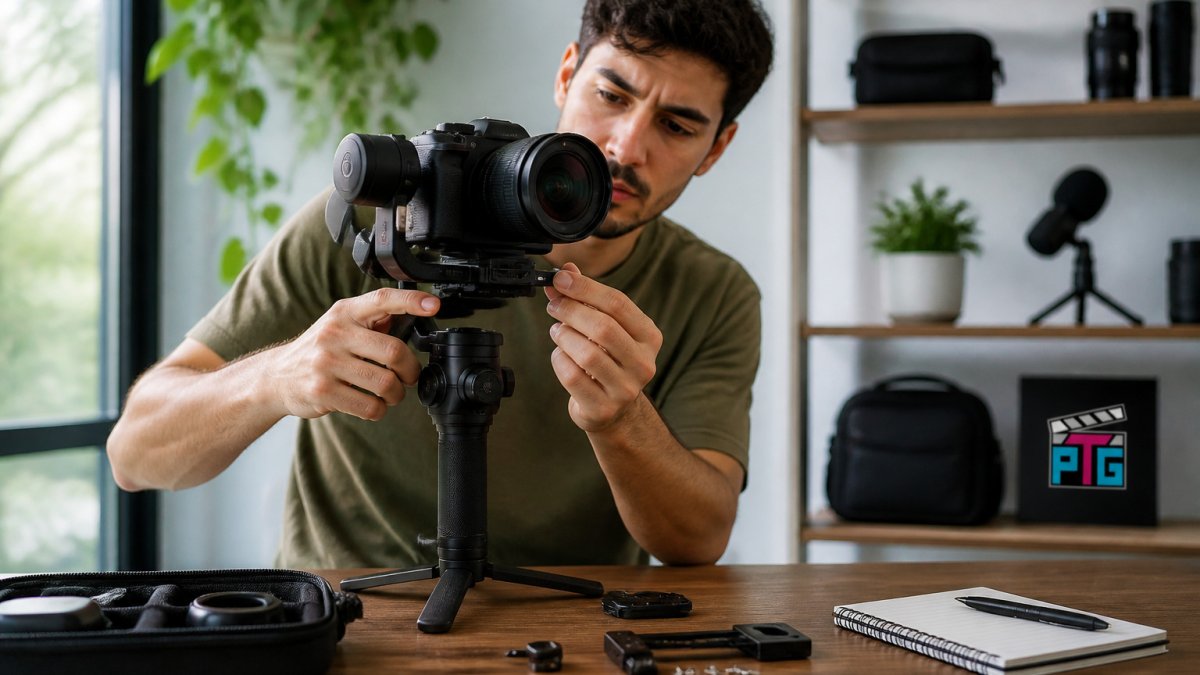
Start with the tilt axis, then the roll axis, and finish with the pan axis. Move the camera forward or back on the slider to balance tilt, and adjust the side position to balance roll. Once the camera stays put on each axis, tighten the locks and power on.
Lens-Specific Balancing Challenges
Each lens changes the balance point, so a setup that is perfectly balanced with one lens may tilt forward with another. A long zoom sits far out in front of the camera and pulls the center of gravity forward, while a short prime keeps it closer to the pivot. Rebalance the rig every time you swap lenses, and note the slider position for each lens so you can reset faster on set. Heavier lenses also demand more motor torque, which is another reason to keep payload headroom in mind.
Gimbal vs IBIS: When Each One Makes Sense
Many mirrorless bodies include in-body image stabilization (IBIS), which reduces shake by moving the sensor. IBIS is convenient because it adds no extra weight or setup, and it works with any lens. A gimbal stabilizes the entire camera on separate motors, so it handles larger, sustained movements like walking and following a subject far better than IBIS alone.
A reasonable rule is to rely on IBIS for still photography, quick handheld clips, and situations where you need a light, fast setup. Choose a gimbal when you need smooth walking shots, orbiting moves, or follow shots.
Compatibility, Controls and Accessory Mounting
Confirm that the gimbal explicitly supports mirrorless cameras, since some models are designed mainly for smartphones or action cameras. Check the quick-release system, the mounting plate size, and whether the gimbal supports vertical shooting if you film in portrait orientation. Controls matter as well: a gimbal with a joystick, a touchscreen, or detachable remote handle lets you adjust settings without reaching for the camera.
Mounting Standards and Quick-Release Systems
Mirrorless gimbals commonly use a Manfrotto-style or Arca-Swiss-style quick-release plate, and the standard matters because it determines whether your existing tripod plates and cages transfer over. A gimbal that accepts an Arca-Swiss plate lets you move the camera between a tripod, a slider, and the gimbal without re-mounting, which saves time and preserves balance settings. Check the plate length as well: a long plate gives more fore-aft travel for balancing front-heavy lenses, while a short plate can run out of adjustment before the tilt axis balances. Confirm the plate's screw thread and whether the gimbal includes a safety lock, since a plate that releases under load is a dropped-camera risk.
Accessory Integration: Monitors, Follow-Focus, and Transmitters
This is where most buying guides stop, and it is where the real selection decisions happen.
Cable management is part of the same decision. A gimbal that routes power and control cables through the arm, or that offers a powered USB or HDMI pass-through, reduces the snag risk that causes jerky pans.
Watch out: adding a monitor and a follow-focus motor can push a rig that was comfortably within payload into motor strain, so re-weigh the full accessory load before you commit to a model.
Controls, App Support, and Firmware
Controls matter as well: a gimbal with a joystick, a touchscreen, or detachable remote handle lets you adjust settings without reaching for the camera. Check whether the joystick speed is adjustable, since a fast default makes precise framing difficult with a long lens. App support is worth verifying before purchase because firmware updates often add camera compatibility, new follow modes, and bug fixes; a gimbal from a manufacturer with an active update history will stay compatible with newer camera bodies longer.
Vertical Shooting and Compatibility Checks
If you film in portrait orientation, verify that vertical mode is a native configuration rather than a re-mount workaround. Native vertical support usually means a rotating plate or a vertical arm that keeps the camera's center of gravity over the roll axis; a manual re-mount shifts the weight sideways and can exceed the roll axis travel. Confirm that your camera's lens diameter and the gimbal's tilt arm clearance work together in portrait, because a wide lens hood or a follow-focus bracket can contact the arm when the camera is rotated.
Pick Your Gimbal and Test It Before Your Next Shoot
Start by writing down the weight of your full camera and lens setup, then choose a gimbal with at least 25% payload headroom above that figure. Confirm three-axis motorized stabilization, check the axis ranges, and verify mirrorless compatibility and vertical shooting if you need it.
Once you have a gimbal, test it before a paid shoot. Mount your camera, balance each axis, and walk a short route while recording. Review the footage on a large screen to check for drift, vibration, and axis lock issues. Practicing in a low-stakes setting will show you whether the gimbal and your balancing routine work together before the moment that matters.
Frequently Asked Questions
Which gimbal is best for a mirrorless camera?
The best gimbal for a mirrorless camera is the one that handles your heaviest real setup with headroom. Add the camera body, lens, microphone and any monitor or accessories, then choose a model rated above that total. Adding at least 25% payload capacity is a sensible margin, and a 2 kg gimbal can feel tight with a full-frame body and a 24-70mm f/2.8 lens. Three-axis control, Bluetooth or wired connection, and vertical shooting support are the next factors to compare.
What is the most important factor when choosing a mirrorless gimbal?
Payload capacity is the most important factor. A gimbal is designed to support a specific weight, and running near its limit strains the motors and reduces stabilization. Check the heaviest combination you plan to use, not the camera body alone. Weighing the complete kit before buying is a practical step.
Do I need a gimbal if my camera has in-body image stabilization (IBIS)?
Not always. IBIS smooths small handheld movements inside the camera body, which works well for stills and modest video shake. A motorized three-axis gimbal handles larger walking movements and smooth pans, tilts and rolls that IBIS cannot correct. If your shots involve moving with the subject, a gimbal usually gives steadier footage. For static or tripod-free shots with light movement, IBIS may be enough.
Are all gimbals compatible with every mirrorless camera?
No. Compatibility depends on payload, camera and lens size, and the mounting plate. Check the manufacturer's list of supported devices and confirm the lens you use will fit within the gimbal's arm range. Camera-and-lens compatibility is a key factor when choosing a gimbal. For example, the FeiyuTech SCORP Mini 3 Pro supports a maximum payload of 2000g and lists DSLRs and mirrorless cameras among its compatible devices.
