

Best Flexible Tripods for Travel Vlogging Setups in 2026
Table of Contents
- Quick Comparison: Best Flexible Tripods for Travel Vlogging Setups
- Fotopro UFO2SET: Best Budget Flexible Tripod for Wraparound Mounting
- PGYTECH MantisPod Z: Best Vlogging Tripod for Action Cameras and Handheld Shots
- Ulanzi MT71 and JJ03: Best Magnetic Phone Tripods for Selfie Framing
- Fotopro X-GO MINI2 and Ulanzi TreeRoot: Best Compact and Carbon Fiber Options for Heavier Loads
- Flexible Tripod vs Traditional Tripod for Vlogging: Which Support Fits Your Travel Kit
- How to Set Up a Vlogging Tripod for Mobile in Five Steps
- Best Vlogging Tripod Accessories to Pack With Your Flexible Tripod
- Frequently Asked Questions
Last Updated: October 20, 2026
Quick Comparison: Best Flexible Tripods for Travel Vlogging Setups
A flexible tripod has bendable, articulating legs that wrap around railings, poles, and uneven surfaces instead of standing only on flat ground. For travel vlogging, that wraparound grip turns a fence post into a camera stand. This guide from Perfect Take Gear covers six options across three price tiers, from a $42.99 wraparound model to a full carbon fiber travel tripod.
Every pick comes from the brand's own catalog, and each row reflects listed specs rather than marketing language.
| Tripod | Price | Weight | Best For |
|---|---|---|---|
| Fotopro UFO2SET | $42.99 | 280g | Wraparound mounting on rails and poles |
| PGYTECH MantisPod Z | $67.99 | 250g | Action cameras and handheld vlogging |
| Ulanzi MT71 | $48.99 | 118g | Magnetic phone selfie framing |
| Ulanzi JJ03 | $44.99 | 125g | Phone grip and desktop tripod combo |
| Fotopro X-GO MINI2 | $144.99 | 640g | Heavier camera loads on tabletops |
| Ulanzi Falcam TreeRoot | $648.99 | 1500g | Full-height stability for mirrorless rigs |
The trade-off worth naming up front: flexible legs trade maximum height and wind resistance for mounting versatility.

Fotopro UFO2SET: Best Budget Flexible Tripod for Wraparound Mounting
The Fotopro UFO2SET is the cheapest way into true wraparound mounting here at $42.99, and the only tripod in this lineup with genuinely bendable legs that wrap around rails, poles, or uneven surfaces.
A universal 1/4-inch screw takes DSLRs, webcams, camcorders, and action cameras, and the kit includes a GoPro adapter, a phone grip mount, and a Bluetooth remote shutter with up to 10 meters of range and no app required.
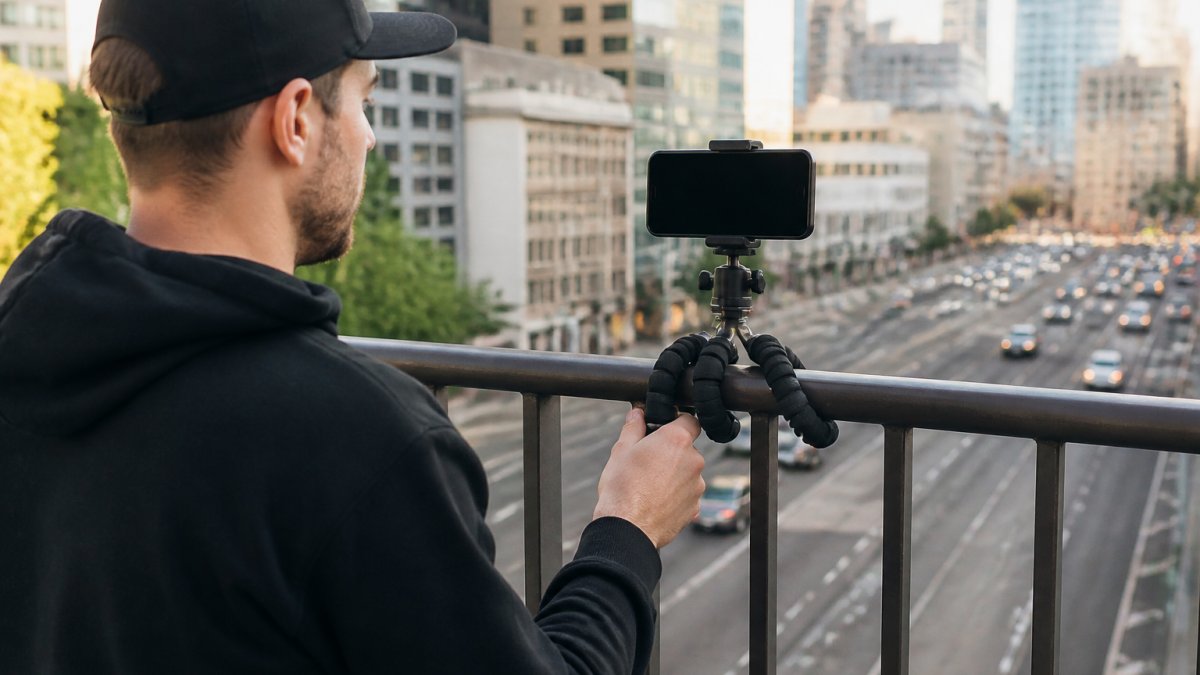
Pros: Wraparound legs, included remote and adapters, light at 280g. Cons: Plastic build at 279mm length, so it suits light rigs rather than a full DSLR setup.
PGYTECH MantisPod Z: Best Vlogging Tripod for Action Cameras and Handheld Shots
Action camera shooters get the most from the MantisPod Z. At $67.99 and 250g, it is a 3-way vlogging tripod and hand grip built around a patented CapLock quick-release system that mounts in one motion.

Five modes cover the scenarios travel vloggers actually hit: Mantis for overhead unboxing, Grip for handheld walking segments, Extension for selfies and group shots, Tripod for livestreaming and time-lapse, and Briefcase for low-angle pet photography. Load capacity is 1kg standard, dropping to 500g in extended mode.
It fits GoPro, Insta360, DJI, and other action cameras, plus mirrorless and compact cameras; smartphones need a clip, sold separately. The nylon and fiberglass body with aluminum alloy parts should handle backpack knocks better than all-plastic designs.
Pros: Five modes in one tool, CapLock speed, action camera native. Cons: The 500g extended-mode limit rules out heavier mirrorless bodies on the extension arm.
Ulanzi MT71 and JJ03: Best Magnetic Phone Tripods for Selfie Framing
Phone-first creators should look at these two, and the choice comes down to how you shoot. The Ulanzi MT71 ($48.99) is a 2-in-1 magnetic selfie stick and desktop tripod extending from 17.3cm to 33.5cm with 180° angle adjustment. At 118g with a 500g load capacity, it disappears into a pocket, attaching magnetically to iPhone 15-17 Pro Max and other phones via the included adapter ring.
The Ulanzi JJ03 ($44.99) is the more capable of the pair: a selfie stick, wireless phone grip, and desktop tripod with dual-sided magnets rated at ≥12N holding MagSafe-compatible phones or cases. The head offers 225° tilt and 360° rotation, height adjusts between roughly 215mm and 400mm, and a Bluetooth remote reaches ≥10m. Folded size is 125 x 59 x 45mm at 125g.
Pros: MT71 is the lightest option here; JJ03 adds rotation, tilt range, and a remote. Cons: Neither is a wraparound tripod. Both are desktop and handheld tools, not rail-mounting ones.
Fotopro X-GO MINI2 and Ulanzi TreeRoot: Best Compact and Carbon Fiber Options for Heavier Loads
Load capacity is where budget flexible tripods hit a wall, and these two answer it differently. The Fotopro X-GO MINI2 ($144.99) is a carbon fiber mini tripod folding to 190mm and extending to 451mm, with a metal ball head, two independent control knobs, a 360° panoramic panning scale, and a reversible center column. It carries up to 8kg at 640g, so a DSLR with a lens is no problem.

The Ulanzi Falcam TreeRoot ($648.99) is the professional option: M40 carbon fiber rated 60% stiffer than standard T300, folding to 168mm and extending to 1552mm at 1500g. Quick-lock legs open with a one-third twist, the F38 Pro plate is compatible with 90% of standard Arca-Swiss plates, and all-terrain foot pegs plus a multifunctional hook add outdoor versatility.
Pros: X-GO MINI2 is remarkable load capacity for the packed size; TreeRoot delivers full-height stability. Cons: Neither has flexible legs. If wraparound mounting is the goal, the UFO2SET is the correct buy.
Flexible Tripod vs Traditional Tripod for Vlogging: Which Support Fits Your Travel Kit
The honest answer: flexible tripods win on mounting versatility, traditional tripods win on height and wind resistance, and most travel vloggers eventually carry one of each.
How the legs actually behave under load. A flexible tripod's legs are segmented wire-and-rubber or articulated polymer limbs. When you wrap a leg around a railing, grip comes from friction and the leg's resistance to unbending, not a locking joint, so grip strength scales with contact area and wrap tightness.
Fotopro UFO2SET Flexible Tripod with Remote →
Stability in wind and on uneven ground. Bendable legs absorb vibration rather than resisting it, so a flexible tripod on a windy overlook transmits more shake than a locked traditional tripod at the same height.
Height and framing consequences for vlogging. A traditional tripod with leg sections and a center column gives repeatable eye-level framing, which matters for talking-head segments and shot-to-shot continuity.
Setup speed and repositioning. Traditional tripods with quick-lock legs deploy faster once you know the locks.
Use this to decide:
- Choose flexible if your shots involve railings, fences, branches, tight spaces, or low-angle and overhead angles that a flat-base tripod cannot reach.
- Choose traditional if you need consistent eye-level framing, shoot in open windy locations, or need repeatable height across multiple setups in a day.
- Carry both if you shoot travel vlogs seriously: a flexible tripod at 280g costs almost nothing in carry weight, and the two tools cover each other's failure modes.
- Match the support to the load, not the price. A flexible tripod rated for a phone will not hold a mirrorless body with a lens on an extension arm; check the payload figure against your heaviest body-plus-lens combination before ordering.
How to Set Up a Vlogging Tripod for Mobile in Five Steps
Setting up a vlogging tripod for mobile takes about two minutes once you know the sequence, but the sequence is only half the job.
Step 1: Build the rig before you extend anything. Mount the phone grip or magnetic mount, then attach your microphone and any light while the tripod is still collapsed.
Step 2: Level the head, then lock it. Set tilt and rotation with the head loose, confirm framing on screen, then tighten. Adjusting after locking is how plates strip and magnetic mounts shear off.
Step 3: Extend from the bottom up. Spread the legs or extend the column first, then fine-tune height; top-heavy extensions tip.
Step 4: Wrap flexible legs with tension, not slack. Bend each leg segment around the anchor so the load hangs below the grip point. Loose wraps slide.
Step 5: Pair the remote and test the shutter. Confirm the Bluetooth remote fires before you walk into frame; ten meters of range means nothing if pairing failed silently.
Best Vlogging Tripod Accessories to Pack With Your Flexible Tripod
The accessories that earn backpack space are the ones that solve a problem the tripod itself cannot.
- A spare Bluetooth remote battery. The JJ03 remote runs on a CR1225 cell, and a dead remote mid-shoot means walking back to the camera every take.
- A magnetic adapter ring. Non-MagSafe phones need one to use magnetic mounts, and the MT71 includes one while the JJ03 needs a ring sticker sold separately.
- An action camera adapter. The UFO2SET and MantisPod Z both include one, but a spare 1/4-inch to GoPro adapter costs little and saves a shoot.
- A microfiber cloth and a zip pouch. Sand and grit work into leg joints and magnetic surfaces. A pouch keeps both clean in transit.
- A small power bank. Magnetic mounts and remotes both draw from phone and cell batteries over a long day.
Durability matters because travel is hard on gear. Wipe leg joints after beach or trail days, keep magnetic surfaces free of metal grit, and store flexible legs unbent rather than wrapped around a bag strap, legs that stay bent for months develop memory and lose grip tension.
For creators building out a full kit, buy the tripod that matches the majority of your shots and add accessories as specific needs appear. Perfect Take Gear stocks creator gear, cameras, lighting, and audio equipment at accessible prices, so a starter setup can grow piece by piece rather than in one expensive order.
Travel vlogging gear fails in predictable ways: the mount that cannot grip the railing, the remote that will not pair, the tripod rated for half the weight of your camera. Matching the support to your actual shots solves most of it.
Frequently Asked Questions
What is the best flexible tripod for heavy mirrorless cameras?
Load capacity decides this. The Fotopro X-GO MINI2 handles up to 8kg and folds to 190mm, so it supports a mirrorless body with a lens attached without flexing. The Ulanzi Falcam TreeRoot at 1500g is the sturdier pick for longer lenses and outdoor shooting, though it is a traditional leg design rather than a bendable one. Standard flexible tripods such as the Fotopro UFO2SET are built for phones, action cameras, and compact setups, so check the rated payload before mounting a full mirrorless rig.
How do I set up a vlogging tripod for mobile without extra apps?
Mount the phone in the grip, tighten the ball head or tilt joint, and pair the tripod's Bluetooth remote directly in your phone's Bluetooth settings. The Fotopro UFO2SET and Ulanzi JJ03 both pair this way with no app required, and both remotes work from about 10 meters. Frame your shot, lock the head, and start recording from the remote so you avoid the shake that comes from tapping the screen.
Does TSA allow tripods in carry-on bags?
TSA permits tripods in carry-on luggage, and the rules do not set a size limit for camera supports. Screeners may pull out larger tripods for a second look, so pack yours where it is easy to reach. Compact options like the Ulanzi MT71 at 118g or the PGYTECH MantisPod Z at 250g rarely cause delays, while a full-size carbon fiber tripod is more likely to be inspected. Always confirm current rules with TSA before flying.
Which vlogging tripod accessories are worth adding first?
Start with a phone grip mount if your tripod does not include one, then add an action camera adapter so the same support works with a GoPro or DJI camera. A Bluetooth remote shutter is the third accessory most creators use daily, since it removes screen-tap shake from selfie framing and video recording. The Fotopro UFO2SET kit already bundles the grip mount, GoPro adapter, and remote, which makes it a practical first purchase for a travel vlogging setup.