

Best Camera Settings for Home Studio Videos
Table of Contents
- The Exposure Triangle: The Foundation of Home Studio Videos
- Frame Rate and Shutter Speed for 24fps Video
- Aperture and Depth of Field for a Clean Background
- ISO Settings for Low Light Without Noise
- White Balance and Color Temperature for Consistent Footage
- The Best Lighting for Home Studio Videos
- Video Camera Settings for Beginners: A Step-by-Step Start
- Troubleshooting Common Home Studio Issues
- Frequently Asked Questions
Last Updated: September 20, 2026
The Exposure Triangle: The Foundation of Home Studio Videos
Getting the best camera settings for home studio videos starts with one concept: the exposure triangle. The exposure triangle is the relationship between aperture, shutter speed, and ISO, the three controls that together determine how bright or dark a video looks. Change one, and you have to adjust another to compensate.
That single idea explains why copying a settings list from a tutorial rarely works. A room with a bright window needs different numbers than a windowless corner, even with the same camera.
This guide from Perfect Take Gear walks through each leg of the triangle, then translates it into settings you can punch in today. Below, you'll find starting points for frame rate, aperture, ISO, and white balance, plus the platform-specific tweaks most guides skip.
Frame Rate and Shutter Speed for 24fps Video
For 24fps video, set shutter speed to 1/48 or 1/50 second. That double-the-frame-rate rule, known as the 180-degree shutter rule, produces the natural motion blur viewers associate with cinema.
The math is simple: shutter speed equals twice your frame rate. So 24fps gets 1/48 (or the nearest available setting, 1/50), 30fps gets 1/60, and 60fps gets 1/120. Shoot at 24fps for talking-head content and 60fps only when you plan to slow footage down in editing. Mixing frame rates across clips on one timeline is a common mistake that causes stuttery playback.
Aperture and Depth of Field for a Clean Background
Aperture controls depth of field, the zone of your shot that stays sharp. A low f-stop like f/1.8 creates a shallow depth of field, blurring the background so you stand out. A higher f-stop like f/5.6 keeps more of the room in focus.
For most home studio videos, f/2.8 to f/4 hits the sweet spot. It separates you from the wall behind you without turning your face soft if you lean forward. The catch: wide apertures demand accurate focus. What most guides miss is that a shallow depth of field punishes any movement, so if you gesture a lot, stop down to f/4 or f/5.6.
ISO Settings for Low Light Without Noise
ISO brightens your image electronically, and higher values introduce visible grain. In a well-lit home studio, ISO 100 to 400 keeps footage clean. In dim conditions, many creators find ISO 800 to 1600 is the practical ceiling before noise becomes distracting.
Fix the light before you raise ISO. Adding a dedicated light source lets you keep ISO low, which preserves detail and dynamic range. A compact COB LED light such as the COLBOR W60/W100 offers adjustable brightness and, on bi-color models, a 2800K-6500K range, so you can add light without pushing ISO into noisy territory.

White Balance and Color Temperature for Consistent Footage
White balance tells the camera what counts as white, and it's measured in Kelvin. Daylight sits near 5600K, while tungsten bulbs run closer to 3200K. Set the wrong value and skin tones drift orange or blue.
The fix is to match your camera's white balance to your dominant light source, then leave it locked. Auto white balance drifts whenever a cloud passes or a lamp cycles, and correcting that shift across a long recording is tedious. If you mix window light with a desk lamp, pick one as your primary source and set white balance to it.
The Best Lighting for Home Studio Videos
The best lighting for home studio videos is a soft, diffused key light placed slightly off-axis and above eye level, with a fill source opposite it and a deliberate plan for whatever ambient light the room already has. Soft light flatters skin and hides imperfections that a harsh bare bulb exaggerates. But in a home studio, the hard part is rarely the key light itself, it is the mixed light sources you cannot turn off, like a window on one side and a warm lamp on the other.
Start by identifying your dominant source. If a window is your brightest light, treat it as the key and position yourself facing it at roughly 45 degrees, then add a small LED panel on the shadow side as fill. If a lamp or overhead fixture is dominant, turn off the window (close blinds or hang a blackout curtain) so you are not fighting two color temperatures at once. Most practitioners find that matching every light in the frame to a single color temperature, either all daylight-balanced near 5600K or all tungsten near 3200K, removes the orange-and-blue split that is nearly impossible to fix in editing.
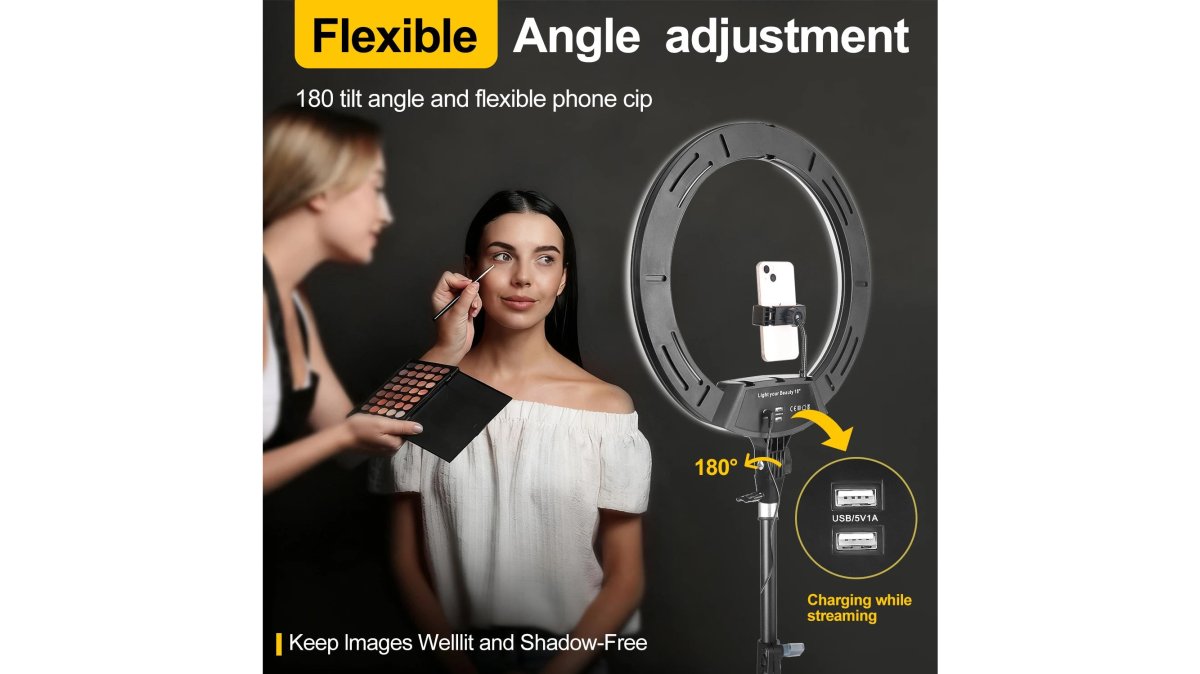
For a single-creator setup, a ring light or LED panel works well. Position it roughly 45 degrees to one side and just above your eyeline, then add a small fill light or a white foam board on the opposite side to soften shadows. Avoid overhead room lights as your only source; they cast shadows under your eyes and mix color temperatures with your key light. If you must keep an overhead fixture on, consider swapping the bulb for a daylight-balanced LED so it matches your key instead of fighting it.
A ring light kit like the 18-Inch RGB Ring Light Kit includes a collapsible tripod and adjustable holders, which makes repositioning between shots quick. For audio, a tabletop USB condenser mic keeps your setup compact.

One more home-specific constraint: small rooms bounce light off walls and ceilings, which can flatten contrast and create odd color casts. If your footage looks washed out, move the key light closer to the subject and angle it down slightly, or flag the side of the light facing a colored wall. This is the kind of adjustment that separates a usable home studio from one that always looks slightly off, and it is the step most general camera-settings guides skip entirely.
Video Camera Settings for Beginners: A Step-by-Step Start
Beginners should start in manual mode with a fixed frame rate, a mid-range aperture, and a locked white balance, then adjust ISO last.
- Set resolution to 1080p at 24fps for talking-head content.
- Set shutter speed to 1/48 or 1/50.
- Set aperture between f/2.8 and f/4.
- Set white balance to match your key light.
- Add light until ISO can stay at 800 or below.
- Frame your shot, then confirm focus on your eyes.
| Setting | Starting Value | Adjust When |
|---|---|---|
| Frame rate | 24fps | Slow-motion needs 60fps |
| Shutter speed | 1/48 or 1/50 | Match to frame rate |
| Aperture | f/2.8 to f/4 | Background too busy |
| ISO | 100 to 800 | Room too dark |
| White balance | Match key light | Colors look off |
If your webcam is your main camera, models like the JIYUE 4K Autofocus Webcam handle resolution and focus for you, while a PTZ option such as the OBSBOT Tiny 2 Lite adds AI tracking for movement-heavy streams. Note that many webcams default to auto exposure and auto white balance; if your software allows it, switch those to manual and set them once so your image stays consistent across a long session.

Troubleshooting Common Home Studio Issues
Most home studio problems trace to three causes: mixed lighting, echo, and flicker. Each has a practical fix.
- Color shifts between window and lamp light: pick one source, set white balance to it, and close the blinds.
- Flickering or banding: your shutter speed clashes with your lights' cycle. Nudge shutter speed slightly; many creators find a small adjustment clears it.
- Echoey audio: bare walls reflect sound. Adding absorption panels reduces reverberation noticeably.
- Soft focus mid-shot: a wide aperture plus movement pulls you out of the plane of focus. Stop down.
Frequently Asked Questions
What are the best camera settings for shooting in a studio setting?
Start with 4K at 24fps or 30fps, shutter speed at double your frame rate (1/48 or 1/60), aperture between f/2.8 and f/4 for a blurred background, and ISO at its native base (usually 100-400). Set white balance manually to 3200K for tungsten or 5600K for daylight. These settings give you clean, consistent home studio videos with minimal noise and natural motion.
How does shutter speed for 24fps video affect the look of my footage?
The 180-degree rule says your shutter speed should be double your frame rate. For 24fps, use 1/48 or 1/50. This creates natural motion blur that mimics film. A faster shutter (like 1/250) makes movement look choppy and staccato, while a slower shutter (1/30) adds blur and smearing. Stick to 1/48 for the most cinematic look in your home studio videos.
What is the best ISO setting to avoid noise in indoor videos?
Use the lowest ISO your lighting allows. Most cameras have a native ISO of 100 or 200 for cleanest results. If your home studio is dim, add light instead of raising ISO. If you must push ISO, stay under 1600 on most cameras to avoid visible grain. Full-frame sensors handle higher ISO better than smaller ones. Test your camera at 800, 1600, and 3200 to find your noise threshold.
How do I fix flickering lights or color shifts in my home studio videos?
Flicker comes from mismatched shutter speed and light frequency. In the US, set shutter to 1/60 or 1/120 to match 60Hz power. For color shifts, lock white balance manually instead of using auto. If your footage looks orange or blue, adjust Kelvin: 3200K for warm indoor bulbs, 5600K for daylight. Mixed lighting causes uneven color, so turn off overhead lights and use one consistent source like the COLBOR W60/W100.
Getting the best camera settings for home studio videos comes down to controlling your light and locking your exposure, not memorizing a fixed list of numbers. Perfect Take Gear carries the gear that makes that easier, from adjustable LED lighting and ring light kits to PTZ webcams and acoustic panels. Browse the Perfect Take Gear range and build a setup that turns any room into a studio.