

Best Beginner Lighting for TikTok Videos in 2026
Table of Contents
- Why Lighting Makes or Breaks Your TikTok Videos
- Ring Light vs. LED Panel: Which Beginner Lighting for TikTok Is Right?
- The 5 Best Beginner Lighting Kits on the Market
- How to Set Up Lighting for TikTok: A Simple 3-Point Method
- Affordable TikTok Lighting Setup: What to Buy First
- TikTok Lighting Tips for Beginners: Mistakes to Avoid
- Conclusion: Your First Lighting Investment
- Frequently Asked Questions
Last Updated: September 8, 2026
Why Lighting Makes or Breaks Your TikTok Videos
Beginner lighting for TikTok videos is the single highest-impact upgrade you can make, often mattering more than your phone's camera quality. A phone camera struggles in low light, producing grainy footage viewers scroll past (ieee.org).
Many new creators assume they need an expensive camera first. In practice, a $1,000 phone with poor lighting will lose to a $200 phone with a proper setup.
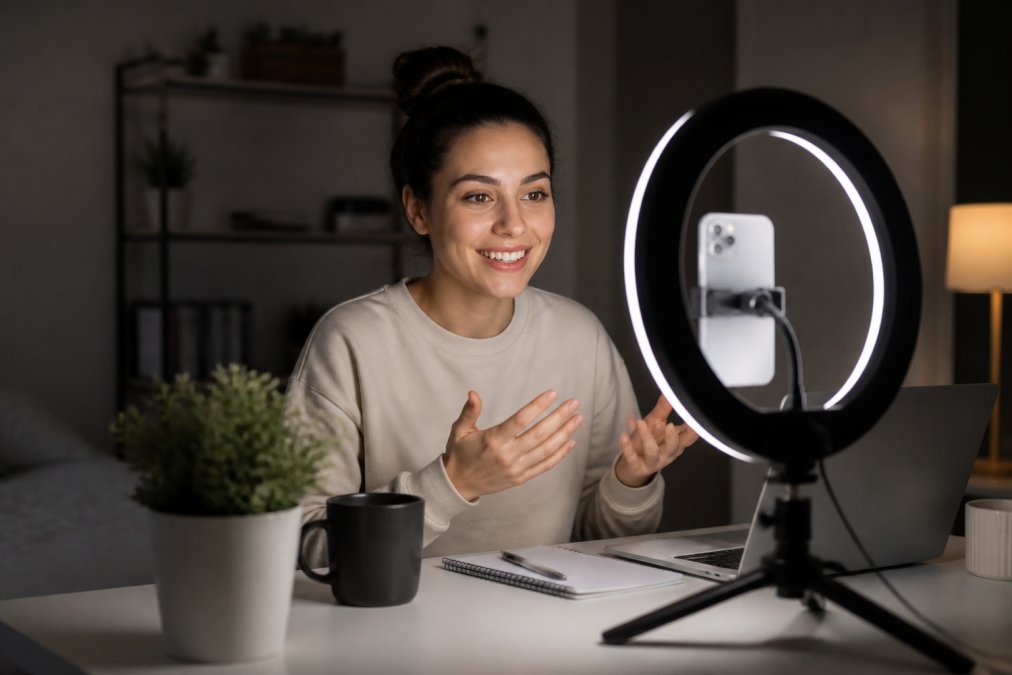
Ring Light vs. LED Panel: Which Beginner Lighting for TikTok Is Right?
The choice between a ring light and an LED panel comes down to your content type. Ring lights produce a circular catchlight and even, shadow-free illumination from the camera's position, ideal for face-forward content (adorama.com). LED panels provide a broader, directional beam that can be angled to sculpt light, reduce glare, and illuminate movement or products.

Start with a ring light for talking-head videos. For cooking, unboxings, or dance videos where you move around the frame, an LED panel or versatile kit serves better because it can be repositioned to light a wider area.
Ring Lights: The Classic Beauty and Close-Up Choice
Ring lights are the default for beauty, makeup, and close-up content because they wrap light around the lens, creating an evenly lit face with minimal shadows.
LED Panels: Versatile Light for Movement and Products
LED panels are the better investment when your content involves more than just your face. Their adjustable stands allow directional setups, such as a key light on one side and a fill on the other, adding depth.
The 5 Best Beginner Lighting Kits on the Market
These five kits cover the full spectrum of needs for beginner lighting for TikTok videos, from plug-and-play ring lights to portable panels you won't outgrow.
| Light Kit | Price | Best For | Key Feature |
|---|---|---|---|
| 18-Inch RGB Ring Light Kit | $62.99 | Multi-device streaming, portraits | 3 phone holders, RGB modes |
| 12-Inch Ring Light with Tripod | $63.99 | Beauty, vlogging, on-the-go | 5 color temps, selfie stick mode |
| Ulanzi LT003 RGB LED Panel | $80.99 | Livestreams, product shots | CRI 95+, 120-min battery |
| Ulanzi P40 40W Bi-Color Panel | $113.99 | Studio-style setups | 40W output, 2700K-6500K range |
| COLBOR W60/W100 COB Light | $202.99 | Outdoor, high-power needs | 97+ CRI, app control |
1. 18-Inch RGB Ring Light Kit with 1.86m Tripod
This kit is the most versatile ring light option here, priced at $62.99. The 18-inch diameter provides a large, soft light source, while RGB modes add colored background lighting. Three adjustable phone holders allow filming from multiple angles simultaneously.

2. 12-Inch Ring Light with 67-Inch Tripod Stand
For portability, this 12-inch model at $63.99 is the smart pick. It runs on 240 LEDs at 20W with five color temperatures and ten brightness levels.
3. Ulanzi LT003 RGB Full-Color LED Panel Light
The Ulanzi LT003 is a compact panel light priced at $80.99 for creators wanting more control than a ring light. It features 266 lamp beads with a CRI above 95 for accurate colors.
4. Ulanzi P40 40W Bi-Color LED Video Panel Light
At $113.99, the Ulanzi P40 is the step-up choice for a more serious home studio. The 40W output is significantly brighter than smaller panels, and the 2700K-6500K range lets you match ambient light or create a mood.
5. COLBOR W60/W100 Handheld COB LED Light
For maximum flexibility, the COLBOR W-series is a professional-grade option starting at $202.99. Available in 60W and 100W versions, this handheld light uses a COB design delivering high output from a compact 345g body.
How to Set Up Lighting for TikTok: A Simple 3-Point Method
The classic three-point method, key light, fill light, and backlight, is the foundation of professional-looking video. Here’s how to adapt it for common TikTok niches.
For Beauty and Makeup Tutorials: Prioritize Shadow-Free Evenness
Beauty content demands flawless, even skin tones, eliminate shadows on the face entirely.
- Key Light: Place your ring light directly behind your phone, at eye level or slightly above, angled down at a 10-15 degree tilt. This creates the signature 'catchlight' in your eyes and provides the flat, even illumination that makeup application videos require.
- Fill Light: Instead of a second light, use a white foam core board or a makeup mirror with built-in lights placed directly below your chin. This 'chin light' is the secret weapon for erasing under-eye shadows and neck shadows that a single top-down ring light can create.
- Backlight: For beauty content, a backlight is often unnecessary and can wash out your skin tone. If you want separation from the background, use a small, dim LED panel with a warm color temperature (around 3200K) aimed at the wall behind you, not at your shoulders.
For Gaming and Streaming: Light the Face, Not the Screen
The biggest mistake in gaming setups is lighting the monitor or room, creating a dim, murky face.
- Key Light: Position an LED panel at a 45-degree angle to your face, slightly above eye level. This creates a more dramatic, sculpted look that reads well on camera and reduces glare on your glasses if you wear them.
- Fill Light: Use a second, less powerful LED panel on the opposite side at a 30-degree angle. Set its brightness to about 50% of your key light. This softens shadows without flattening the look, which helps you appear more dynamic and engaged.
- Backlight: This is critical for gaming. Place a colored RGB light (like the Ulanzi LT003) behind your monitor, aimed at the wall. This creates a vibrant halo effect around you, separating you from the dark room and adding a professional 'streamer' aesthetic. It also prevents your face from blending into a black background.
- Screen Glare Fix: If your key light causes glare on your monitor, lower the light's height so it's below the top edge of the screen, or angle it more toward your face and away from the monitor's surface.
For Cooking and Product Content: Light the Scene, Not Just Yourself
Cooking and product videos require lighting that illuminates a larger area, the countertop, ingredients, or item you're showing.
- Key Light: Place a powerful LED panel (like the Ulanzi P40) at a 45-degree angle, but position it higher (around 6-7 feet) and aim it down at the entire work surface. This provides broad, even illumination for the food or product.
- Fill Light: Use a reflector or a second panel on the opposite side at a lower intensity to open up shadows on the subject. For food, this often means placing the fill light lower to the ground to illuminate the front of the dish.
- Backlight: A backlight is essential for making food look glossy and appealing. Place a light behind the dish, aimed toward the camera, to create a rim light that outlines the food's texture and steam.
- The 'Top-Down' Angle: For overhead cooking shots (like chopping vegetables), you need a light that can be mounted overhead. A sturdy C-stand with a boom arm is the professional solution, but a budget-friendly alternative is clamping a small LED panel to a shelf or cabinet directly above your filming area.
The One-Light Setup That Works for Every Niche
If you only have one light, place it at a 45-degree angle to your face, about 2-3 feet away, slightly above eye level. Then, place a large piece of white poster board on the opposite side to bounce light back and fill in shadows.
Affordable TikTok Lighting Setup: What to Buy First
Building an affordable TikTok lighting setup is about prioritizing the one light that gives the most immediate improvement. For most creators, that first purchase should be a ring light kit with a tripod.
A practical first setup costs around $60 and includes a ring light, tripod, and phone holder. The next upgrade is adding a small LED panel or reflector to fill in shadows on one side of your face. If you're unsure where to start, browsing a dedicated collection of Cameras, Lighting & Audio Equipment can help you compare entry-level options side by side without getting overwhelmed.
TikTok Lighting Tips for Beginners: Mistakes to Avoid
Even with the right gear, beginners make predictable mistakes. Here’s how to fix the most common issues.
Mistake 1: Relying on Overhead Room Lights
Overhead ceiling lights cast harsh shadows downward, creating dark eye sockets and an unflattering look.
The Fix: Turn off all overhead lights and rely solely on your dedicated lighting setup. If you must use room lights, bounce them off the ceiling by pointing a work light or LED panel upward.
Mistake 2: Mixing Color Temperatures
Combining a warm household lamp (2700K) with a cool LED panel (5600K) creates a color mismatch that is nearly impossible to correct in post-production (premiumbeat.com).
The Fix: Set every light source in your frame to the same color temperature. For most indoor setups, 5000K-5600K (daylight balance) is the standard. If you're using a practical lamp for ambiance, match your key light to its warmth (around 3200K) instead of fighting it.
Mistake 3: Ignoring Flicker and Banding
Cheap LED lights or those on a low-quality power supply can flicker at a frequency your camera picks up, causing visible banding or a strobe effect.
The Fix: Always test your light by recording a quick video and reviewing it on your phone's screen before filming your actual content. If you see flicker, try changing your camera's frame rate (e.g., from 30fps to 24fps) or shutter speed. If the problem persists, the light's driver is likely faulty, this is a case where spending a bit more on a reputable brand like Ulanzi or COLBOR is worth it.
Mistake 4: Creating Harsh Reflections on Glasses
If you wear glasses, a ring light placed directly in front of you will create a bright, distracting reflection on your lenses.
The Fix: Raise your key light so it's above your eyeline and angle it down at a 45-degree angle. This moves the reflection out of the lens's direct line of sight. Alternatively, tilt your glasses slightly downward on your nose to change the angle of reflection.
Mistake 5: Blown-Out Skin Tones (Overexposure)
Placing a high-power light too close to your face will blow out your highlights, washing out your skin tone and losing detail. This is a common issue with 18-inch ring lights at full brightness.
The Fix: Move the light further away (to at least 2-3 feet) and reduce the brightness to 50-70%.
The Zero-Cost Fix: Software-Based Lighting Adjustments
Before you spend another dollar on hardware, learn to use the tools already in your phone.
- Adjust Exposure and Focus Manually: Tap and hold on your face in the camera app to lock focus and exposure. Then, drag the sun icon down slightly to darken the image if it's too bright, or up to brighten it if it's too dark. This simple step prevents the camera from constantly re-adjusting as you move.
- Use Your Phone's Built-in 'Photographic Styles' (iPhone) or 'Scene Optimizer' (Android): These AI-driven settings can subtly adjust contrast and warmth in real-time. For example, the 'Studio Light' effect on some Android phones can help fill in shadows on your face.
- Try a Free Editing App for Post-Processing: Apps like CapCut (free) and DaVinci Resolve (free version) have powerful color correction tools. You can lift shadows, reduce highlights, and adjust white balance to fix a poorly lit clip. A common trick is to use the 'Curves' tool to add a slight S-curve, which instantly adds contrast and makes the image look more professional.
- Use a 'Lighting' Filter Sparingly: Many editing apps have filters that simulate better lighting. They can be a lifesaver for a single bad clip, but they often degrade video quality. Use them as a last resort, and never apply them to an entire video if you want a consistent look.
Conclusion: Your First Lighting Investment
Choosing the right beginner lighting for TikTok videos does not need to be complicated or expensive. For most new creators, a versatile ring light kit is the fastest path to better video quality.
Perfect Take Gear offers a curated range of starter kits and individual lights to help you build a setup that grows with your skills. Search the collection to find the light that fits your content style and start filming with confidence.
Frequently Asked Questions
What is the 3-point lighting rule for video?
The 3-point lighting rule uses three separate light sources to create depth and dimension. The key light is your main source, placed at a 45-degree angle to your face. The fill light goes on the opposite side at a lower intensity to soften shadows. The backlight sits behind you to separate your subject from the background. For TikTok, you can start with just a key light and a window for fill, then add a small LED panel as a backlight when you're ready.
What is the difference between ring lights and softbox lights for creators?
Ring lights create a flat, even light with a distinctive circular catchlight in the eyes, which is why they're popular for beauty and close-up content. Softbox lights produce a broader, more diffused light that wraps around the subject, making them better for full-body shots or product videos where you need to fill a larger space. For a beginner lighting for TikTok setup focused on face-forward content, a ring light is usually the more practical and affordable first purchase.
Do I need expensive lighting to start on TikTok?
No, you don't need to spend hundreds of dollars to get a quality beginner lighting for TikTok setup. Many creators start with an affordable ring light kit like the 12-inch model with a tripod, which costs around $63.99 and offers 5 color temperatures and 10 brightness levels. The key is understanding how to position your light to avoid harsh shadows. As you grow, you can add a fill light or a backlight panel to your kit.
How do I set up lighting for TikTok in a small room?
In a small room, position your main light close to your face, about 1 to 2 feet away, and slightly above eye level pointing down at a 45-degree angle. This softens shadows under your eyes and chin. Use the room's natural light from a window as your fill source. If you're using a ring light, start at 50% brightness to avoid a washed-out look. A compact LED panel with a built-in battery is ideal for small spaces because it doesn't require a wall outlet nearby.
What LED lights do TikTokers use?
Most TikTokers start with an 18-inch ring light with a tripod because it provides flattering, even illumination for face-focused content. As they expand their setup, many add a bi-color LED panel light, like the Ulanzi P40, to use as a fill or backlight. For creators who film on the go, a handheld COB LED light is a popular choice because it's portable and battery-powered. The best beginner lighting for TikTok videos depends on your content niche, such as beauty, gaming, or cooking.