

Best Affordable Lighting for Video Streaming
Table of Contents
- Best Affordable Lighting for Video Streaming
- Quick Comparison: Ring Lights vs LED Panels for Streaming
- How to Set Up Three-Point Lighting on a Budget
- Lighting Placement for Webcam Streaming: Positioning That Works
Last Updated: August 16, 2026
Best Affordable Lighting for Video Streaming
Streaming quality depends more on lighting than most creators realize. Weak lighting leaves you looking washed out, shadowy, or exhausted on camera. Professional-looking lighting doesn't require a studio budget or complex setup. This guide from Perfect Take Gear covers affordable lighting options that deliver real results. Whether you're streaming on Twitch, recording YouTube videos, or hosting virtual meetings, the right lighting transforms how your audience sees you.
Quick Comparison: Ring Lights vs LED Panels for Streaming
Ring lights and LED panels solve the same problem differently.
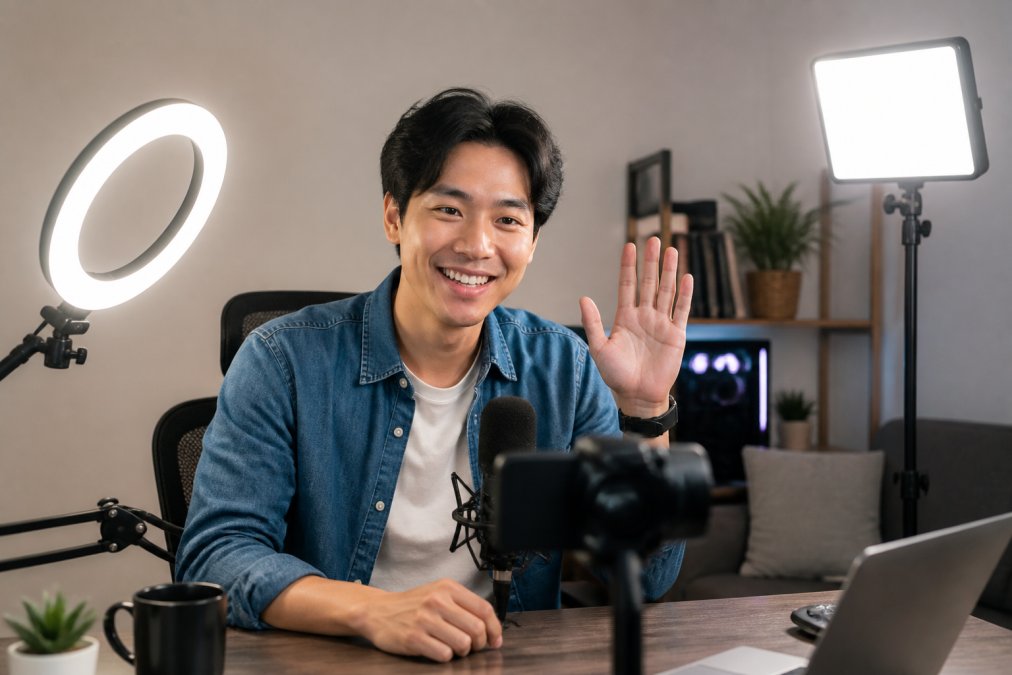
Ring lights mount around your camera and create a circular catchlight in the eyes. They're compact and ideal for desk setups, excelling when your subject sits close to the camera within 3 to 6 feet.
LED panels mount on stands separate from your camera, offering more positioning flexibility. They work better for full-body shots or wider scenes and let you adjust color temperature to match any lighting environment.
Ring lights dominate for desk streaming with your camera a few feet away. LED panels win if you want to light a background, position lights at different angles, or stream in a larger room.
| Lighting Type | Best For | Setup Size | Key Advantage |
|---|---|---|---|
| Ring Light | Desk streaming, close-up shots | Compact (2-3 ft) | Circular catchlight, easy to mount |
| LED Panel | Room lighting, full-body shots | Larger (4-8 ft) | Adjustable positioning, wider coverage |
How to Set Up Three-Point Lighting on a Budget
Three-point lighting, key light, fill light, and backlight, is the professional standard. You don't need expensive gear; positioning matters most.
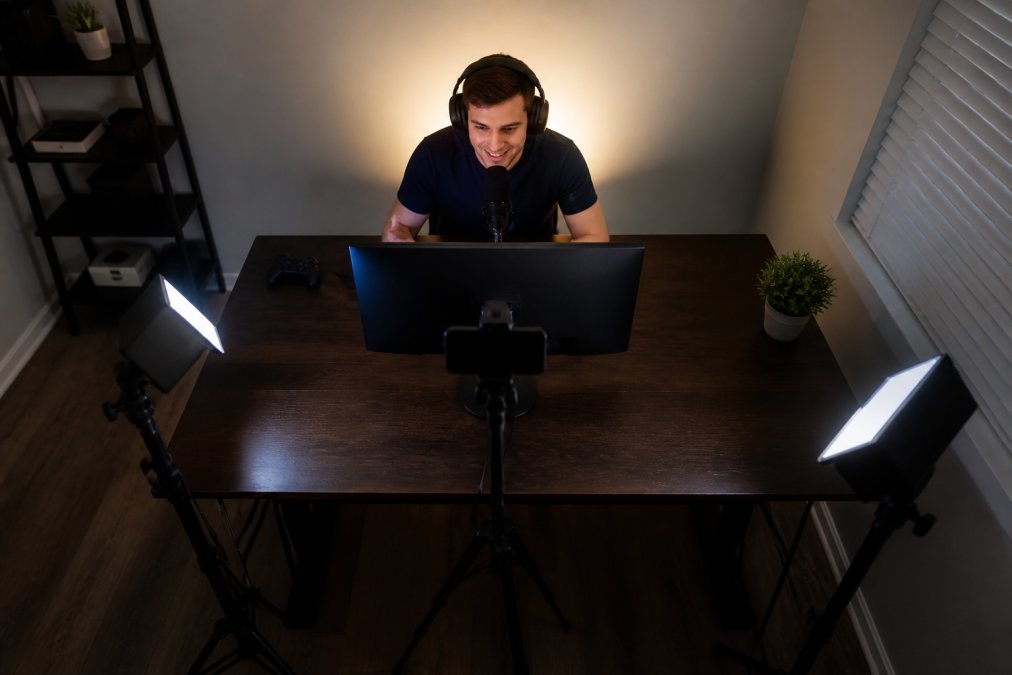
The key light is your main source. Position it at a 45-degree angle to your side, roughly 2 to 3 feet from your face. This creates dimension and reduces flat appearance.
The fill light softens shadows created by the key light. It sits opposite the key light at lower intensity, typically 50% brightness of your key light. A second affordable ring light or white poster board to bounce light works well.

The backlight separates you from the background and adds depth. Position it behind you, pointing toward the back of your head or wall behind you, creating a subtle halo that makes you stand out.
Lighting Placement for Webcam Streaming: Positioning That Works
Placement determines whether your lighting helps or hurts. Bad positioning creates glare on glasses, casts unflattering shadows, or washes out your skin tone.
Angle and distance matter most. Position your key light at a 45-degree angle to your side, roughly 2 to 3 feet from your face. This angle flatters most faces by creating gentle shadows that add dimension. Too close and the light becomes harsh; too far and shadows return.
Avoid direct overhead lighting. Lights mounted directly above create harsh shadows under your eyes and nose. If overhead is your only option, tilt the light down at a 45-degree angle rather than straight down.
For glasses wearers, angle is critical. Position your key light slightly lower than eye level and angled upward. This prevents the light from reflecting directly off the lenses into your camera.
Color temperature affects how you look. Warmer light (2700K to 3200K) is flattering for skin but feels less energetic. Cooler light (5600K to 6500K) looks more alert but can feel clinical. Most streamers use 4000K to 5000K, neutral white that balances energy and warmth.
Reduce glare on your monitor. Position lights so they don't reflect off your screen. A monitor arm that tilts your screen downward slightly helps.
Lighting for Specific Streaming Scenarios
For face-only streaming (Twitch, Discord calls, virtual meetings), a single ring light or small LED panel works perfectly. Position it at eye level, 2 to 3 feet away.

For full-body content (fitness streams, cooking, product demonstrations), use an LED panel positioned 4 to 6 feet away, or use two smaller lights to cover different areas.
For outdoor or mobile streaming, battery-powered lights let you stream from different locations without worrying about power outlets.
For streaming with a phone camera, clip-on lights let you position light exactly where you need it without additional stands or arms.
Energy Efficiency and Heat Management
Affordable lighting typically means LED, which runs cooler and uses less power than older tungsten lights. LEDs generate minimal heat, so you won't feel uncomfortable after hours on camera and draw minimal power, with most affordable LED lights running on USB or small batteries.
Check the lumens rating when comparing lights. Most affordable streaming lights deliver 1000 to 2500 lumens at 1 meter, which is enough for any home or office space. Battery life varies depending on brightness settings. For streaming longer than a few hours, use AC-powered lights or keep a backup battery charged.
Choosing Between USB-Powered and Battery Lights
USB-powered lights plug into a wall adapter or your computer's USB port and offer unlimited runtime. Battery-powered lights run independently until the battery drains, giving you mobility and working well for fill lights or backlights where cable management gets messy.
Many lights support both, USB for stationary use and battery as backup. For streaming, redundancy is smart. If one light fails, a backup keeps you on air.
Diffusers and Light Modifiers on a Budget
Diffusers soften harsh light and reduce glare by scattering light rays instead of letting them beam directly at your face. Many affordable lights include diffusers in the box. If not, aftermarket diffusers work with most lights. A white poster board or foam core panel propped in front of a light works as a DIY diffuser.
Reflectors bounce light into shadows without adding another fixture. A white poster board, foam core, or even a white wall works as a reflector. Position it opposite your key light to fill shadows.
Affordable lighting for video streaming doesn't mean sacrificing quality. The right combination of budget-friendly fixtures, proper positioning, and understanding color temperature delivers professional results. Cameras, Lighting & Audio Equipment from Perfect Take Gear offers complete streaming lighting kits and individual fixtures designed for creators on any budget. Start with a single key light, position it correctly, and add fill and backlight as your setup evolves. Most creators see immediate improvement in video quality after fixing their lighting, often before they upgrade their camera or microphone.
Frequently Asked Questions
What kind of lighting is best for streaming?
The best lighting for streaming balances brightness, color accuracy, and placement. Ring lights work well for solo streamers and content creators because they produce even, flattering light with minimal shadows. LED panels offer more flexibility for three-point lighting setups. Look for lights with adjustable color temperature (2700K-6500K range) and brightness control so you can match your environment and avoid glare on glasses or screens. Most affordable options start around $40-$80.
Do I need a ring light for streaming?
A ring light isn't mandatory, but it's one of the most affordable and effective starting points. Ring lights excel at reducing shadows and providing flattering key light for face-on streaming. However, if you're building a three-point lighting setup or need more directional control, LED panels or smaller fill lights may work better. Your choice depends on your space, budget, and streaming style. Many creators start with a ring light and add supplementary lights later.
How do you light a room for video streaming on a budget?
Start with one key light, either a ring light or small LED panel positioned at eye level, 2-3 feet from your face. Add a fill light (a smaller, dimmer light) on the opposite side to soften shadows. Position your key light slightly to one side, not directly centered, for more natural-looking results. Use your room's existing windows during daytime if possible. Avoid backlighting from windows behind you, which causes silhouettes. Affordable setups under $150 typically combine a main light ($60-$80) with a budget fill light ($40-$50).
How many lights do I need for a professional streaming setup?
Three lights create the professional standard: key light (main), fill light (shadow reduction), and backlight (separation). However, beginners can start with just a key light and add others as needed. For streaming specifically, a key light and fill light are usually enough to produce clean, professional video. Backlighting becomes more important if you're doing product shots or want to separate yourself from the background. Budget-friendly three-point setups can be built for $120-$200 by combining affordable options.
Can I use household lamps for streaming?
Household incandescent or fluorescent bulbs aren't ideal because they often produce uneven color temperature, flicker, and generate excess heat. They also don't offer brightness or color control. Video-specific LED lights are designed for consistent color rendering (CRI 95+), flicker-free operation, and adjustable color temperature. For streaming, invest in dedicated video lights even if they're affordable models. The difference in video quality and viewer comfort is noticeable, especially for longer streams.
This article was written using GrandRanker